Xeriscaping a Front Yard: A Practical Starting Layout
By Jim Vernon · 5 min read · Last updated
Xeriscaping done badly is a gravel lot. Done well it is a layered, low-water garden that still looks intentional in January.
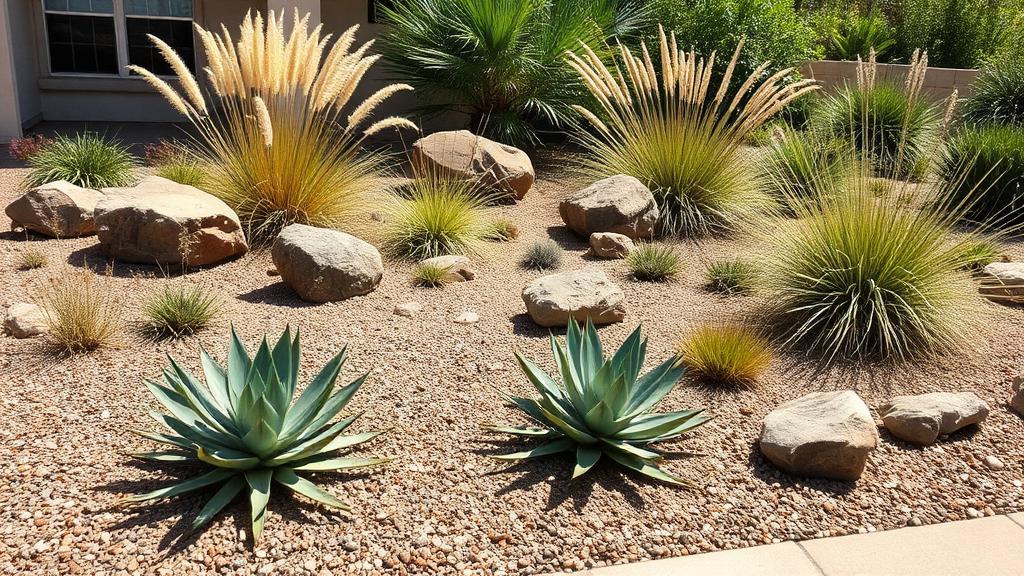
The word xeriscape gets reduced in practice to rock and cactus, but the actual principle is grouping plants by water need and matching that to the site, so irrigation targets only the areas that need it rather than blanket-watering an entire yard to keep the thirstiest plant alive.
Zone the yard by water need, not by visual grouping
| Zone | Typical location | Plant examples | Watering need |
|---|---|---|---|
| High water | Near downspouts, low spots | Ornamental grasses, small shade trees | Regular |
| Moderate water | General bed area | Salvia, yarrow, coreopsis | Occasional deep watering |
| Low water | Slopes, full sun, poor soil | Lavender, sedum, native grasses | Established, rarely watered |
| No supplemental water | Furthest from hose bib | Native drought-adapted shrubs, succulents | Rain only once established |
Replace lawn in stages, not all at once
Converting an entire front lawn in one weekend usually produces a yard that looks stripped and unfinished for a full growing season while new plants establish. Removing lawn in defined sections — starting with the sunniest, most water-hungry strip nearest the street — gives each phase time to fill in and keeps the property looking maintained throughout.
Hardscape carries the design when plants are young
- A defined path, even a narrow one, reads as intentional design rather than a bare lot from day one.
- Boulders or larger stones placed as anchors give structure while smaller plants fill in around them over one to two seasons.
- Mulch — organic or gravel depending on the zone — should go down immediately after planting, not after weeds have already colonised bare soil.
- A low edging border between xeriscape beds and any remaining lawn keeps the transition looking deliberate.
Soil prep still matters even for drought-tolerant plants
Many low-water natives actually prefer lean, fast-draining soil and struggle in rich, amended beds where roots stay too wet. Resist the instinct to add heavy compost across the whole xeriscape bed; amend only the moderate and high water zones, and leave low-water zones closer to native soil with a gravel or coarse mulch topping.
Irrigation matched to the new layout
Sprinkler systems built for lawn coverage waste water across a zoned xeriscape bed. Converting spray heads to drip lines or low-flow bubblers on separate valves for each water zone lets each area get exactly what it needs, and is usually the single biggest water-saving change in the whole conversion.
A worked example: converting a strip of lawn
A 300-square-foot lawn strip watered twice a week at half an inch uses roughly 190 gallons per week. Converted to a low-water xeriscape zone on drip, the same area typically needs under a third of that once established, since drip delivers water directly to roots with far less evaporation and no runoff onto adjacent paving.
Common mistakes
- Treating the whole yard as one water zone instead of grouping plants by actual need, which forces overwatering the driest zone or underwatering the thirstiest.
- Laying gravel or mulch before finishing bed amendment, which then has to be scraped back and redone.
- Choosing only succulents and rock, which reads as barren rather than layered once neighbors' gardens are in full bloom nearby.
- Skipping extra watering during the establishment period because the plant tags say drought-tolerant.
A worked example: budgeting a phased conversion
A 1,000-square-foot front lawn converted in three roughly equal phases over three years spreads both the labor and the plant cost, and lets each phase inform the next — a plant combination that struggled in phase one's sun exposure can be adjusted before phase two is planted. Converting all 1,000 square feet in one season concentrates cost and risk into a single planting window, with no chance to correct a misjudged plant choice before it is repeated across the whole yard.
Local water rules and rebates
Many municipalities in drought-prone regions offer rebates for converting irrigated turf to low-water landscaping, sometimes calculated per square foot of lawn removed. Checking local water utility programs before starting a conversion can materially offset material costs, though most programs require photo documentation of the lawn before removal and inspection after planting, so it is worth applying before any lawn is torn out rather than after the fact.
Rough cost ranges by approach
A DIY xeriscape conversion using mostly gallon-container perennials, a gravel mulch topping, and a basic drip retrofit typically runs $4-8 per square foot in most US regions, including plants, mulch, and irrigation parts but not labor. A professionally installed conversion with larger specimen plants, boulders, and a permitted irrigation redesign commonly runs $12-25 per square foot. On a 1,000-square-foot front lawn, that puts a phased DIY conversion in the $4,000-8,000 range spread over two to three years, versus $12,000-25,000 or more for a single-season professional install — the gap is almost entirely plant size and labor, not the underlying materials.
Does xeriscaping mean no lawn at all?
No. Many successful xeriscape designs keep a small, functional patch of lawn for a specific use, such as a play area, while converting the rest of the water-hungry turf to zoned planting.
Is gravel mulch better than organic mulch in a xeriscape?
It depends on the zone. Gravel suits the driest, sun-baked areas and lasts indefinitely; organic mulch suits moderate zones and also improves soil over time as it breaks down.
How much water can xeriscaping actually save?
Reductions of 50-70% in landscape water use are commonly reported once a conversion is fully established and irrigation is zoned to match plant need.
What is the cheapest way to start a xeriscape conversion?
Convert the smallest, sunniest strip first using existing soil with minimal amendment, hardy low-water perennials, and a simple gravel mulch — this proves the layout works before investing in a larger area or a dedicated drip zone.
Do I need to remove the lawn entirely before planting?
Yes, ideally by smothering with cardboard and mulch for several weeks or physically stripping sod, rather than planting directly into living turf, which will compete aggressively with new plantings.
Run the numbers for your own project
- Rain Barrel and Water Harvest CalculatorHow much rainwater can I actually harvest from my roof?
- Wildflower and Pollinator Mix CalculatorHow much wildflower seed do I need for my patch?
- Mulch CalculatorHow much mulch do I need for my beds?
Keep reading
- Starting Your First Vegetable Garden Without Wasting a SeasonMost first gardens fail for reasons that have nothing to do with a green thumb. Here are the five that matter.
- Building Soil That Actually Grows ThingsFeeding plants is a short-term fix. Feeding the soil is what makes a garden easy.
- Reviving a Tired Lawn: A Season-Long PlanA thin lawn is a symptom. Treating the symptom with more seed is why it keeps coming back.