How Do You Transplant an Established Rose Bush Without Shocking It?
By Jim Vernon · 9 min read · Last updated
A mature rose bush responds to an abrupt move by dropping its leaves and dying, but precise timing and aggressive pruning will force it to thrive.
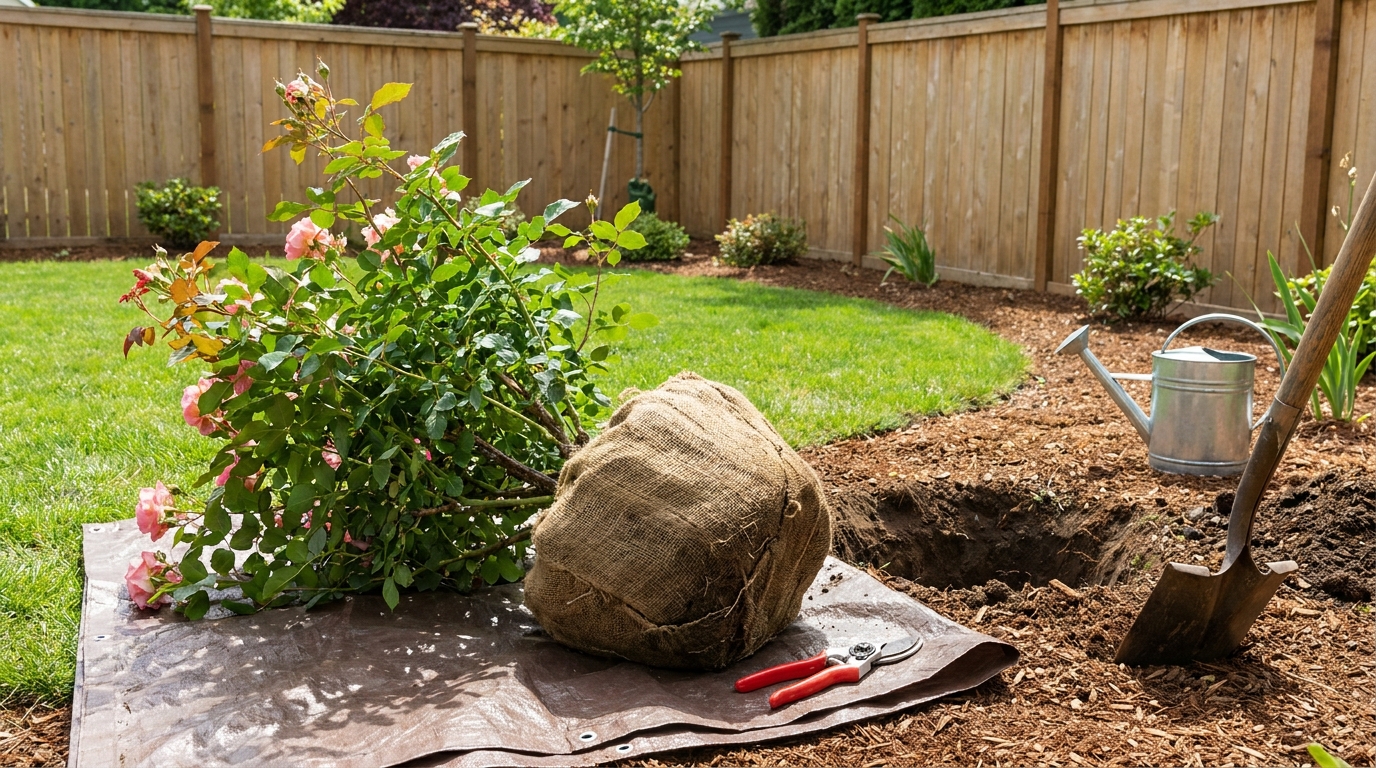
To transplant an established rose bush successfully, you must move it during late winter or early spring while it is dormant, dig a root ball at least 15 inches (38 cm) wide, and cut the canes back by one-third to balance the inevitable root loss. Waiting until the plant is fully leafed out in May or June almost guarantees fatal transplant shock, as the severed roots cannot absorb enough water to sustain the massive leaf canopy in the heat. By preparing the new hole before you dig the plant up, keeping the roots wrapped in wet burlap during transit, and mudding in the backfill to remove air pockets, you minimize root exposure and give the shrub the best mechanical chance to establish in its new home.
- Transplant only during dormancy in late winter or early spring before new leaves push out.
- Prune the top growth back by at least one-third to compensate for severed feeder roots.
- Dig the new hole first, amending the backfill with compost, not synthetic fertilizer.
- Lift the root mass using a tarp or burlap; pulling on the canes will tear the delicate root system apart.
- Water the transplant immediately with 2 to 3 gallons (7.5 to 11 liters) to eliminate subterranean air pockets.
When Is the Best Time of Year to Move a Rose Bush?
The ideal window to transplant a rose is during its dormant period, which falls between late winter and early spring. In USDA Hardiness Zones 5 through 8, this typically occurs from late February to early April. You want the ground to be fully thawed but the buds on the canes to remain tight and unswollen. Soil temperatures should be hovering around 45 to 50 degrees Fahrenheit (7 to 10 degrees Celsius).
Moving a rose when it is actively growing in summer is a primary failure mode for this project. Once a rose is fully leafed out, it relies on an uninterrupted flow of moisture from its roots to its foliage. Severing the roots in July heat means the plant loses moisture through its leaves faster than it can replace it, resulting in rapid dehydration, severe wilting, and often death. If you are forced to move a rose mid-summer due to construction or an emergency, you must erect a shade cloth over the plant for at least three weeks and water it daily.
- Wait for the ground to thaw completely so your spade can penetrate deeply without bouncing.
- Ensure buds are tight and red, not green and actively unfurling into leaves.
- Avoid late fall transplanting in zones colder than 6, as frost heave can push unsettled roots out of the soil.
How Do You Prepare the New Planting Hole?
Dig the new hole entirely before you touch the existing plant. You want to minimize the time the root ball spends exposed to drying air. Select a location that receives a minimum of six hours of direct sunlight daily. Dig the hole roughly 24 inches (60 cm) wide and 18 inches (45 cm) deep. Before planting, fill the hole with water and time how long it takes to drain. If the water sits for more than an hour, the soil is too heavy and will rot the rose roots; you will need to mound the soil or choose a different site.
Do not add granular synthetic fertilizer to the hole. The high nitrogen and salt content will instantly burn the tender, broken roots. Instead, mix your excavated native dirt with a 50/50 blend of high-quality, well-rotted compost. Expect to spend $6 to $10 in 2026 for a premium 1-cubic-foot bag of organic compost. Create a small cone of this amended soil in the center of the hole to support the bottom of the root mass.
- Select a site with well-draining soil and at least six hours of full sun.
- Dig a hole twice as wide as your expected root ball, but only exactly as deep.
- Mix the backfill soil evenly with organic compost, avoiding chemical fertilizers.
How Much Should You Prune Before Digging?
This is where professional landscapers make a radically different judgment call than beginners. A novice will often try to keep as much of the existing top growth as possible, hoping for a massively sized plant immediately in the new location. A pro knows that the digging process inevitably severs up to half of the plant's feeder roots. To keep the plant from dying of dehydration, you must prune the top growth aggressively to match the reduced root mass.
Use a sharp pair of bypass pruners—which slice cleanly like scissors rather than crushing the stem like anvil pruners—and cut the canes back by one-third to one-half. Reduce the overall height of the bush to about 12 to 18 inches (30 to 45 cm). Make your cuts at a 45-degree angle, about a quarter-inch above an outward-facing bud eye. This directs the plant's limited spring energy into re-establishing a strong anchor root system rather than trying to push sap up three feet of vulnerable, spindly wood.
- Sanitize your pruners with rubbing alcohol before making any cuts to prevent disease transfer.
- Remove all dead, crossing, or pencil-thin wood completely down to the crown.
- Cut the remaining healthy canes down to 12 to 18 inches (30 to 45 cm).
How Large of a Root Ball Do You Actually Need?
For an established rose bush that has been in the ground for three to five years, aim for a root ball that is 15 to 18 inches (38 to 45 cm) in diameter. Older, massive shrub roses might require a 24-inch (60 cm) root ball. Using a heavy, long-handled steel spade, cut a vertical circle straight down into the soil, keeping your blade about 8 to 10 inches (20 to 25 cm) away from the main central stems.
Once you have severed the lateral roots in a complete circle, angle your spade inward at a 45-degree angle to undercut the bottom of the root mass. You are aiming for a digging depth of roughly 12 to 15 inches (30 to 38 cm) to capture the thickest anchor roots. Listen for the popping sound of roots snapping; if you encounter a stubborn taproot, use a pair of loppers to cut it cleanly rather than ripping it blindly with the shovel.
- Mark your digging circle in the dirt before making your first cut.
- Keep the blade straight up and down on the first pass to sever lateral roots cleanly.
- Use sharp loppers to cut any roots thicker than your thumb rather than tearing them.
How Do You Safely Lift and Transport the Heavy Shrub?
A common, fatal mistake is grabbing the thorny canes and pulling straight up to yank the plant out of the hole. This immediately tears the delicate, fibrous feeder roots away from the heavy soil clump, leaving you with bare, traumatized roots that will struggle to establish. The dirt attached to the roots must stay attached.
Instead, use a sturdy garden fork or your steel spade to lever the root ball out from the bottom. Gently tilt the plant and slide a piece of wet burlap or a small, heavy-duty plastic tarp under the root mass. Roll the root ball onto the fabric, then lift the shrub entirely by picking up the corners of the tarp. If you must transport the rose via wheelbarrow to another part of the yard, wrap the wet burlap completely around the root ball so the wind does not dry out the exposed root tips.
- Never lift the rose by its canes; always support the weight from beneath the soil clump.
- Keep the soil intact around the roots to preserve the microscopic root hairs.
- Wrap the root ball in wet burlap or a tarp if the move takes longer than five minutes.
What Is the Correct Way to Backfill and Water the Transplant?
Place the rose onto the soil cone inside your prepared hole. The positioning of the graft union—the swollen, woody knot where the canes meet the rootstock—is critical. In cold climates (Zones 4-6), bury the graft union 1 to 2 inches (2.5 to 5 cm) below the soil line to protect it from freezing. In warm climates (Zones 7-9), keep the graft union exactly at or slightly above the finished soil line to prevent the canes from rotting.
Backfill the hole halfway with your dirt-and-compost mixture, then stop. Flood the hole with 2 gallons (7.5 liters) of water to settle the dirt into a thick mud. This 'mudding in' technique is vital because it forcefully expels subterranean air pockets that would otherwise cause roots to dry out and die. Once the water drains completely, fill the rest of the hole with soil, tamp it gently with your hands (do not stomp it with your boots, which compacts the soil), and water heavily a second time. Finish with a 2-inch (5 cm) layer of shredded hardwood mulch, pulling it away from the base of the canes.
- Adjust the height of the graft union based on your specific USDA Hardiness Zone.
- Backfill the hole in two stages, flooding it with water in the middle to remove air voids.
- Apply mulch to retain moisture but keep it from touching the canes to prevent rot.
How Long Does It Take for a Transplanted Rose to Recover?
Expect a transplanted rose to spend its first full growing season focusing its energy below ground. Root development will take priority over massive blooms. You may see slightly stunted cane growth and fewer, smaller flowers in year one. Do not panic; this means the plant is successfully allocating its resources to survival. Keep the soil consistently damp but not waterlogged for the first three months. Check it by inserting your index finger 2 inches (5 cm) deep; if it feels dry at your fingertip, apply 1 to 2 gallons (3.8 to 7.5 liters) of water at the base.
Do not apply granular fertilizer until the rose has pushed out its second flush of new leaves, typically in early summer. A stressed plant cannot properly process high doses of nitrogen. By the second spring, the root system will be fully anchored, and the bush will resume its normal, vigorous blooming cycle.
- Expect a 50 percent reduction in blooms during the first year after transplanting.
- Check soil moisture by hand twice a week, watering only when the top 2 inches are dry.
- Delay all synthetic fertilization until the plant proves it is actively growing again.
| Age of Rose Bush | Root Ball Diameter Needed | Pruning Height Before Digging | Estimated Root Ball Weight |
|---|---|---|---|
| 1 to 2 Years | 10 to 12 inches | 18 to 24 inches | 20 to 30 lbs |
| 3 to 5 Years | 15 to 18 inches | 12 to 18 inches | 40 to 60 lbs |
| 6+ Years (Large Shrub) | 20 to 24 inches | 12 to 15 inches | 80 to 120 lbs |
Frequently asked questions
Can I transplant a blooming rose in the middle of summer?
It is highly discouraged. A rose in full leaf and bloom requires maximum water uptake. Severing roots in summer heat will almost certainly cause fatal dehydration. If you must move it due to an emergency, cut all blooms off, prune the bush back by half, erect a shade cloth over it for a month, and water it daily.
Should I fertilize my newly transplanted rose bush immediately?
No. Synthetic fertilizers contain salts that will burn the broken, sensitive roots of a fresh transplant. Wait to feed the plant until you see significant new, red leaf growth several months later. Use only organic compost mixed into the backfill hole for immediate nutrients.
Why are the leaves turning yellow and dropping off my newly moved rose?
Yellowing and dropping leaves are the classic signs of transplant shock. The plant is shedding foliage it no longer has the root capacity to support. Keep the soil evenly moist, do not overwater to the point of creating mud, and allow the plant time to adjust.
Should I use a rooting hormone when moving a mature rose?
Rooting hormones and granular mycorrhizal inoculants (costing about $15 to $25 in 2026) can help stimulate new root hair growth, but they are not strictly necessary. Proper dormant timing, a wide root ball, and correct watering practices are far more important to survival than commercial root stimulators.
Keep reading
- Starting Your First Vegetable Garden Without Wasting a SeasonMost first gardens fail for reasons that have nothing to do with a green thumb. Here are the five that matter.
- Building Soil That Actually Grows ThingsFeeding plants is a short-term fix. Feeding the soil is what makes a garden easy.
- Reviving a Tired Lawn: A Season-Long PlanA thin lawn is a symptom. Treating the symptom with more seed is why it keeps coming back.