How Do You Fix a Broken Underground PVC Sprinkler Pipe?
By Jim Vernon · 8 min read · Last updated
A geyser in your front lawn doesn't mean you need to pay a landscaper $300 to fix what takes twenty minutes and a $15 part.
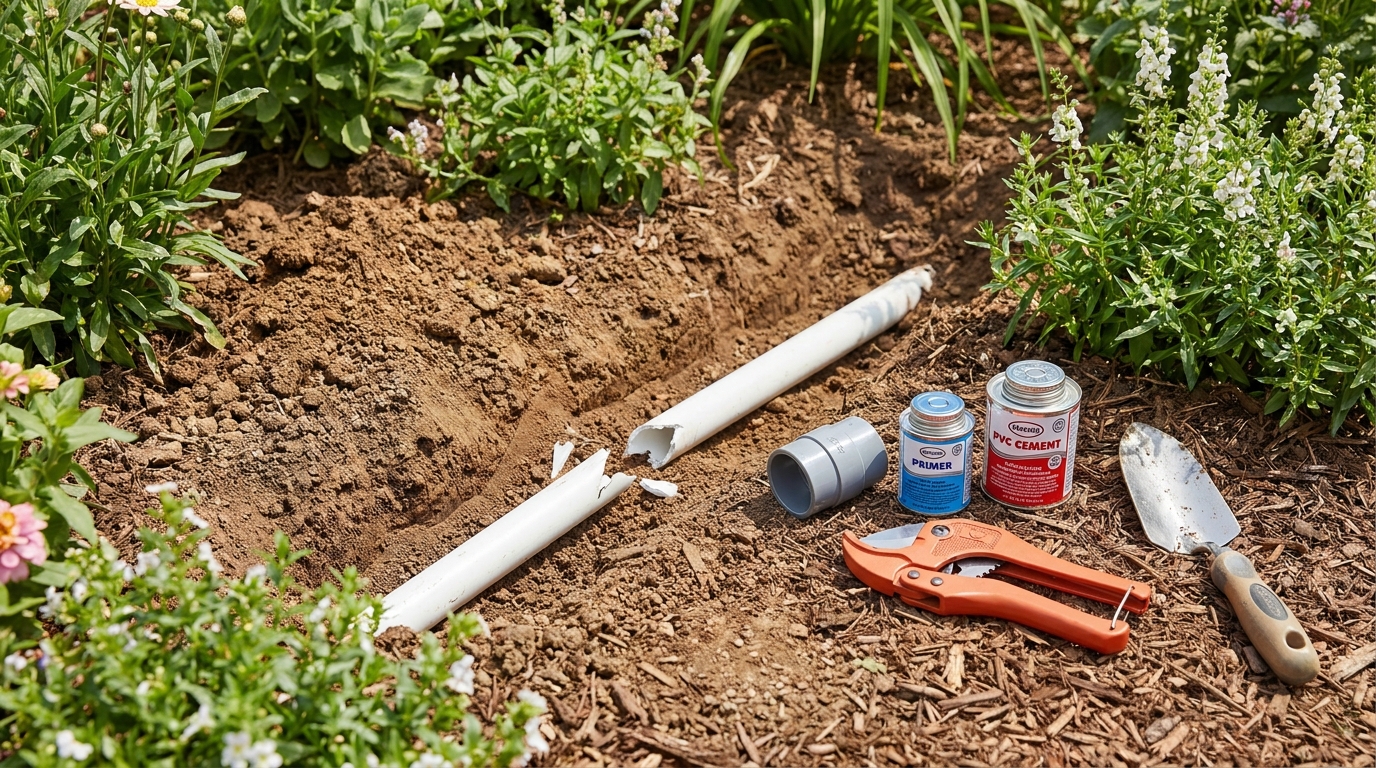
To fix a broken underground PVC sprinkler pipe, excavate a 24-inch (60 cm) trench around the break, cut out the shattered section with ratcheting PVC cutters, and bridge the gap using a telescoping PVC repair coupling (often called a Slip-Fix). Prime and glue the fixed end to your main line first, expand the inner piston into the opposite fitting, and let the cement cure for at least two hours before turning the water pressure back on. You do not need to dig up the entire yard or bend brittle old pipes to make this repair permanently water-tight.
- Use a telescoping PVC repair coupling to bridge the gap without bending or stressing the existing underground pipes.
- Never cut PVC sprinkler pipe with a hacksaw; use ratcheting PVC cutters to prevent plastic shavings from jamming sprinkler heads.
- Dig at least 4 inches (10 cm) of clearance beneath the pipe so primer and cement daubers can easily reach the bottom of the joint.
- Allow PVC cement to cure for a minimum of 2 hours at temperatures above 60°F (15°C) before testing the system under pressure.
How Do You Find the Exact Location of the Underground Leak?
A broken sprinkler line usually reveals itself by creating a localized swamp, a sudden drop in water pressure across a specific zone, or a literal fountain shooting up through the sod. Turn the system on manually zone by zone to identify which valve controls the leaking pipe. Once you identify the zone, walk the line between the sprinkler heads. You are looking for bubbling water, completely washed-out mulch, or ground that feels spongy underfoot.
Turn off the water at the main valve as soon as you spot the epicenter. If the area is entirely flooded, wait 24 hours for the water to drain into the soil before you start digging. Attempting to glue PVC pipe in a mud puddle guarantees a failed joint. Mark the center of the wettest area with a landscaping flag or a shot of marking paint.
How Do You Safely Dig Around the Broken PVC Pipe?
Even for a shallow sprinkler trench, you must dial 811 to have underground utilities marked before you put a shovel in the dirt. Sprinkler lines are typically buried 8 to 12 inches (20 to 30 cm) deep, which is shallow enough to intersect with internet, cable, or landscape lighting wires.
Start digging a trench roughly 24 inches (60 cm) long, centered on the leak. Use a round-point shovel for the heavy lifting, but switch to a small hand trowel once you are within a few inches of the pipe to avoid striking and shattering it further. Clear out the dirt entirely around the pipe, making sure to excavate at least 4 inches (10 cm) of clearance directly underneath the break. You need this empty space below the pipe to safely maneuver your cutting tool and ensure your primer and glue daubers can reach 360 degrees around the joints.
Why Is a Telescoping Repair Coupling Better Than Standard Fittings?
This is the most common judgment call where professionals and beginners diverge. When faced with a broken pipe, a beginner will typically cut out the break and attempt to glue a standard 50-cent slip coupling onto both sides. To make the second connection, they have to physically bow and pry the existing pipes upward to slip the fitting over the ends. Underground PVC becomes highly brittle after a few years in the dirt. Forcing it to bend almost always snaps the pipe further down the trench, turning a 6-inch repair into a 6-foot replacement.
Professionals avoid this entirely by using a telescoping repair coupling, commonly known as a Slip-Fix. This fitting features an outer cylinder and a sliding inner piston with factory-sealed O-rings. You glue the static end to one side of your broken pipe, then physically pull the inner piston outward to bridge the gap and slot into the other side. The pipe stays perfectly flat in the trench, taking zero stress during the repair.
What Tools and Materials Do You Need for This Repair?
Sprinkler repairs require surprisingly few tools, but you must ensure your fittings match the diameter of your pipe. Most residential irrigation lines are either 3/4-inch or 1-inch Schedule 40 PVC. Read the printed text on the side of your existing pipe to confirm the size before heading to the hardware store. For a typical 2026 DIY repair, expect to spend about $35 if you need to buy the cutter, or under $20 if you already own one.
- Ratcheting PVC pipe cutter ($15 to $20)
- Telescoping PVC repair coupling / Slip-Fix matching your pipe diameter ($10 to $15)
- Standard PVC slip coupling matching your pipe diameter ($1)
- PVC Purple Primer and Medium-Bodied PVC Cement duo pack ($8 to $10)
- Clean, dry shop rags
How Do You Cut and Prep the Pipe Without Contaminating the System?
A major failure mode for DIY sprinkler repair is cutting the broken pipe out with a standard hacksaw. A hacksaw leaves jagged plastic burrs and drops hundreds of tiny PVC shavings directly inside the pipe. When the water turns back on, those shavings travel straight into the intricate gear drives of your downstream rotary sprinkler heads, permanently jamming them.
Avoid this entirely by using a ratcheting PVC cutter. This tool functions like heavy-duty pruning shears, slicing cleanly through the pipe with a sharp blade that produces zero shavings. Cut back at least 1 inch (2.5 cm) past any visible hairline cracks on both sides of the break. Once the bad section is removed, wipe the outside and inside of the cut ends completely clean with a dry rag. Any dirt, moisture, or mud left on the pipe will compromise the chemical weld of the cement.
How Do You Prime, Glue, and Install the Telescoping Coupling?
A telescoping repair coupling requires a standard slip coupling on its piston end to connect to the raw pipe. Dry-fit the entire assembly in the trench first to ensure the fully compressed Slip-Fix and the standard coupling will comfortably bridge the gap you cut out.
Start by swabbing purple primer onto the outside of the existing pipe and the inside of the fittings. The primer softens the plastic, preparing it for a chemical weld. Immediately apply a layer of PVC cement over the primed areas. Push the fixed (non-sliding) end of the telescoping coupling onto one side of the existing pipe, giving it a quarter-turn twist as it goes on. This twist ensures the glue spreads evenly without channeling. Hold the joint firmly together for 30 seconds so the expanding gases in the cement don't push the fitting back off.
Next, prime and glue the opposite pipe end, the standard slip coupling, and the piston end of the telescoping unit. Slide the inner piston out of the cylinder until it bottoms out inside the standard coupling on the opposite side. Give it the same quarter-turn twist and hold it for 30 seconds.
How Long Must the PVC Cement Cure Before Testing the Pressure?
Do not immediately turn the water back on after gluing the joints. While PVC cement sets up in minutes, it takes time to reach full pressure-handling strength. A residential irrigation system runs at roughly 40 to 60 PSI, which is more than enough force to blow apart a wet joint and force you to start over.
If the ambient temperature is above 60°F (15°C), let the repair sit in the open trench for a minimum of 2 hours. If the temperature is between 40°F and 60°F (4°C and 15°C), double the cure time to 4 hours. Never attempt to glue PVC in temperatures below 40°F (4°C) as the solvent will not properly melt the plastic.
How Do You Backfill the Trench Without Re-Breaking the Pipe?
Once the curing time has elapsed, turn the water main back on and manually run the repaired zone for five minutes. Inspect all your new glue joints for drips or weeping. If the repair is bone dry on the outside, you are ready to bury the pipe.
Do not dump large rocks or heavy, compacted clay directly onto the new fitting. Bed the pipe by packing loose, rock-free native soil (or a bag of play sand) under and immediately around the repair to support it. Fill the rest of the trench, tamping the soil down lightly with your foot every 4 inches (10 cm) to prevent the ground from settling into a sunken trench later in the season. Replace the grass plug and water it heavily to encourage the roots to re-establish.
| Repair Method | Average Material Cost | Ease of Installation | Best Application |
|---|---|---|---|
| Telescoping Coupling (Slip-Fix) | $10 - $15 | Beginner Friendly | Straight runs of brittle, established underground pipe. |
| Standard Slip Couplings | $1 - $3 | Difficult in Trenches | New installations where pipes can move freely. |
| Four-Elbow Swing Joint | $5 - $8 | Moderate | Repairs requiring a change in depth or routing around roots. |
| Compression Coupling | $8 - $12 | Very Easy | Temporary or emergency fixes only; prone to future leaks. |
Frequently asked questions
Can I use a compression fitting instead of gluing the PVC?
While rubber-gasket compression fittings exist for PVC, they are not recommended for underground sprinkler mains that sit under constant static pressure. Soil shifting and freezing temperatures eventually cause the rubber to deform, leading to slow, hidden leaks. Solvent-welded (glued) joints are permanent and significantly more reliable.
What happens if it rains while I am gluing the PVC pipe?
Moisture ruins the chemical reaction of standard PVC cement, turning the glue into a useless, gummy paste. If it is actively raining, you must wait for it to stop, dry the pipe entirely, and use a specialized "wet-or-dry" blue PVC cement specifically formulated to cure in damp conditions.
Why is my glued PVC joint leaking immediately after turning the water on?
Immediate leaks mean the chemical weld failed. This is usually caused by failing to use primer, leaving dirt or water on the pipe, not pushing the fitting entirely to the internal stop, or turning the pressure back on before the mandatory two-hour cure time elapsed. The only fix is to cut out the leaking joint and start over.
Do I really need to call 811 before digging a shallow sprinkler trench?
Yes. Internet, cable, and sometimes secondary gas or electric lines are frequently buried just inches below the surface, often in the same trenches as irrigation lines. Calling 811 is a free service, and striking an unmarked utility line with a shovel can cost thousands of dollars in liability.
Keep reading
- Starting Your First Vegetable Garden Without Wasting a SeasonMost first gardens fail for reasons that have nothing to do with a green thumb. Here are the five that matter.
- Building Soil That Actually Grows ThingsFeeding plants is a short-term fix. Feeding the soil is what makes a garden easy.
- Reviving a Tired Lawn: A Season-Long PlanA thin lawn is a symptom. Treating the symptom with more seed is why it keeps coming back.