How Do You Build a Block Retaining Wall That Won't Bow or Blow Out?
By Jim Vernon · 9 min read · Last updated
A leaning retaining wall isn't a victim of gravity; it's a casualty of invisible water weight trying to push it over.
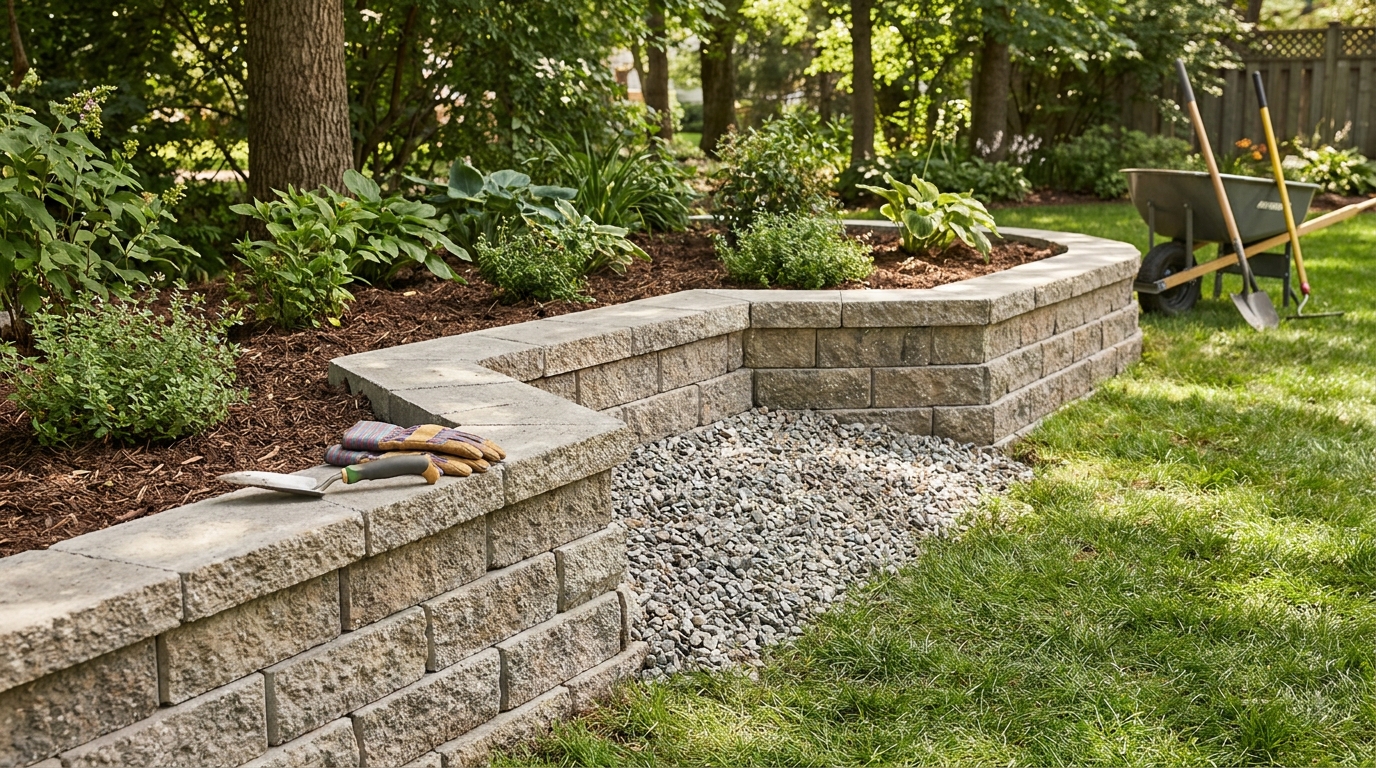
To build a block retaining wall that stays dead-plumb for decades, you must dig a level base trench at least 6 inches (15 cm) deep, tamp a foundation of 3/4-inch (19 mm) minus crushed stone, ensure the first row of blocks is perfectly level, install a perforated corrugated drain pipe behind the wall, and backfill with at least 12 inches (30 cm) of clean, washed gravel. Retaining walls rarely fail because of bad blocks or weak adhesive; they fail because water gets trapped in the dirt behind them. If you skip the gravel backfill and the drainage pipe, groundwater accumulates behind the wall, creating immense hydrostatic pressure. Once winter hits, that wet soil freezes, expands, and blows out the face of your wall. Building it right means spending more time moving heavy stone than actually laying the blocks.
- Bury at least 1 inch (2.5 cm) of block for every 1 foot (30 cm) of overall wall height to anchor the structure.
- Compact a minimum of 6 inches (15 cm) of 3/4-inch (19 mm) minus crushed stone for your base; never build on topsoil or loose sand.
- Install a 4-inch (10 cm) perforated drain pipe wrapped in landscape fabric behind the base course, pitched to drain away from the wall.
- Backfill immediately behind the blocks with 12 inches (30 cm) of 3/4-inch (19 mm) clean, washed stone to eliminate hydrostatic pressure.
What actually causes retaining walls to lean and fail?
The most common failure mode for a DIY retaining wall has nothing to do with the blocks themselves and everything to do with what is directly behind them. When an amateur builds a wall, they often backfill the newly created void with the exact same dirt they excavated to build it. Native soil, especially clay-heavy soil, acts like a sponge. When it rains, that dirt absorbs massive amounts of water, multiplying its weight and creating hydrostatic pressure against the back of the blocks.
To avoid this catastrophic failure, you must eliminate the water's ability to pool behind the wall. Water needs a path of least resistance to flow down and away. By replacing the dirt immediately behind the wall with a column of clean, washed gravel, water drops straight through the rocks instead of pushing laterally against your wall. Eliminating hydrostatic pressure is the single most important rule of structural hardscaping.
- Saturated soil can weigh over 120 pounds per cubic foot, easily overpowering segmental blocks.
- Freezing temperatures cause wet soil to expand, forcing blocks outward in a process known as frost heave.
- Proper drainage reduces the lateral earth pressure by more than fifty percent.
How deep and wide should you dig the base trench?
A retaining wall cannot sit on the surface of your lawn; it must be keyed into the earth. The golden rule for trench depth is to bury 1 inch (2.5 cm) of the wall's height for every 1 foot (30 cm) it rises above ground, plus an additional 6 inches (15 cm) to accommodate your compacted gravel foundation. For example, if your exposed wall will be 24 inches (60 cm) tall, you need to bury 2 inches (5 cm) of block, plus 6 inches (15 cm) of base material, making your starting trench 8 inches (20 cm) deep.
The trench width needs to be generous enough to accommodate the block, the front toe, and the drainage stone behind it. Make your trench at least twice as wide as the depth of your chosen block. If you are using standard 8-inch (20 cm) deep retaining wall blocks, dig a trench 16 to 18 inches (40 to 45 cm) wide. Remove all organic topsoil, roots, and loose dirt until you hit undisturbed, solid subsoil.
Which stone creates a foundation that will not sink?
This is where a pro makes a completely different judgement call from a beginner. A beginner will often dig a shallow trench, pour in a few bags of loose play sand or pea gravel, and start setting blocks. Sand washes away, and pea gravel acts like ball bearings, meaning the wall will settle and wave within a year. A professional will exclusively use 3/4-inch (19 mm) minus crushed stone, also sold as road base, paver base, or quarry process.
The word minus means the mix contains 3/4-inch jagged rocks all the way down to fine stone dust. When you run a heavy steel hand tamper or a gas-powered plate compactor over this material, the jagged edges lock together while the stone dust fills the microscopic voids. Once fully compacted, 3/4-inch minus essentially turns into a porous concrete that will never settle, shift, or wash out. Add the stone to the trench in 2-inch (5 cm) lifts, misting it lightly with a hose and tamping each layer until it rings like concrete when struck.
How do you perfectly level the first row of blocks?
Eighty percent of your total project time should be spent on the base trench and the first row of blocks. If the first row is off by 1/8 inch (3 mm), the fourth row will be off by a half-inch, creating a wall with visible gaps that leans dangerously forward. Do not use standard masonry mortar to level segmental retaining wall blocks; they are designed to be dry-stacked directly on your compacted base.
Use a rigid screed pipe and a straight 2x4 piece of lumber to strike off the final layer of your base stone perfectly flat. Set your first block at the lowest elevation point of your yard. Place a 9-inch (23 cm) torpedo level across the block left-to-right, and then front-to-back. Use a heavy 3-pound dead-blow polyurethane mallet to tap the block down into the base until the bubble is dead center. The block must be perfectly level side-to-side, but professional installers often pitch the block about 1/16 inch backward into the hill to increase stability.
Where does the perforated drain pipe go?
Once your first course of blocks is locked in, you must install the drainage system. Lay a piece of non-woven geotextile landscape fabric down the back of the trench, draped up the soil bank. Place a 4-inch (10 cm) perforated corrugated drain pipe directly behind the first row of blocks, resting on top of your compacted base. Ensure the pipe has a drainage sleeve over it to prevent silt from clogging the weep holes.
Water relies on gravity, so the pipe must be pitched properly to evacuate the water to daylight. Slope the pipe at least 1/4 inch (6 mm) for every 1 foot (30 cm) of lateral run. Direct the lowest end of the pipe either out through the face of the wall using a specialized block grate, or run it beyond the end of the wall into a dedicated yard drainage basin or pop-up emitter.
Why is gravel backfill the secret to a permanent wall?
While the base foundation uses stone with dust in it to lock together, the backfill behind the wall requires the exact opposite. You must backfill the space immediately behind the blocks with 12 inches (30 cm) of 3/4-inch (19 mm) clean, washed stone. The word clean means there are no fines or stone dust present. Because the rocks are entirely jagged and free of dust, massive voids remain between them, allowing water to plummet instantly down to your drain pipe.
As you build the wall up course by course, add the clean stone backfill simultaneously. Never build the entire wall and try to pour the rocks in later, as the falling rocks can knock your upper courses out of plumb. Keep your landscape fabric pinned between this clean stone and the earth embankment to prevent mud from migrating into your clean gravel over the years. Stop filling with gravel about 6 inches (15 cm) below the final cap block, fold the landscape fabric over the gravel, and top with native soil to support grass or mulch.
At what height do you need to install geogrid?
Segmental retaining walls rely on their own weight and a slight backward setback to hold back earth. However, physics dictates a hard limit to how high a gravity wall can go before the earth overpowers it. For most standard 6-inch (15 cm) tall residential blocks, any wall exceeding 36 inches (90 cm) in total height requires mechanical stabilization using geogrid.
Geogrid is a high-tensile synthetic mesh. You lay it flat over the top of a block course, pin the next course of blocks on top of it, and then roll the mesh backward into the hillside, covering it with compacted backfill. This effectively ties the face of the wall to the mass of the earth behind it, turning the soil itself into an anchor. If your wall is creeping above 3 feet (90 cm), check your local municipal codes, as engineering plans and permits are almost universally required.
How much does a DIY block retaining wall cost in 2026?
Material costs vary by region, but building a structurally sound retaining wall is an investment heavily weighted toward bulk stone rather than the decorative blocks. In 2026, standard rough-face retaining wall blocks range from $5 to $8 each at big box stores, while premium tumbled blocks from landscape supply yards run $9 to $14 each. Exterior polyurethane construction adhesive, required for gluing the top cap blocks, costs about $8 per tube.
The bulk aggregates will dictate the rest of your budget. Expect to pay between $45 and $65 per cubic yard for 3/4-inch minus base stone and 3/4-inch clean washed backfill stone, plus a $75 to $150 delivery fee. When factoring in the blocks, pipe, fabric, and stone, a DIY retaining wall will cost between $15 and $30 per square face foot. For a wall that is 30 feet (9 meters) long and 2 feet (60 cm) high, expect a total DIY materials bill between $900 and $1,800.
| Material Type | Where to Use It | Why It Works |
|---|---|---|
| 3/4-Inch Minus (Road Base) | Underneath the wall in the base trench | Contains stone dust that locks jagged rocks together into a concrete-like, non-settling pad when tamped. |
| 3/4-Inch Clean (Washed Stone) | Behind the wall as vertical backfill | Contains zero dust or fines, leaving large voids that allow water to plummet quickly to the drain pipe. |
| Pea Gravel | Avoid for structural retaining walls | Smooth, round stones act like ball bearings and will not compact, causing the wall to shift and settle over time. |
| Native Soil / Dirt | Only the top 6 inches behind the wall | Holds moisture and expands when freezing. Use it only at the very top to hide the gravel and grow grass. |
Frequently asked questions
Do I need landscape fabric behind a retaining wall?
Yes, but it must be placed correctly. Use non-woven geotextile fabric to separate the native dirt hillside from your clean gravel backfill. Never put landscape fabric directly under the wall blocks or under the foundation base, as it creates a slip plane that can cause the wall to slide forward.
Can I use regular mortar to hold retaining wall blocks together?
No. Segmental retaining wall blocks are designed to be dry-stacked and often feature a locking lip or pin system. Mortar will crack and fail as the ground naturally shifts and freezes. The only adhesive you should use is a flexible exterior polyurethane construction adhesive, and it is typically only applied to secure the final top row of cap blocks.
Do I need a building permit for a low garden wall?
Most municipalities in the United States do not require a building permit or an engineer's stamp for decorative garden walls under 36 inches (90 cm) in total height from the base trench to the top cap. However, if the wall supports a driveway, sits on a steep slope, or exceeds 3 feet (90 cm), a permit and engineering plans are legally required.
How do I cut a retaining wall block for corners?
You cannot cleanly split these dense concrete blocks with a standard hammer and chisel. Rent a 14-inch (35 cm) gas-powered concrete saw with a diamond blade, or use a large angle grinder with a masonry blade. Always wear a P100 respirator to protect yourself from silica dust when cutting concrete.
Keep reading
- Starting Your First Vegetable Garden Without Wasting a SeasonMost first gardens fail for reasons that have nothing to do with a green thumb. Here are the five that matter.
- Building Soil That Actually Grows ThingsFeeding plants is a short-term fix. Feeding the soil is what makes a garden easy.
- Reviving a Tired Lawn: A Season-Long PlanA thin lawn is a symptom. Treating the symptom with more seed is why it keeps coming back.