Designing a Cottage Garden Border That Doesn't Collapse Into Chaos
By Jim Vernon · 4 min read · Last updated
A cottage garden that reads as charming rather than neglected has a structure underneath the apparent chaos.
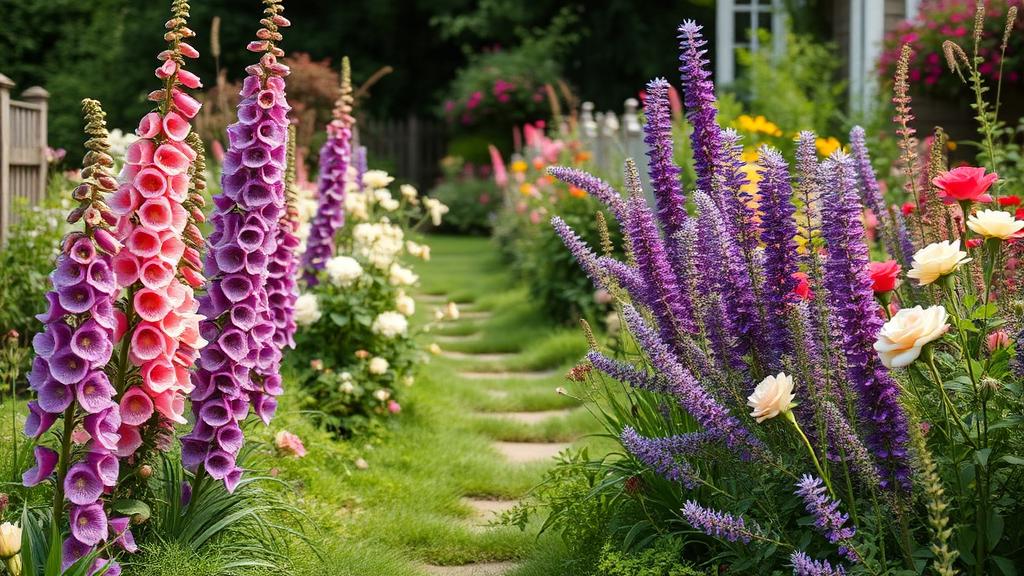
Cottage gardens are meant to look informal and full, but the ones that succeed visually still follow a set of underlying rules about height, repetition, and structure. Without them, the same plant list produces a border that looks abandoned rather than abundant.
Layer by height, back to front
Even in an informal border, taller plants belong toward the back or centre and shorter ones toward the front edge, loosely rather than in strict rows. This layering lets every plant get visible light and keeps the border readable from a distance, even when individual plants are allowed to lean and mingle.
| Layer | Height range | Example plants |
|---|---|---|
| Back / structural | 4-6 ft | Delphinium, hollyhock, climbing rose on a support |
| Middle | 2-3 ft | Foxglove, phlox, coneflower, Shasta daisy |
| Front / edging | 6-18 in | Catmint, lady's mantle, dianthus, dwarf lavender |
| Filler / self-seeders | Varies | Nigella, poppy, forget-me-not |
Repetition is what stops chaos from reading as mess
Repeating the same three to five plant varieties at intervals along the border ties an otherwise wildly varied planting scheme together visually. A border with thirty different plants each appearing once looks scattered; the same thirty plants with five or six repeated in a loose rhythm looks intentional and full.
Structure that holds the display together
- A defined edge — brick, low box hedging, or even a mowed line — signals that the abundance inside is deliberate, not neglect spilling over.
- A path or stepping stones through or alongside a deep border make the planting feel navigable rather than an impenetrable wall of growth.
- A few evergreen or structural shrubs anchor the border through winter, when most perennials have died back.
- Vertical supports — obelisks, arches, or simple stakes — give climbing and floppy plants somewhere to go instead of collapsing over their neighbours.
Succession of bloom across the season
A cottage border planted entirely for a single peak month looks bare the rest of the year. Deliberately including spring bulbs, early summer perennials, midsummer standards like phlox and coneflower, and late-season asters or sedum keeps something in flower from spring through the first frosts, rather than one spectacular month bookended by green filler.
Soil and spacing still matter in an informal design
Cottage borders are often planted more densely than formal beds to achieve the layered, full look quickly, which makes soil preparation and initial spacing more important, not less — overcrowded plants in poor soil compete for nutrients and show it within a season through weak stems and reduced flowering.
Sizing the border to the space
A cottage border needs enough depth for its layering to work — a border under about 4 feet deep struggles to fit back, middle, and front layers without everything crowding into view at once. Where space is tight, drop the back layer's height ambitions rather than compressing all three layers into too shallow a strip; a border with only middle and front layers still reads as intentional, while one with all three squeezed together looks cramped.
A worked example: planning a 20-foot run
A 20-foot border at 5 feet deep gives roughly 100 square feet to work with. Following a rough one-third split by layer, that is about 33 square feet each for back, middle, and front planting, enough for perhaps 4-6 back-layer plants spaced generously, 8-10 middle-layer plants, and a denser 12-15 front-layer and filler plants once self-seeders are factored in. Repeating three or four of the middle-layer varieties at two or three points along the run ties the whole 20 feet together visually instead of reading as one plant of each kind lined up in sequence.
Seasonal maintenance rhythm
- Early spring: cut back any perennial stems left standing over winter for wildlife cover, and edit self-seeded volunteers before they crowd out planned perennials.
- Late spring: stake floppy or tall plants such as delphinium before they reach full height, since staking after a plant leans rarely corrects it fully.
- Midsummer: deadhead repeat-bloomers and cut back the first flush of early perennials to encourage a tidier second flowering later in the season.
- Autumn: leave seed heads on plants that reseed intentionally, remove genuinely spent material, and top up mulch before winter.
Common cottage border mistakes
- Planting every layer at a uniform height instead of deliberately layering back to front, which flattens the visual depth the style depends on.
- Choosing thirty different plants with none repeated, producing a scattered look instead of a tied-together rhythm.
- Letting self-seeders run completely unmanaged until they outcompete the perennials they were meant to complement.
- Skipping a defined edge or path, so the border's abundance reads as an untended area rather than a deliberate design.
How far apart should plants go in a cottage border?
Slightly closer than the tag's mature spread suggests, generally allowing plants to just touch at maturity, since some crowding is part of the intended full look, but not so tight that airflow is completely blocked.
Do cottage gardens need full sun?
Most classic cottage garden plants prefer full sun to light shade. Shadier sites can still achieve the layered, informal look using shade-tolerant substitutes like astilbe, foxglove, and hosta in the same height layers.
How do I keep a cottage border from looking messy by midsummer?
Deadhead spent blooms regularly, stake floppy plants early before they lean, and cut back the first flush of early perennials once they finish, which encourages a tidier second flush and prevents collapse over neighbouring plants.
Run the numbers for your own project
- Wildflower and Pollinator Mix CalculatorHow much wildflower seed do I need for my patch?
- Soil Amendment and pH CalculatorHow much lime or sulfur do I need to fix my soil pH?
- Hedge and Tree Spacing CalculatorHow far apart should I space my hedge or trees?
Keep reading
- Starting Your First Vegetable Garden Without Wasting a SeasonMost first gardens fail for reasons that have nothing to do with a green thumb. Here are the five that matter.
- Building Soil That Actually Grows ThingsFeeding plants is a short-term fix. Feeding the soil is what makes a garden easy.
- Reviving a Tired Lawn: A Season-Long PlanA thin lawn is a symptom. Treating the symptom with more seed is why it keeps coming back.