How Do You Build a Layered Lighting Plan for Any Room?
By Jim Vernon · 5 min read · Last updated
One ceiling fixture is not a lighting plan — it's a light bulb with delusions of grandeur.
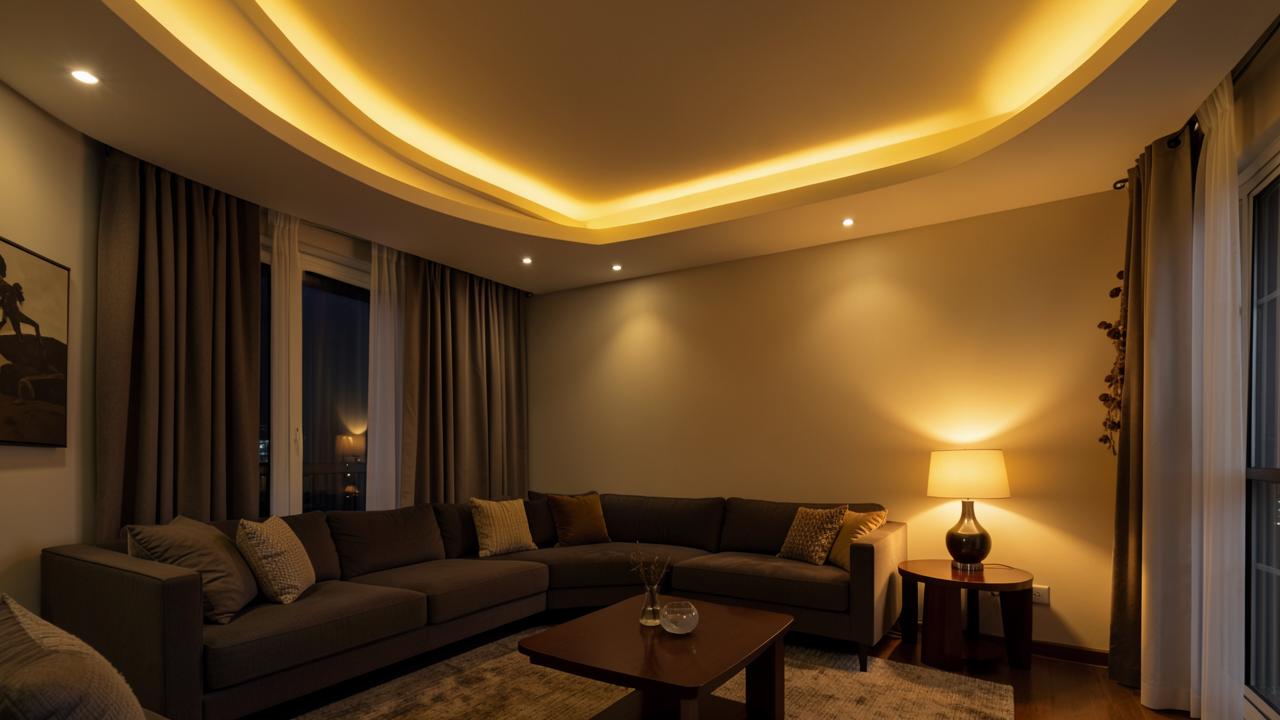
A layered lighting plan uses three distinct types of light — ambient (overall room fill), task (focused light for reading, cooking, or grooming), and accent (highlighting art, texture, or architecture) — each controlled separately so you can adjust the mood and function of a room independently. Most rooms feel flat or harsh because they rely on a single ceiling fixture to do all three jobs at once.
Why one overhead fixture never looks right
A single centered ceiling light throws even, shadowless light straight down, which flattens faces, washes out texture on walls and furniture, and leaves corners dark because light intensity falls off fast with distance. It also forces an all-or-nothing choice: bright enough to read by, or dim enough to relax, never both. Layering solves this by spreading the lumens across multiple sources at different heights and angles.
How much light does each layer actually need?
| Layer | Typical fixtures | Target output | Control |
|---|---|---|---|
| Ambient | Recessed cans, flush mount, ceiling fan light | 10-20 lumens per sq ft of floor area | Dimmer on its own switch |
| Task | Under-cabinet strips, desk lamp, vanity bar | 300-500 lumens focused on the work surface | Separate switch or plug |
| Accent | Picture lights, wall sconces, cove lighting | 3:1 to 5:1 ratio brighter than surrounding ambient light | Dimmer, often on a smart plug |
What's a realistic layout for a living room?
- Ambient: 4-6 recessed 3-inch cans on the perimeter (not centered) at 2700K, wired to one dimmer.
- Task: a floor lamp beside the reading chair and a table lamp on the console, both on standard outlets.
- Accent: a picture light over art or a low-voltage LED strip in a cove or behind a TV console, on a separate switch or smart plug so it can stay on alone in the evening.
- A ceiling fan light, if present, counts as ambient but should not be the only ambient source.
How do you sequence the electrical work?
- Map where each layer goes on paper first, including outlet locations for lamps — moving a lamp cord across a doorway is a trip hazard, not a design choice.
- Have an electrician run switch legs for new ceiling or sconce circuits before drywall is closed if this is part of a remodel; retrofitting after walls are finished means fishing wire or using battery/plug-in fixtures instead.
- Group ambient and task lighting on separate switches at minimum; add smart dimmer switches or a smart hub if you want scenes (e.g., 'movie' dims ambient to 10% and kills task light).
- Test bulb color temperature and brightness in the room at night before buying multiples — a single sample bulb saves an expensive return trip.
What does a layered lighting retrofit cost?
A plug-in retrofit using lamps, smart plugs, and LED strips can run $150-$400 for a living room and needs no electrician. A hardwired retrofit adding recessed ambient lighting plus a couple of switched circuits typically runs $800-$2,500 per room depending on ceiling access (open joists from an attic above are far cheaper than a finished ceiling below a second floor).
How do you plan lighting for a kitchen versus a bedroom?
A kitchen needs ambient light spread evenly overhead (recessed cans or a flush mount at 3000-3500K), strong task light under cabinets for chopping and reading recipes, and often a small accent layer over open shelving or a kitchen island pendant. A bedroom flips the priority: ambient light should be soft and dimmable to near-off, task light is limited to reading lamps on each nightstand at 300-450 lumens, and accent light is optional, often just a plug-in sconce or LED strip behind a headboard. Treating both rooms the same layout wastes money on features the room doesn't need and misses the ones it does.
What are the most common layering mistakes homeowners make?
- Buying dimmable switches but non-dimmable bulbs, which caps the range and sometimes causes buzzing at low settings.
- Putting all three layers on one switch, which forces an all-on or all-off choice and defeats the purpose of layering in the first place.
- Choosing accent fixtures that are brighter than the ambient layer, which draws the eye to the fixture itself instead of the wall or object it's meant to highlight.
- Skipping task lighting near mirrors and desks and expecting the ambient layer to compensate, which leaves shadows exactly where clear light matters most.
- Ignoring bulb color temperature consistency between layers, mixing a 2700K lamp with a 4000K recessed can in the same room.
How long does a typical layered lighting project take?
A plug-in-only layering project (lamps, smart plugs, LED strips) can be done in an afternoon since it involves no electrical work beyond using existing outlets. A hardwired retrofit adding new switches or recessed cans typically takes one to three days of electrician labor depending on ceiling access, plus any drywall patching and paint touch-up time after the wiring pass, which can add another day or two before the room is fully back together. Homeowners doing a full remodel should plan lighting layers at the framing stage, since running wire before drywall is a fraction of the cost of retrofitting afterward.
Frequently asked questions
Do I need a dimmer on every layer?
No, but ambient and accent layers benefit most since they set mood. Task lighting for close work like reading or chopping vegetables should stay near full brightness, so a dimmer there is optional rather than essential.
Can I layer lighting without any new wiring?
Yes. Table lamps, floor lamps, plug-in sconces, and battery or USB-powered LED strips can create ambient, task, and accent layers entirely through existing outlets and smart plugs, which is the fastest and cheapest way to test a layout before committing to hardwired fixtures.
How many lumens does a typical living room need overall?
A 200-square-foot living room generally needs 2,000-4,000 total lumens across all fixtures for comfortable ambient use, roughly 10-20 lumens per square foot, with task areas layered on top at higher local intensity.
Run the numbers for your own project
- Energy Savings CalculatorWill this upgrade pay for itself?
- Project Cost EstimatorWhat will this project cost me?
Keep reading
- How Much Paint Do You Actually Need for a Room?The tin says 400 square feet. Your wall says otherwise. Here is the arithmetic that actually holds up.
- DIY or Hire a Pro? A Decision Framework That Is Not About MoneyThe labour saving is real. So is the cost of a job done twice — and of tools you use once.
- Storage for Small Rooms That Does Not Make Them SmallerSmall rooms do not need more storage. They need storage that stops interrupting the eye.