How Do You Stop a Front-Load Washing Machine From Walking on a Wood Floor?
By Jim Vernon · 9 min read · Last updated
Your washing machine doesn't have to sound like a jackhammer trying to escape your laundry room.
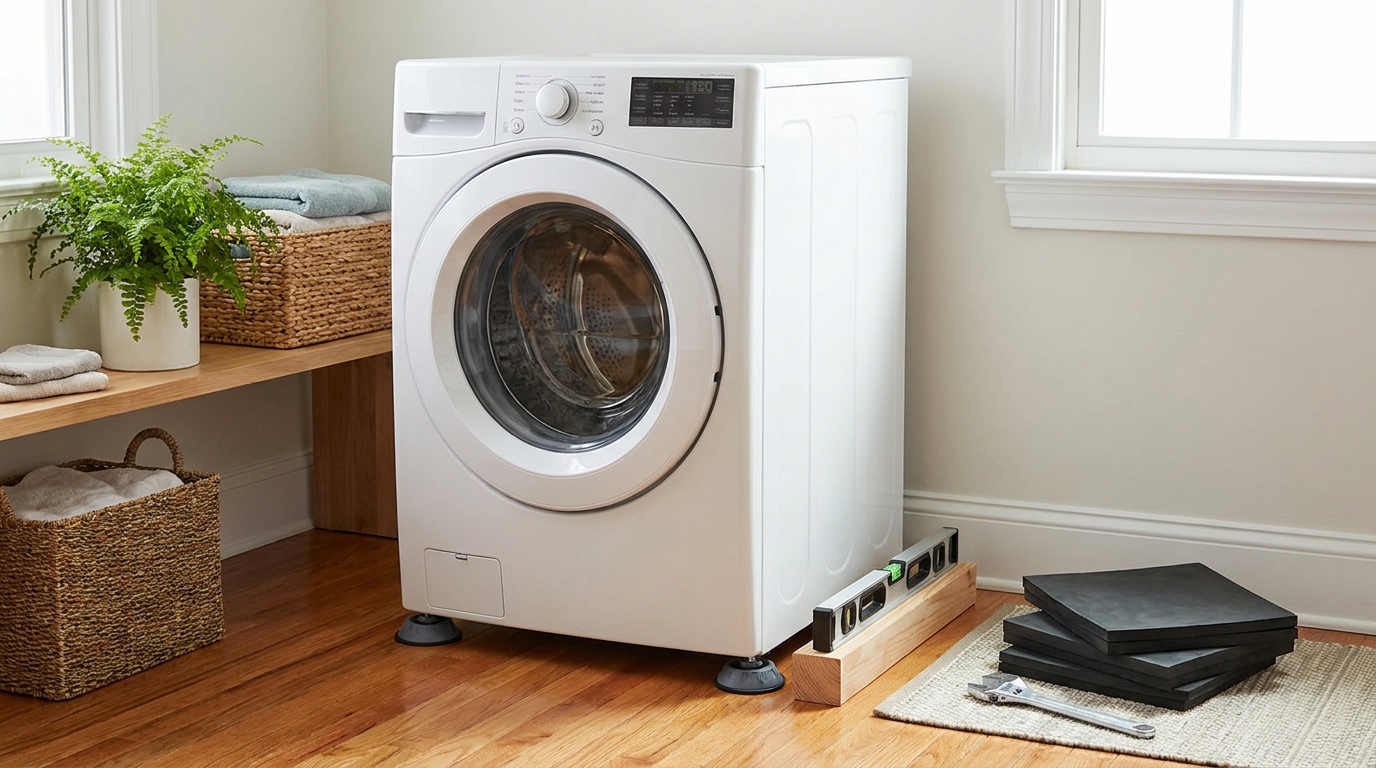
To stop a front-load washing machine from walking across a wood floor, you must lower its leveling legs to their shortest possible height to reduce its center of gravity, perfectly level the chassis front-to-back and side-to-side, and place dense, hard-rubber anti-vibration pucks under all four feet. If the floor itself is bouncing, you will also need to reinforce the floor joists below the laundry room with solid wood blocking or a 3/4-inch (1.9 cm) plywood subfloor overlay. Front-load washers spin incredibly fast—often exceeding 1,200 revolutions per minute (RPM)—which generates severe lateral forces that a flexible wood-framed floor simply cannot absorb on its own. Ignoring a walking washer will eventually damage both the appliance's internal suspension and your home's structural framing.
- Lowering the machine's center of gravity by keeping the leveling legs as short as possible reduces lateral swaying.
- True leveling requires adjusting the front legs only after the machine is pushed into its final operating position.
- Cheap foam anti-vibration pads compress under the weight and worsen the problem; only solid, vulcanized tire rubber works.
- If the floor bounces beneath the machine, adding 2x8 solid blocking between the joists is required to stop the structural deflection.
- Washing single heavy items like a duvet or bath mat creates an eccentric load that defeats the machine's internal shock absorbers.
Why Do Front-Load Washers Vibrate So Much More Than Top-Loaders?
Front-load washing machines rely on gravity and a horizontal drum to clean clothes, tumbling the laundry through a shallow pool of water. To compensate for using less water, they extract moisture by spinning at blistering speeds, typically between 1,000 and 1,400 RPM. A traditional top-load washer maxes out around 800 RPM and directs its centrifugal force vertically, straight down into the floor.
A front-loader's horizontal drum throws the wet weight of the laundry laterally, pushing the machine side to side. When this lateral force meets a standard residential wood floor built with joists spaced 16 inches (40.6 cm) apart, the floor acts like a trampoline. The wood deflects, the machine loses its solid footing, and the rotation causes the entire appliance to literally walk forward or sideways across the room.
- Top-loaders push force vertically down into the floor joists.
- Front-loaders spin up to 1,400 RPM and generate violent side-to-side lateral force.
- Standard wood floors are designed for static loads, not the dynamic pulsing of a horizontal drum.
What Is the Pro Judgement Call When Adjusting Washer Feet?
When a beginner realizes their washing machine is rocking, their first instinct is to grab a wrench and extend the shortest leg until it firmly touches the floor. A professional appliance installer does the exact opposite. The pro judgement call is to thread all four leveling legs entirely into the machine's base so the washer sits as close to the floor as physically possible.
Once the machine is at its absolute lowest height, the pro will unscrew only the corners that need lifting, and by the bare minimum amount required to achieve level. Every fraction of an inch you extend a leveling leg raises the machine's center of gravity and turns that threaded steel rod into a flexible lever. A washer raised on legs extended by 1.5 inches (3.8 cm) will walk violently, whereas the exact same machine resting directly above its casters on legs extended only 0.25 inches (0.6 cm) will stay planted.
- Beginners extend legs to reach the floor; pros retract all legs to the minimum height first.
- Longly extended threaded legs act as flexible levers that amplify vibration.
- A lower center of gravity drastically reduces the machine's ability to generate lateral momentum.
How Do You Level a Washing Machine Properly?
Leveling a washing machine requires a 24-inch (61 cm) spirit level, an adjustable wrench, and a pair of slip-joint pliers. First, pull the machine out from the wall just enough to access the rear legs. Place the spirit level across the top edge of the machine—not on the curved control panel, but directly on the flat metal housing. Check the side-to-side level at both the front and the back.
Adjust the rear legs first to achieve a perfect level across the back, then use the locking nuts to secure them tightly against the chassis. Push the machine back into its final operating position before leveling the front. Floors are rarely perfectly flat, and leveling the machine in the middle of the room does no good if it will be running two feet closer to the wall. Adjust the front legs until the machine is perfectly level front-to-back and side-to-side. Once leveled, lean your body weight against diagonal corners to check for any rocking; there should be zero movement.
- Always use a 24-inch (61 cm) spirit level on the flat metal top of the chassis.
- Level and lock the rear legs first, then push the machine into its final spot.
- Final front-leg adjustments must be made in the exact location where the washer will run.
- Tighten the metal locking nuts upward against the chassis to stop the legs from slowly unthreading.
How Do You Tell If the Wood Floor Is the Actual Problem?
If your machine is perfectly level and practically kissing the floor, but it still shakes the entire room during the final spin cycle, your wood floor is structurally deflecting under the load. You can test this using the water glass method. Set a glass of water on the floor about 3 feet (0.9 m) away from the running washing machine.
If the water simply ripples, the vibration is normal mechanical transfer. If the water splashes or the glass visibly travels across the floor, your joists lack the rigidity required for a front-loader. Standard second-story residential floors are designed to support a static load of 40 pounds per square foot (195 kg per square meter). A 200-pound (90 kg) washing machine generating dynamic, pulsing centrifugal force can easily exceed the floor's deflection limits, causing the joists to bow downward and spring back up with every rotation.
- Use a glass of water set 3 feet (0.9 m) away to visualize floor deflection.
- Standard second-story framing is built for 40 pounds per square foot of static weight.
- If the floor bounces visibly beneath your feet when you jump, it will not hold a front-load washer still.
How Do You Reinforce a Flexing Laundry Room Floor?
To stop a floor from bouncing, you must tie the independent floor joists together so they share the dynamic load. If you have an unfinished basement or crawlspace directly beneath the laundry room, install solid wood blocking. Cut lengths of 2x8 or 2x10 lumber to fit snugly between the floor joists directly under the washing machine's footprint. Stagger the blocks slightly so you can drive three 3-inch (7.6 cm) wood screws through the joists into the ends of each block. This project requires about $40 to $60 in lumber and hardware in 2026 pricing, and completely eliminates lateral joist twisting.
If your laundry room is on the second floor and the ceiling below is finished drywall, you must stiffen the floor from above. Cut a piece of 3/4-inch (1.9 cm) CDX plywood to slightly larger than the footprint of both your washer and dryer. Screw this plywood directly through the existing finished floor and into the joists below using 2.5-inch (6.3 cm) wood screws spaced every 8 inches (20 cm). This spreads the machine's footprint across three separate joists instead of letting it hammer down on just one.
- Install 2x8 or 2x10 solid wood blocking between the joists from the basement beneath the machine.
- Use three 3-inch (7.6 cm) screws on each side of the blocking to prevent joist twisting.
- For finished ceilings below, install a 3/4-inch (1.9 cm) CDX plywood overlay beneath the washer.
- Plywood overlays cost around $60 to $80 in 2026 and force multiple joists to share the appliance's weight.
Which Anti-Vibration Pads Actually Stop a Walking Washer?
The most common failure mode homeowners experience when trying to stop a walking washer is buying cheap, lightweight EVA foam anti-vibration pads. These $10 waffle-patterned foam squares compress under the static weight of the machine. When the spin cycle starts, the foam crushes unevenly, actively creating a slope that encourages the machine to slide off the pad and resume walking.
To actually stop vibration, you must buy dense, vulcanized rubber pucks. Look for pads made from recycled tire rubber that are at least 1 inch (2.5 cm) thick and feature a recessed cup on top to capture the washer's leveling foot. Expect to pay between $25 and $45 for a set of four high-quality rubber isolators. These dense pads will not compress under a 250-pound (113 kg) load, and their high friction coefficient grips both the wood floor and the metal foot, physically preventing lateral movement while dampening sound waves.
- Avoid cheap EVA foam pads that crush unevenly and create a slippery slope.
- Buy dense, vulcanized rubber pads made from recycled tires.
- Quality pads should be at least 1 inch (2.5 cm) thick and feature a recessed cup for the washer foot.
- High-density rubber provides the exact friction coefficient needed to grip slick hardwood and tile.
How Do Unbalanced Loads Cause Washing Machines to Walk?
Even a perfectly leveled machine on a reinforced floor will violently walk if the laundry load is severely unbalanced. Front-load washers use internal sensors to detect weight distribution before ramping up to high speeds. If a single heavy item, like a saturated king-size duvet insert or a heavy bath mat, clumps on one side of the drum, it acts as an eccentric weight. At 1,200 RPM, a 5-pound (2.2 kg) wet towel off-center generates hundreds of pounds of outward force.
Always wash heavy items in pairs—such as two bath mats or two large pillows—to give the machine a chance to balance the drum. If you must wash a single heavy blanket, add several large, dry bath towels to the load. The towels will absorb water and provide counter-weight during the spin cycle, allowing the internal suspension springs and shock absorbers to properly isolate the movement from the outer frame.
- A single heavy, wet item acts as an eccentric weight that overpowers internal shock absorbers.
- Always wash heavy items in pairs to allow the drum to balance itself.
- Add dry bath towels when washing a single large blanket to provide necessary counter-weight.
| Strategy | 2026 Material Cost | DIY Labor Time | Effectiveness |
|---|---|---|---|
| Install solid 2x8 joist blocking from below | $40 - $60 | 2 - 3 Hours | Excellent (Stops structural bounce completely) |
| Add 3/4-inch plywood overlay from above | $60 - $80 | 1 Hour | Good (Distributes weight across multiple joists) |
| Install heavy-duty adjustable joist supports | $80 - $120 | 1 - 2 Hours | Excellent (Transfers load to concrete slab in basement) |
Frequently asked questions
Can I use a thick rubber gym mat instead of individual anti-vibration pads?
No. A solid rubber mat placed under the entire machine traps moisture, leading to hidden mold and wood rot on your floor. Furthermore, the large smooth surface area of a mat provides less concentrated friction than individual pucks, meaning the machine is actually more likely to slide across the mat itself during a high-speed spin.
Do laundry pedestal drawers make washing machine vibration worse?
Yes, universally. Pedestal drawers elevate the washing machine by 12 to 15 inches (30 to 38 cm), raising its center of gravity drastically. The hollow metal box acts as an amplifier for noise and a flexible lever for lateral forces. If your machine is walking violently, removing the pedestal is often the most effective immediate fix.
Will tightening the shipping bolts stop the shaking?
Never reinstall or tighten shipping bolts on a machine you intend to use. Those bolts are designed exclusively to lock the drum to the frame during truck transport. If you run a wash cycle with shipping bolts in place, the centrifugal force will bypass the internal shock absorbers and transfer directly into the frame, completely destroying the machine's plastic outer tub in a single cycle.
Keep reading
- How Much Paint Do You Actually Need for a Room?The tin says 400 square feet. Your wall says otherwise. Here is the arithmetic that actually holds up.
- DIY or Hire a Pro? A Decision Framework That Is Not About MoneyThe labour saving is real. So is the cost of a job done twice — and of tools you use once.
- Storage for Small Rooms That Does Not Make Them SmallerSmall rooms do not need more storage. They need storage that stops interrupting the eye.