How Do You Safely Remove a Popcorn Ceiling Without Damaging the Drywall?
By Jim Vernon · 7 min read · Last updated
A dated popcorn ceiling makes any room look small and shadowy, but you can scrape it away in a single weekend for under $100 if you know the exact trick to softening the texture first.
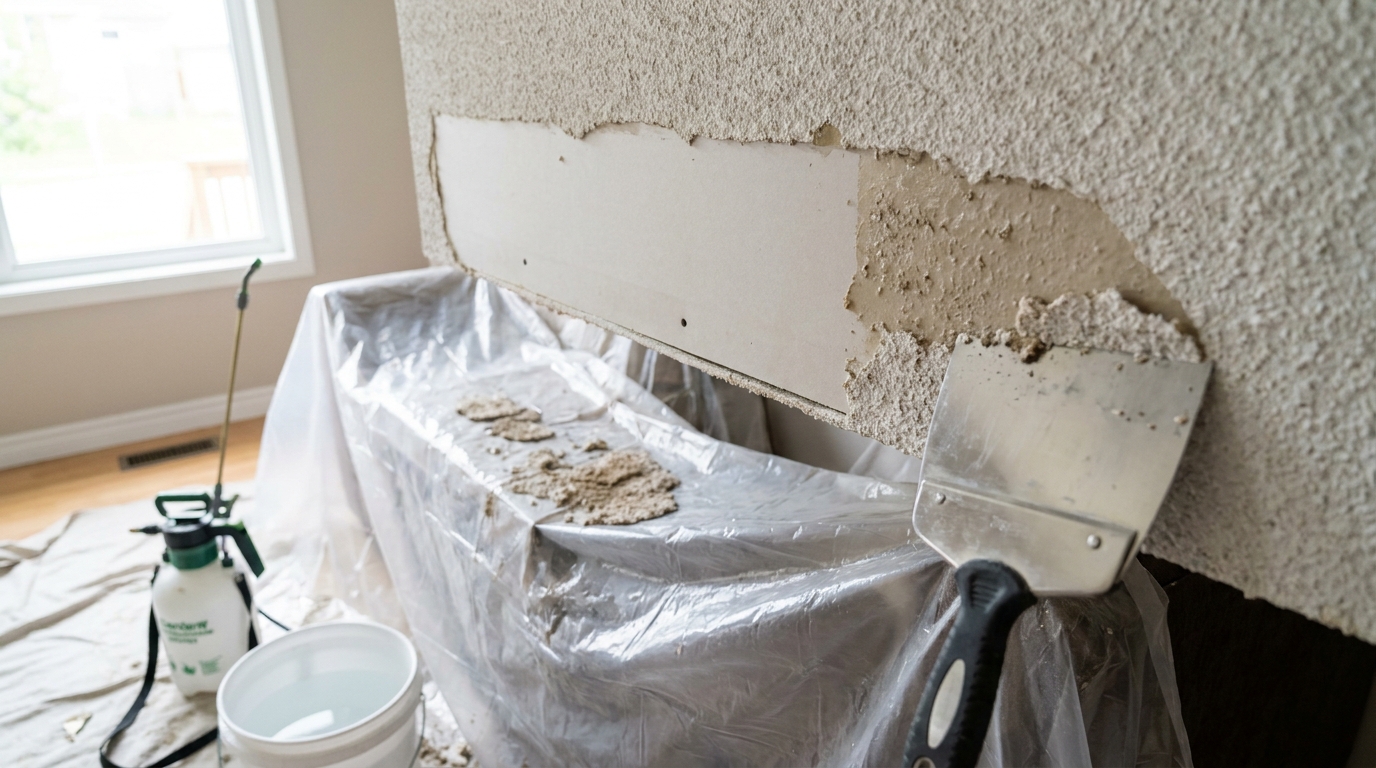
To remove a popcorn ceiling without gouging the drywall underneath, you must mist the texture with warm water mixed with two drops of dish soap, let it soak for exactly 15 minutes, and scrape it off at a shallow 30-degree angle using a 10-inch (25 cm) drywall taping knife with filed corners. Attempting to dry-scrape the ceiling requires excessive force, which inevitably digs the blade into the drywall paper and leaves deep trenches that take days to patch. By properly hydrating the acoustic texture, it loses its bond with the ceiling and falls away in heavy, wet sheets with only a gentle push. Whether you are updating a single bedroom or modernizing an entire house, taking this job on yourself is one of the highest-return DIY projects available, provided you prepare the room correctly and control the mess from the start.
- Always test homes built before 1980 for asbestos using a mail-in lab kit before scraping.
- File the sharp corners off your taping knife to prevent the blade from tearing the drywall paper.
- Completely waterproof the room using 6-mil plastic on the floor and 1-mil plastic draped down the walls.
- Do not over-soak the ceiling; a light misting left for 15 minutes prevents the drywall paper from bubbling.
How Do You Test a Popcorn Ceiling for Asbestos?
If your home was built before 1980, you must assume the popcorn texture contains asbestos until proven otherwise. The EPA banned asbestos in ceiling textures in 1977, but existing inventories were legally installed well into the 1980s. Never scrape, sand, or disturb an untested ceiling in an older home.
You can buy an EPA-approved mail-in test kit at any major hardware store for $10 to $15, plus a $30 to $50 lab fee. To take a sample, put on an N95 respirator, mist a small inconspicuous area inside a closet with water to prevent dust, and scrape a tablespoon-sized amount into the provided plastic bag. If the results come back positive, stop immediately. You must either hire a licensed abatement contractor or encapsulate the ceiling by installing new 1/4-inch (6 mm) drywall directly over it.
What Tools and Materials Do You Need for the Job?
You do not need specialized electric scrapers to remove popcorn ceilings. The most effective tool is a standard 10-inch (25 cm) drywall taping knife. Before you begin, use a metal file to round off the sharp outer corners of the blade. This simple modification prevents the edges from catching and tearing the drywall paper.
You will also need a 1-gallon (3.8-liter) pump garden sprayer, heavy-duty 6-mil plastic sheeting for the floors, thin 1-mil plastic sheeting for the walls, painters tape, a step ladder, and safety gear including glasses and a respirator. If the ceiling has been painted over, the water will not penetrate the paint shell. In that scenario, you will also need a drywall scoring tool to puncture the paint layer before spraying.
How Do You Prep the Room to Contain the Mess?
Removing a popcorn ceiling is incredibly messy, turning your room into a swamp of wet, sticky drywall mud. A beginner will often try to catch the falling texture in a small hand-held tray or lay down canvas drop cloths that allow wet mud to seep straight through to the hardwood floors below.
A professional makes a completely different judgement call: they remove all furniture, cover the floor in waterproof 6-mil plastic sheeting, and run the plastic 2 feet (60 cm) up the walls, taping it securely. They then drape thin 1-mil plastic down from the ceiling line, overlapping the floor plastic. This creates a fully waterproof containment zone. When the scraping is done, you simply roll the entire floor plastic up with the wet debris trapped inside and throw it straight into a heavy-duty trash bag, leaving zero cleanup. Be sure to turn off the power to the room at the breaker and stuff the electrical boxes with newspaper to keep the wet mud out.
How Much Water Should You Spray on the Ceiling?
Fill your pump sprayer with warm water and add two drops of liquid dish soap to act as a surfactant, which helps the moisture penetrate the porous texture. Work in manageable 4-by-4-foot (1.2-by-1.2-meter) sections. Mist the ceiling evenly until it is damp to the touch, but not dripping.
Let the water sit for exactly 15 minutes to soak through the texture and dissolve the water-soluble glue holding it to the drywall. A common failure mode is soaking the ceiling with too much water or leaving it to sit for more than 20 minutes. This causes the paper facing of the drywall itself to bubble, delaminate, and peel off, turning a fast scraping job into days of tedious mudding and skim-coating. If the texture does not scrape off easily after 15 minutes, apply a second light misting and wait five more minutes rather than drenching it all at once.
What Is the Best Technique for Scraping the Texture?
Hold your rounded 10-inch (25 cm) drywall knife by the handle, placing your index finger on the back of the blade for control. Push the blade forward at a shallow 30-degree angle to the ceiling. If the texture is properly hydrated, it will peel away like wet oatmeal with almost no resistance.
Keep your strokes long and smooth. Do not force the blade if you hit a stubborn patch; simply mist it again and move on to another area while it softens. Around the edges of the room, switch to a smaller 4-inch (10 cm) putty knife to avoid gouging the wall corners. Keep a damp rag handy to wipe the blade clean every few strokes, which prevents dried mud from scratching the ceiling as you push.
How Do You Repair and Sand the Drywall Afterward?
Once the popcorn texture is removed, you will be left with the original drywall joints and fastener holes. Wait 24 hours for the ceiling to dry completely, then inspect the surface for any gouges or loose drywall tape.
Use standard all-purpose joint compound and your 10-inch knife to skim coat over the seams, filling in any imperfections. Once the compound dries, sand the entire ceiling lightly with a pole sander equipped with 120-grit drywall screen. Finally, wipe away the dust with a damp microfiber cloth and apply a high-build drywall primer. A standard paint-and-primer-in-one will not seal the porous, newly exposed joint compound properly, leading to dull spots when you apply your final ceiling paint.
How Much Does It Cost to Remove a Popcorn Ceiling in 2026?
In 2026, hiring a professional contractor to remove an unpainted popcorn ceiling, skim coat the joints, and prime the surface costs between $1.50 and $3.00 per square foot, assuming no asbestos is present. For a typical 12-by-15-foot (3.6-by-4.5-meter) bedroom, expect to pay a pro roughly $400 to $600. If asbestos is present, professional abatement costs jump to $5 to $10 per square foot.
Taking the DIY route for an asbestos-free ceiling is highly cost-effective. The materials, including the pump sprayer, taping knives, plastic sheeting, and joint compound, will cost around $60 to $80 in total. You will save hundreds of dollars per room, trading a Saturday morning of physical labor for a massive, modern upgrade to your home.
| Expense Type | DIY Cost Range | Pro Cost Range |
|---|---|---|
| Asbestos Testing Kit & Lab Fee | $40 - $65 | $100 - $150 |
| Room Prep & Plastic Sheeting | $25 - $35 | Included |
| Scraping Tools & Pump Sprayer | $35 - $50 | Included |
| Joint Compound & Primer | $40 - $55 | Included |
| Labor (Asbestos-Free) | $0 | $400 - $600 |
Frequently asked questions
Can you remove a popcorn ceiling that has been painted over?
Yes, but the paint acts as a waterproof barrier, preventing your water spray from softening the texture. You must first dry-score the ceiling using a specialized wallpaper scoring tool or 60-grit sandpaper on a pole sander. This breaks the paint seal, allowing the water-and-soap mixture to penetrate the acoustic texture below.
Should I remove the popcorn ceiling before or after replacing my flooring?
Always remove the ceiling before installing new floors. The process involves massive amounts of wet, heavy drywall mud falling to the ground, which can scratch, stain, or permanently damage new hardwood, carpet, or luxury vinyl plank, even if you use thick protective drop cloths.
Will my house smell after removing a popcorn ceiling?
Removing the acoustic texture itself does not cause a lingering smell, but the newly exposed wet drywall paper and joint compound will emit a distinct, chalky, damp odor for a day or two. Keeping windows open and running a dehumidifier will quickly dry the ceiling and eliminate the smell before you prime and paint.
Keep reading
- How Much Paint Do You Actually Need for a Room?The tin says 400 square feet. Your wall says otherwise. Here is the arithmetic that actually holds up.
- DIY or Hire a Pro? A Decision Framework That Is Not About MoneyThe labour saving is real. So is the cost of a job done twice — and of tools you use once.
- Storage for Small Rooms That Does Not Make Them SmallerSmall rooms do not need more storage. They need storage that stops interrupting the eye.