How Do You Retrofit Soft-Close Hinges Onto Old Kitchen Cabinets?
By Jim Vernon · 10 min read · Last updated
Upgrading a noisy kitchen doesn't require a massive remodel when a simple box of hardware can silence slamming doors forever.
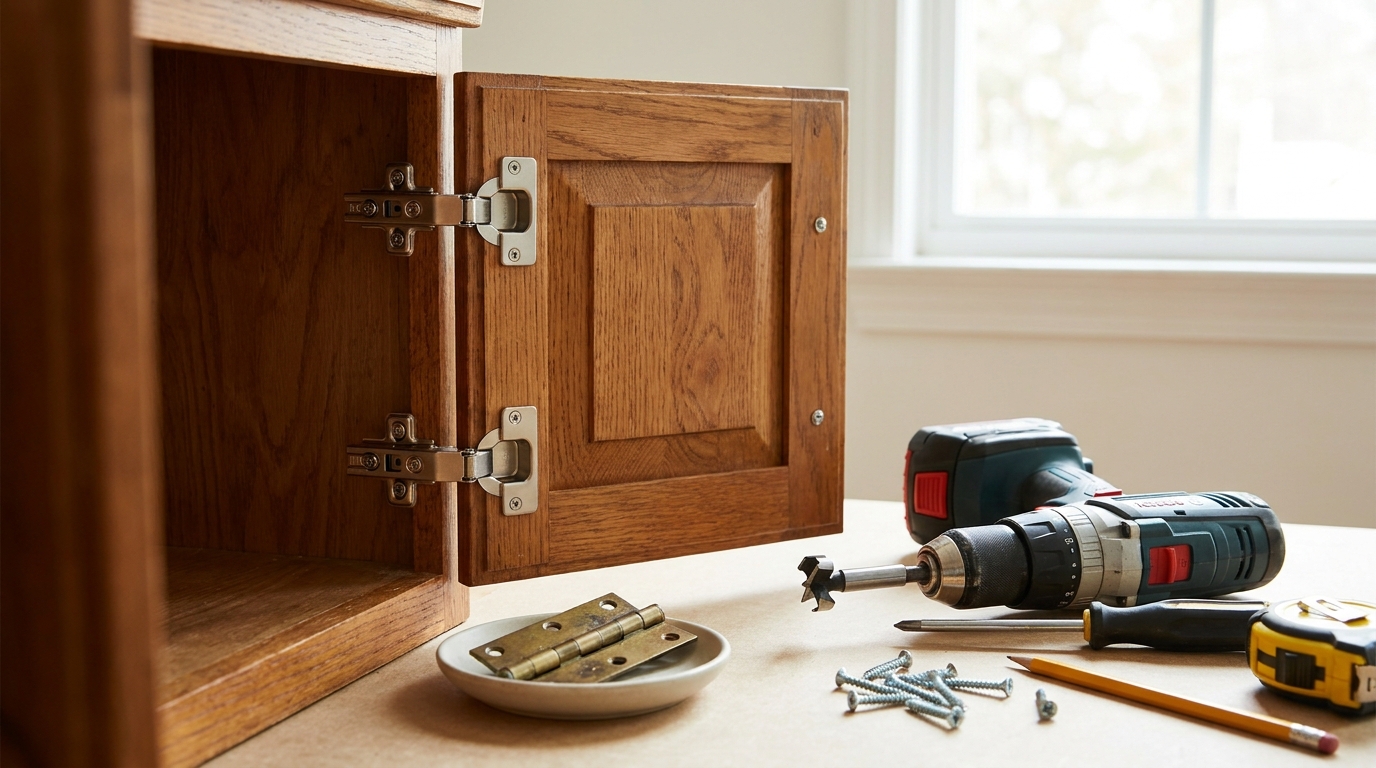
To retrofit soft-close hinges onto old kitchen cabinets, you must first measure how far your door overlaps the cabinet frame, buy matching European-style concealed hinges, and drill a 35mm (1.37-inch) recessed cup hole into the back of each door using a Forstner bit. You will then screw the hinge into the door, mount the corresponding base plate to the cabinet frame, and adjust the built-in tension screws until the door hangs straight and closes silently. Moving from 1980s or 1990s exposed brass hinges to modern soft-close hardware completely changes how a kitchen feels and operates. It is a one-weekend job that requires careful measuring but saves thousands of dollars compared to replacing the cabinetry outright.
- Always measure your door overlay down to the 1/16th of an inch before purchasing replacement hinges.
- Use a dedicated 35mm (1.37-inch) concealed hinge jig to ensure identical cup placement on every single door.
- A depth stop collar is mandatory to prevent drilling the hinge cup hole through the front of the cabinet door.
- Fill old, stripped screw holes with wood glue and toothpicks to give the new hardware a solid mounting surface.
- European concealed hinges offer three-way adjustments (up/down, left/right, in/out) to perfectly align crooked doors.
How do you determine the correct hinge overlay size for your cabinets?
Before buying a single piece of hardware, you must determine your cabinet door overlay. The overlay is simply the distance the cabinet door extends past the opening of the cabinet box and sits over the face frame. If you buy a hinge with the wrong overlay, your doors will either gap in the middle or bind against each other when they attempt to close.
This is where a judgement call separates a professional cabinet installer from a beginner. A beginner usually takes an old hinge to the hardware store, eyeballs it against the packaging, assumes it is a standard 1/2-inch (1.27 cm) overlay, and buys a bulk pack. A pro never guesses. Instead, a pro closes the cabinet door and draws a light pencil line on the face frame exactly where the outer edge of the door rests. After removing the door, they measure the distance from the inside edge of the cabinet opening to that pencil line down to the 1/16th of an inch. That exact measurement is the precise overlay size you must purchase.
- Partial overlay: The door covers only part of the face frame, usually requiring a 1/2-inch (1.27 cm) overlay hinge.
- Full overlay: The door covers almost the entire face frame, typically requiring a 1-1/4-inch (3.17 cm) overlay hinge.
- Inset: The door sits flush inside the cabinet opening, requiring a specialized zero-overlay inset hinge.
What tools and materials do you actually need for a soft-close hinge upgrade?
Upgrading an entire kitchen's worth of cabinet doors is highly cost-effective if you do the labor yourself. In 2026, expect to spend between $45 and $75 for a 20-pack of high-quality European-style soft-close hinges. You will also need a few specialized, inexpensive tools to make the installation accurate and repeatable across dozens of doors.
Do not attempt this job with standard twist drill bits or paddle bits. You must use a 35mm (1.37-inch) Forstner bit to carve the flat-bottomed holes required for the hinge cups. A specialized concealed hinge jig, which costs around $35, will lock that Forstner bit into the exact correct position on every door, eliminating measurement drift. You will also need a combination square, a drill, a self-centering drill bit (often called a Vix bit) for the pilot holes, and a standard #2 Phillips screwdriver for the final hardware adjustments.
- European-style soft-close hinges with matching mounting plates.
- Concealed hinge jig with a 35mm (1.37-inch) Forstner bit and depth collar.
- Self-centering Vix bit for drilling perfectly centered pilot holes.
- Standard 5/8-inch (1.58 cm) #6 wood screws (usually included with hinges).
How do you remove the old hardware and prep the cabinet doors?
Start by removing the doors from the cabinet frames. Take a piece of painter's tape and number each door and its corresponding cabinet opening so you know exactly where they go back. Once the doors are off, unscrew the old hinges from both the doors and the face frames. If your cabinets previously had exposed hinges, you will be left with visible screw holes on the front of the face frames that need addressing.
Do not simply drive your new base plate screws into the old holes. European hinges mount differently, and the old holes rarely align. To fix the old holes on the face frame, dip a wooden toothpick in wood glue, tap it into the old screw hole, and snap it off flush. Once the glue dries, you have a solid wood surface ready for sanding, paint touch-ups, or drilling new pilot holes without the drill bit wandering into the old void.
- Label every door and frame with matching numbers on painter's tape.
- Remove all old hardware and group the screws in a designated container.
- Plug old screw holes with glued toothpicks or hardwood dowels to restore structural integrity.
- Sand the plugged holes flush and apply touch-up paint or stain before installing new plates.
How do you drill the 35mm hinge cup holes without ruining the door?
A common and catastrophic failure mode for this project is drilling the 35mm (1.37-inch) cup hole completely through the front face of your cabinet door. This usually happens when DIYers rely on a piece of tape wrapped around the drill bit as a visual guide, or when they simply press down and guess the depth. Once the tip of the bit pierces the front of the door, the door is ruined and must be replaced.
To avoid destroying your doors, you must use a Forstner bit equipped with a heavy-duty metal depth stop collar. Set the collar with an Allen wrench so the bit penetrates exactly 1/2 inch (1.27 cm) into the wood, which is the standard depth for a hinge cup. Clamp your concealed hinge jig securely to the door, position the guide exactly 3 to 4 inches (7.6 to 10.1 cm) from the top or bottom edge, and drill straight down. Let the tool do the cutting; pushing too hard can cause the bit to tear out the wood fibers or spin the depth collar loose.
- Always test your drill depth on a piece of scrap wood of the same thickness before touching a cabinet door.
- Clamp the jig firmly to the door; never attempt to hold it in place by hand while drilling.
- Clear out sawdust halfway through drilling to prevent the Forstner bit from overheating.
- Ensure the distance from the edge of the door to the edge of the hole (the 'bore distance') matches your hinge specifications.
How do you properly align and mount the new hinges to the door?
Once the 35mm (1.37-inch) cup holes are drilled, drop the new hinges into the recesses. However, do not immediately drive the screws. If the hinge is slightly twisted, it will bind against the cabinet frame when opening and closing, wearing out the soft-close mechanism prematurely.
Take a combination square or a rigid straight edge and press it flat against the back straight edges of both hinges at the same time. This forces both hinges to align perfectly at a 90-degree angle to the edge of the door. While holding the square firmly against the hinges, use your self-centering Vix bit to drill pilot holes into the mounting tabs. Finally, drive the included 5/8-inch (1.58 cm) screws to secure the hinges, being careful not to over-tighten and strip the wood.
- Drop both hinges into the newly drilled cups to check for a flush fit.
- Use a straight edge across both hinge bodies to guarantee they are perfectly parallel.
- Always pre-drill with a self-centering bit so the screws seat exactly in the middle of the hinge holes.
- Use a hand screwdriver for the final turns to avoid stripping out MDF or particleboard doors.
How do you attach the doors to the cabinet frames without a second pair of hands?
Holding a heavy cabinet door in mid-air while trying to level a mounting plate and drive a screw is frustrating and often leads to crooked doors. To do this efficiently, disconnect the mounting plates from the hinges. Using your earlier overlay measurements, measure down from the top of the cabinet opening and mark where the top mounting plate should sit on the face frame.
Pre-drill and attach only the top mounting plate to the face frame first. Now, you can lift the door, slide the top hinge onto the secured plate, and clip it into place. The top hinge will now hold the entire weight of the door. You can simply swing the bottom hinge into position against the face frame, mark its pilot holes, drill, and secure it. This method turns a frustrating two-person chore into a quick solo task.
- Unclip the base plates from the main hinge bodies to install them separately.
- Measure and mount the top base plate to the face frame before lifting the door.
- Clip the top hinge into the secured plate to hold the door's weight while you align the bottom.
- Ensure the door sits perfectly flush against the frame before driving the final bottom screws.
How do you adjust the soft-close hinges once the door is hung?
Even with perfect measurements, newly installed doors will rarely hang perfectly straight on the first try. The massive advantage of European concealed hinges is their built-in adjustability. Once the door is hung, look at the gaps. If the door is rubbing against its neighbor, or if the top sits higher than the adjacent door, you can fix it without removing any screws.
Look at the main body of the hinge. You will see three adjustment screws. The front screw moves the door left and right, allowing you to widen or narrow the gap between doors. The back screw moves the door in and out, fixing doors that bounce off the face frame. The middle screw (or sometimes the screws on the base plate itself) moves the entire door vertically up and down. Make quarter-turn adjustments with a manual Phillips screwdriver until the gaps are uniform and the soft-close cylinder engages smoothly without snapping.
- Use the front-most screw to adjust the door left or right to fix uneven gaps between double doors.
- Use the rear-most screw to move the door closer to or further away from the cabinet box.
- Use the vertical adjustment screws on the mounting plate to align the heights of adjacent doors.
- Never use a power drill for fine-tuning; the high torque will strip out the adjustment threads.
| Overlay Type | How It Fits on the Cabinet | Common Hinge Size Required | Best For |
|---|---|---|---|
| Partial Overlay | Door covers only part of the face frame, leaving gaps. | 1/2-inch (1.27 cm) | Traditional 1990s builder-grade kitchen cabinets. |
| Full Overlay | Door covers almost the entire face frame with minimal gaps. | 1-1/4-inch (3.17 cm) | Modern, seamless kitchen and bathroom vanities. |
| Inset | Door sits entirely flush inside the cabinet opening. | Inset (Zero Overlay) | Custom woodworking and high-end shaker-style cabinetry. |
Frequently asked questions
Can you put soft-close hinges on old cabinets with exposed hinges?
Yes. You simply remove the old exposed hinges, plug the screw holes, and install hidden European soft-close hinges on the inside. You will just need to make sure you measure the door overlay correctly so the new hidden hinges position the door exactly where the old exposed hinges did.
Do I need to replace both hinges on a door to make it soft-close?
While you can sometimes get away with mixing one standard hinge and one soft-close hinge on a small door, it is highly recommended to replace both. Mixing hinge types puts uneven stress on the soft-close hydraulic cylinder, causing it to wear out rapidly.
Why is my new soft-close cabinet door still slamming?
If the door is still slamming, the soft-close tension is either set too low or the hinge is out of alignment. Many modern soft-close hinges have a small switch or dial on the hinge cup that lets you adjust the hydraulic resistance. Also, check that the door is not binding against the face frame, which bypasses the damper.
What do I do if my cabinet doors are too thin for a 35mm hinge cup?
A standard hinge cup requires a drilling depth of 1/2 inch (1.27 cm). If your cabinet door is thinner than 5/8-inch (1.58 cm) overall, the Forstner bit will poke through the front. In this case, you cannot use standard recessed hinges; you must purchase surface-mount soft-close hinges that screw directly to the back of the door without requiring a drilled cup.
Keep reading
- How Much Paint Do You Actually Need for a Room?The tin says 400 square feet. Your wall says otherwise. Here is the arithmetic that actually holds up.
- DIY or Hire a Pro? A Decision Framework That Is Not About MoneyThe labour saving is real. So is the cost of a job done twice — and of tools you use once.
- Storage for Small Rooms That Does Not Make Them SmallerSmall rooms do not need more storage. They need storage that stops interrupting the eye.