How Do You Resurface a Flaking Concrete Patio Without Tearing It Out?
By Jim Vernon · 9 min read · Last updated
If your patio surface is peeling like a bad sunburn, you don't need a jackhammer—you need a polymer-modified overlay.
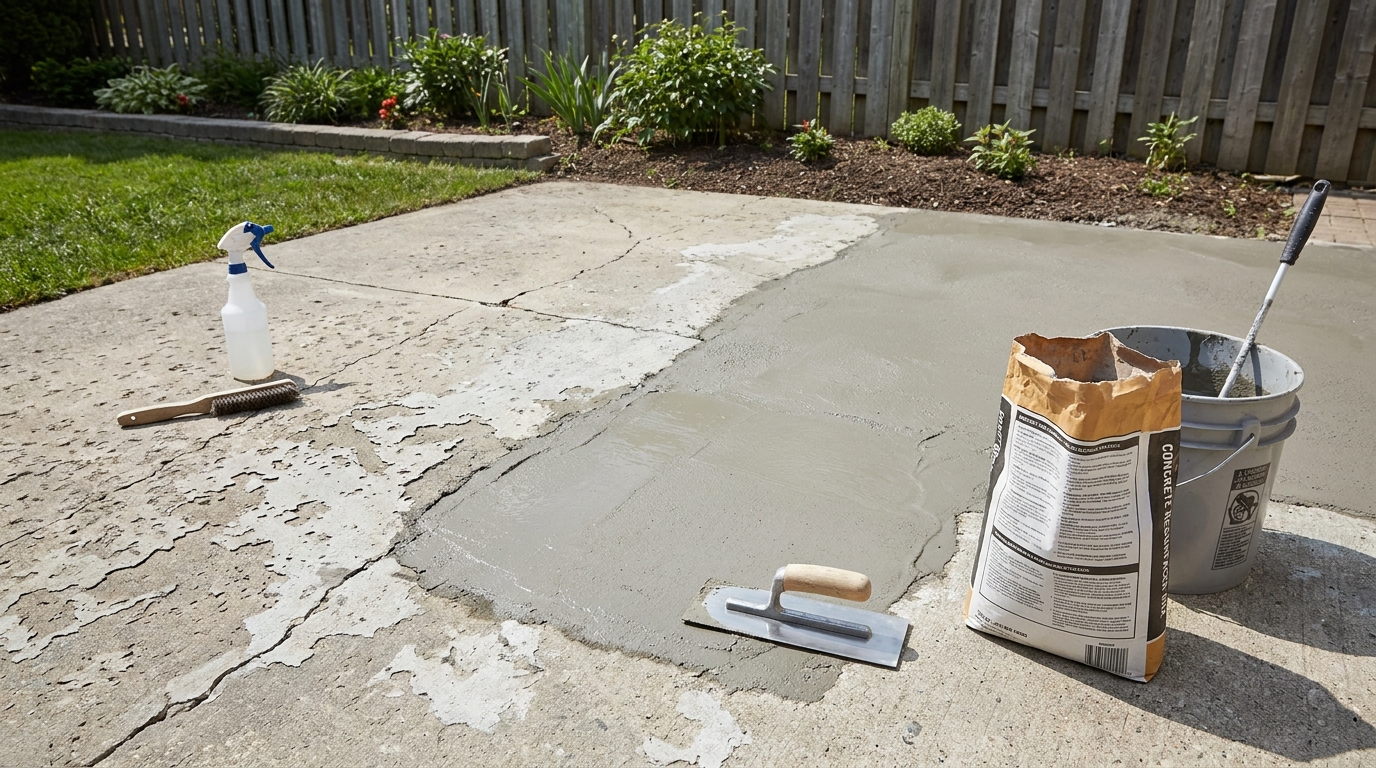
You can resurface a flaking concrete patio by aggressively pressure washing the slab, patching any deep spalls or cracks, and troweling on a polymer-modified concrete overlay. This creates a brand-new, bonded wear layer that looks like a freshly poured slab for roughly $2 to $4 per square foot in materials. However, if the slab has sinking sections or cracks wider than 1/2 inch (12.7 mm) that indicate active settling underneath, an overlay will simply crack again; in those cases, total replacement is your only option. For slabs that are structurally sound but suffering from surface spalling, freeze-thaw damage, or an old, failing skim coat, resurfacing is the ultimate weekend rescue. Doing it right requires meticulous surface preparation, precise mixing ratios, and moving quickly before the fast-setting material cures.
- A polymer-modified overlay bonds chemically to old concrete, allowing it to be spread as thin as 1/8 inch (3.1 mm) without snapping or flaking.
- Surface preparation dictates the success of the project; you must remove all dirt, oil, and old sealer using a 3,000 PSI pressure washer.
- Deep divots and wide cracks require a separate patching step and overnight curing before you apply the final seamless overlay.
- Adding too much water to the mix is a common DIY failure that drastically weakens the compressive strength of the finished surface.
How do you know if your concrete is a candidate for resurfacing?
When a concrete patio starts flaking, chipping, or showing a map of shallow spiderweb cracks, it looks disastrous. However, most surface spalling is strictly cosmetic. It happens when water penetrates the porous top layer of concrete, freezes, expands, and pops the fragile surface layer off. This freeze-thaw damage looks terrible, but the four inches of slab underneath are usually perfectly sound and highly capable of supporting a new surface.
Knowing when a slab is too far gone is a vital judgement call that separates a seasoned pro from a beginner. Beginners often see a vast network of ugly surface crazing and assume the slab is ruined, rushing to rent a demolition hammer. A pro will take a standard framing hammer and tap the concrete heavily across the slab. If the hammer blow yields a sharp, ringing sound, the core is solid. If it makes a dull, hollow thud, the concrete is delaminating deeply—often due to rusted rebar inside—and must be torn out.
- Good candidate: Surface flaking less than 1/4 inch (6.3 mm) deep.
- Good candidate: Discolored, stained, or heavily worn concrete finishes.
- Bad candidate: Uneven slabs that have heaved or sunk due to soil settling.
- Bad candidate: Active cracks wider than 1/2 inch (12.7 mm) that continue to grow each year.
What tools and materials do you actually need for the job?
To resurface a slab successfully, you cannot use standard concrete mix or mortar. Traditional concrete relies entirely on mechanical bonds and will easily snap under its own tension if applied thinner than 2 inches (50.8 mm). Instead, you need a polymer-modified concrete resurfacer. These dry mixes contain acrylic or vinyl polymers that activate with water, allowing the material to bond chemically to the old concrete and cure at a featheredge without cracking.
In 2026, a high-quality polymer-modified resurfacer costs between $40 and $45 per 40-pound bag. At a standard application thickness of 1/4 inch (6.3 mm), one bag will cover approximately 17 square feet. Beyond the mix, you will need tools designed to move heavy, wet material quickly, as the working time is notoriously short.
- Polymer-modified concrete resurfacer (estimate one 40-lb bag per 17 sq ft).
- A heavy-duty 1/2-inch corded drill with a steel paddle mixer attachment.
- A commercial-grade floor squeegee with a rigid rubber blade (do not use foam window squeegees).
- A long-handled concrete broom for applying a non-slip finish.
- A 3,000 PSI gas pressure washer equipped with a 15-degree nozzle.
How do you prep the slab so the new overlay won't peel?
Surface preparation is the single most critical phase of this project. If you rush the cleaning, your new surface will fail, no matter how perfectly you mix the material. Start by aggressively washing the patio with a 3,000 PSI pressure washer. Hold a 15-degree tip about 6 inches (15.2 cm) from the surface to blast away any loose flakes of concrete, dirt, and organic growth. If the concrete has oil stains, scrub them with a heavy-duty degreaser and a stiff brush before rinsing.
A common and catastrophic failure mode is pouring resurfacer over old concrete sealer. If you apply a polymer overlay onto sealed concrete, it cannot bond to the pores and will peel off in large sheets the very first time it freezes. Test your slab by pouring a cup of water on it. If the water beads up instead of instantly soaking in and darkening the concrete, a sealer is present. You must strip it using a chemical concrete stripper or by renting a walk-behind concrete grinder.
- Remove all loose, flaking material; if a piece of concrete can be pried off with a flathead screwdriver, it must go.
- Scrub away organic material, algae, and oil stains with a targeted degreaser.
- Perform the water bead test to check for hidden penetrating sealers.
- Chemically strip or mechanically grind the surface if any sealer is present.
How do you fix deep spalls and cracks before resurfacing?
Polymer resurfacers are designed to be applied in a thin, continuous coat. If you try to fill deep holes and coat the whole patio in one pass, the thicker areas will cure at a different rate, causing shrinkage cracks and visible indentations. Any spalls, divots, or missing chunks deeper than 1/4 inch (6.3 mm) must be patched beforehand.
Mix a small batch of your resurfacer to a stiff, peanut butter consistency by using slightly less water than the bag recommends. Pack this stiff mixture into the deep divots and use a steel margin trowel to scrape it perfectly flush with the surrounding old concrete. Let these deep patches cure for a minimum of 12 hours before proceeding with the main overlay.
- Identify and mark any depressions deeper than 1/4 inch (6.3 mm).
- Mix a specialized stiff batch of resurfacer for patching only.
- Trowel the patch completely flush; do not leave bumps, as they will telegraph through the final coat.
- Allow patches to dry overnight before applying the flood coat.
How do you mix the resurfacer for maximum strength?
The chemistry of a polymer-modified mix demands exact water ratios. A standard 40-pound bag typically requires exactly 3.5 quarts (3.3 liters) of clean water. A pro tip to maintain consistency across a large patio is to measure out your exact water requirement into a clean 5-gallon bucket, mark the water line with a permanent marker, and use that specific bucket to measure the water for every subsequent batch. This ensures uniform color and strength.
Always add the water to your mixing bucket first, then slowly add the dry powder while running your paddle mixer. Mix continuously for 3 minutes until it reaches a lump-free, pancake-batter consistency. Let the mixture sit undisturbed for 1 minute—a process called slaking, which allows the polymers to fully absorb the water—then mix for one final minute. Never add extra water to extend the working time; this drastically weakens the final compressive strength and leads to chalky, fragile surfaces.
- Measure water precisely to the ounce to avoid weak, chalky concrete.
- Add water to the mixing bucket before adding the dry powder to prevent unmixed clumps at the bottom.
- Mix for 3 minutes, let it slake for 1 minute, and remix for 1 minute.
- Only mix one bag at a time unless you have a dedicated helper pouring while you mix.
How do you apply and finish the concrete overlay?
Applying the resurfacer is a fast-paced process, which is why having a helper makes a massive difference. Before you pour a single drop of the mixed material, the old concrete must be in a 'Surface Saturated Dry' (SSD) condition. This means you must hose down the patio so the concrete is cool and damp, but use a broom to push away any standing puddles. If you pour onto dry concrete, the old slab will instantly suck the moisture out of your mix, causing it to flash-cure and crack.
Pour the mixed resurfacer directly onto the damp slab in a long ribbon. Using your heavy-duty floor squeegee, pull the material firmly across the surface, pressing it into the pores of the old concrete. Work in small sections of about 100 square feet at a time. After squeegeeing the section flat to a thickness of 1/8 to 1/4 inch (3.1 to 6.3 mm), wait about 5 minutes for the watery sheen to leave the surface. Then, take your concrete broom and gently pull it across the wet material in one continuous, straight line to create a non-slip, professional finish.
- Pre-dampen the slab to achieve an SSD condition, ensuring no standing puddles remain.
- Pour the material in a ribbon and spread firmly with a rigid squeegee.
- Maintain a wet edge; never let a section dry before pouring the adjacent batch.
- Pull a concrete broom lightly across the surface in one uniform direction for traction.
How long does it take to cure, and when can you use the patio?
Polymer resurfacers cure incredibly fast compared to standard concrete, but they are highly temperature-sensitive. The ideal ambient temperature for this project is between 50°F and 90°F (10°C to 32°C). Do not attempt this project if temperatures are forecasted to drop below 50°F (10°C) within 24 hours of application, as the polymers will not form a proper chemical bond in the cold.
Under ideal conditions, the new surface can handle light foot traffic in about 6 hours. However, you should wait a full 24 hours before moving heavy patio furniture, grills, or planters back onto the slab. To protect your hard work from future freeze-thaw cycles and stains, wait 72 hours for the material to fully expel its moisture, and then apply a high-quality, breathable silane-siloxane penetrating concrete sealer.
- Ensure temperatures remain between 50°F and 90°F (10°C to 32°C) for 24 hours.
- Allow 6 hours for light foot traffic and 24 hours for normal, heavy use.
- Do not slide heavy metal furniture legs across the fresh surface for at least 3 days.
- Apply a breathable silane-siloxane sealer after 72 hours to prevent future water intrusion.
| Method | 2026 Cost (Per Sq Ft) | Durability | Best Application |
|---|---|---|---|
| Polymer Resurfacing | $2.00 - $4.00 | 10 - 15+ Years | Structurally sound slabs with deep surface spalling or cosmetic wear |
| Concrete Paint / Stain | $0.50 - $1.50 | 1 - 3 Years | Faded but otherwise completely smooth slabs with no flaking |
| Total Replacement | $10.00 - $15.00 | 30+ Years | Sinking, heaving, or deeply cracked slabs with active settling |
Frequently asked questions
Can you use regular concrete mix to resurface a patio?
No. Standard concrete mix and sand-topping mixes lack the chemical polymers necessary to bond to old concrete in a thin layer. If applied less than 2 inches (50.8 mm) thick, standard concrete will simply flake off in chunks over the winter.
Do you need to apply a bonding agent before pouring the resurfacer?
For most high-quality, polymer-modified resurfacers, a separate liquid bonding agent is not required as long as the slab is thoroughly cleaned and in a Surface Saturated Dry (damp) condition. Always check the manufacturer's specific bag instructions, but water is usually the only primer needed.
Can you tint or color the concrete resurfacer?
Yes. You can add a liquid concrete colorant directly to your mixing water before blending it with the dry powder. Keep careful track of the exact ratio of colorant to water for every batch to ensure the entire patio dries to a uniform shade.
What happens if it rains right after you resurface a patio?
If heavy rain hits the resurfacer within the first 4 to 6 hours of curing, it will wash away the polymer binders and ruin the finish. Always check the forecast and ensure you have a clear, dry 24-hour window before starting.
Keep reading
- How Much Paint Do You Actually Need for a Room?The tin says 400 square feet. Your wall says otherwise. Here is the arithmetic that actually holds up.
- DIY or Hire a Pro? A Decision Framework That Is Not About MoneyThe labour saving is real. So is the cost of a job done twice — and of tools you use once.
- Storage for Small Rooms That Does Not Make Them SmallerSmall rooms do not need more storage. They need storage that stops interrupting the eye.