How Do You Replace Exterior Rotted Wood Trim With Maintenance-Free PVC?
By Jim Vernon · 10 min read · Last updated
Rotted window and door trim makes your house look neglected and invites structural water damage, but patching it with standard lumber guarantees you will be repeating the exact same miserable chore in five years.
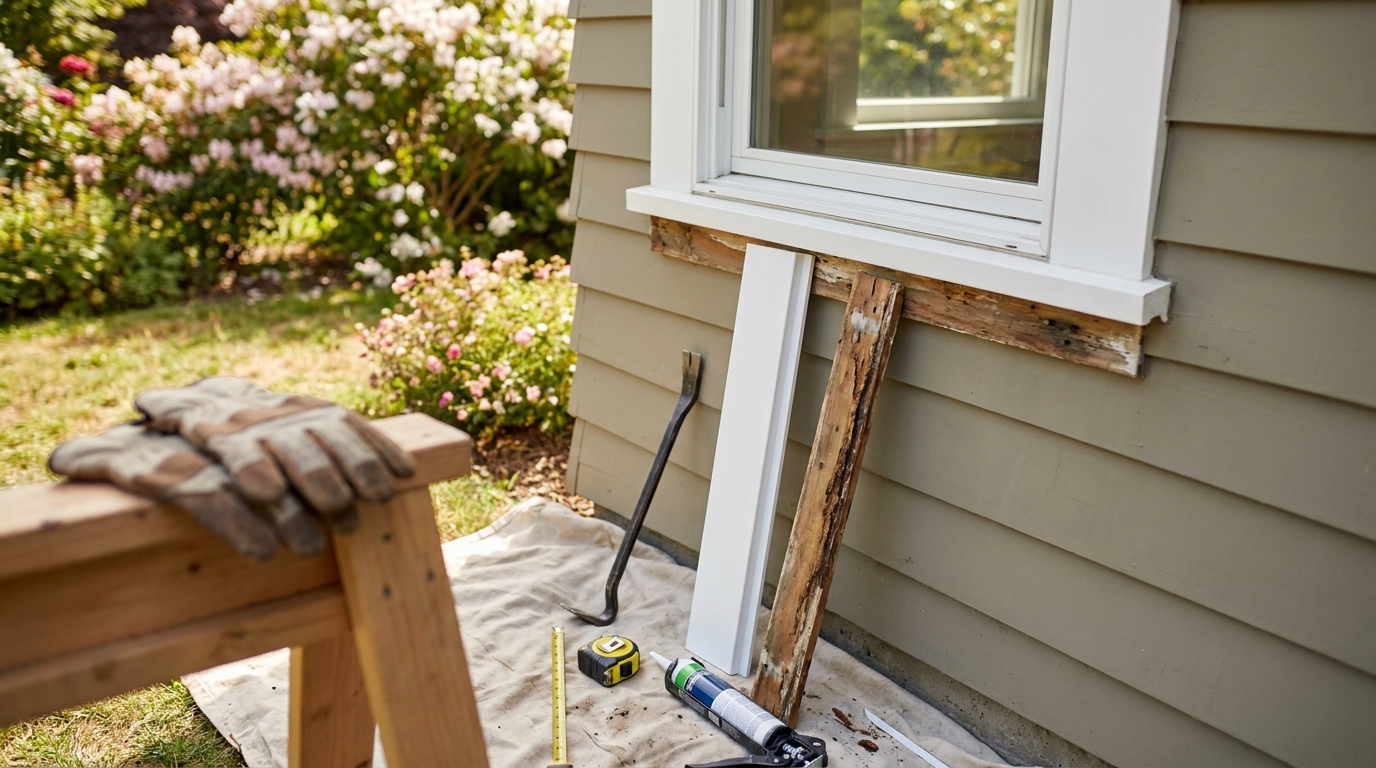
To replace rotted exterior wood trim permanently, pry off the decayed boards, measure and cut cellular PVC replacement stock, secure it into the framing using stainless steel screws or hidden fasteners, and seal the side seams with a high-quality polyurethane caulk. Unlike standard pine, cellular PVC (polyvinyl chloride) is completely impervious to moisture and insect damage. However, it requires different installation techniques than wood because it expands and contracts significantly with temperature shifts. By leaving proper expansion gaps, using the right mechanical fasteners, and managing moisture flow behind the siding, you can create a waterproof seal that outlasts the house itself.
- Cellular PVC is entirely waterproof but requires a 1/8-inch (3 mm) expansion gap on long runs to accommodate thermal expansion.
- Never use standard galvanized finish nails; secure PVC trim every 16 inches (40 cm) with stainless steel trim screws or a hidden fastening system.
- Leave the bottom horizontal edge of exterior trim uncaulked to create a weep gap for trapped water to escape.
- Only paint PVC with 100% acrylic latex paint that has a Light Reflective Value (LRV) of 55 or higher to prevent warping from solar heat gain.
Why Does Exterior Wood Trim Rot, and Why Switch to Cellular PVC?
Wood trim fails mostly at the bottom edges due to capillary action. When rain hits a deck surface, window sill, or concrete walkway, water splashes up and wicks directly into the porous end-grain of pine or cedar boards. Once moisture breaches the paint film and elevates the wood's moisture content, decay fungi take over and rapidly destroy the cellular structure of the lumber.
Cellular PVC (polyvinyl chloride) stops this decay cycle entirely. Extruded as a solid, high-density foam board, it contains absolutely no organic matter. Termites and carpenter ants will not eat it, and water cannot penetrate its core. It machines, cuts, and routes exactly like premium lumber, but it will never cup, rot, or split from water exposure.
While the initial materials are more expensive—expect to pay between $35 and $55 for a premium 1x4 by 18-foot (19 by 89 mm by 5.4 m) PVC trim board in 2026—the labor savings over the next twenty years make it the most cost-effective choice for ground-contact and moisture-prone areas. You only have to do the job once.
- Wood trim naturally wicks moisture through exposed end-grain at the bottom of vertical runs.
- Cellular PVC is a solid, inorganic plastic foam that is completely immune to rot and insect damage.
- A standard 1x4 by 18-foot PVC board costs $35 to $55 in 2026 but offers permanent labor savings.
How Do You Safely Remove the Old Trim Without Damaging the Siding?
Tearing off rotted trim requires finesse to avoid destroying the adjacent siding or the weather barrier underneath. Begin by slicing deeply through the old caulk joints with a sharp utility knife. If you attempt to pry the trim board away from the wall without completely breaking this adhesive seal, you will rip the paint, siding, and underlying paper right off the house.
Slide a wide, flat pry bar behind the trim, positioning it directly over a framing stud to ensure you have solid leverage. If the old, rusted galvanized nails refuse to budge, do not force the pry bar and crush the siding. Instead, slip the blade of an oscillating multi-tool behind the board and cut the nail shafts directly to free the wood.
Once the board is off, meticulously inspect the exposed house wrap and structural sheathing. If the underlying oriented strand board (OSB) or plywood is soft and crumbly, you must cut it out and replace it. If the wood is structurally sound but displays dark water stains, brush a liquid copper naphthenate wood preservative over the area to kill any residual fungi before covering it with the new trim.
- Score all edges with a utility knife to break the caulk seal before prying.
- Use an oscillating multi-tool to cut stubborn hidden nails rather than forcing the pry bar.
- Treat stained but structurally sound framing with a copper naphthenate wood preservative.
What Is the Best Way to Cut and Route Cellular PVC?
You do not need specialized plastic-cutting tools to work with cellular PVC. Standard woodworking equipment—including miter saws, table saws, and routers—slices through the material beautifully. Use a high-quality carbide-tipped saw blade with 40 to 60 teeth to achieve clean, factory-smooth crosscuts that require no sanding.
Because the material has a uniform density and no grain direction, it will not splinter or blow out when shaped with a router. However, routing removes the smooth factory finish and exposes the open-cell core of the board, which has a slightly porous texture that rapidly traps airborne dirt. To keep decorative routed edges looking pristine, lightly sand them with 320-grit paper and wipe them down with acetone to melt and seal the plastic pores.
Be prepared for a surprisingly messy workspace. PVC dust is much heavier than wood sawdust and carries a strong static charge. It clings stubbornly to clothing, tools, and the side of your house. Always lay a large canvas drop cloth under your cutting station to capture the debris, as plastic shavings will not biodegrade if they fall into your lawn or garden beds.
- Cut PVC with standard carbide-tipped woodworking saw blades featuring 40 to 60 teeth.
- Seal porous routed edges by lightly sanding with 320-grit paper and wiping with acetone.
- Use a drop cloth under your saw, as static-charged PVC dust will not biodegrade in your yard.
How Do You Fasten Cellular PVC Trim So It Doesn't Bow or Fall Off?
Fastening PVC trim improperly is the fastest way to ruin an expensive installation. The material is dense but highly flexible, meaning it will bow and warp away from the wall if not secured tightly to structural framing. Never use standard 15-gauge galvanized finish nails; they will eventually rust, and their smooth shanks will easily pull through the soft plastic over time as the board expands and contracts.
Instead, secure the trim using #8 by 2.5-inch (6.3 cm) stainless steel trim head screws, placing two fasteners every 16 inches (40 cm) along the length of the board. You must drive these screws entirely through the exterior sheathing and sink them at least 1.25 inches (3.1 cm) into solid wall studs to achieve the necessary holding power. Keep fasteners at least 2 inches (5 cm) away from the ends of the board to prevent cracking.
For a flawless, professional finish, rely on a hidden fastening system like Cortex. These specialized kits include aggressively threaded screws that naturally countersink themselves to a precise depth, along with color-matched PVC plugs made from the exact same stock as the trim boards. Tap the plug into the hole with a smooth-faced hammer, and the fastener disappears completely into the surface.
- Never use smooth-shank galvanized finish nails, as they will pull through the flexible PVC.
- Drive two stainless steel trim screws every 16 inches (40 cm) directly into solid wall studs.
- Use a hidden fastening system with color-matched PVC plugs for an invisible, permanent hold.
How Do You Manage PVC Thermal Expansion During Installation?
The most devastating failure mode when working with cellular PVC is severe buckling caused by ignoring thermal expansion. Unlike wood, which swells when it absorbs moisture, PVC expands and contracts solely based on ambient temperature changes. If you do not account for this movement, your trim will tear itself off the house.
Consider this common failure: installing an 18-foot (5.4 m) PVC fascia board tight between two corner stops on a crisp 40°F (4°C) autumn morning. By mid-July, when that same board sits in direct sunlight at 95°F (35°C), the plastic will grow by nearly 1/4 inch (6 mm) in length. With nowhere to expand, the board will violently buckle outward, pulling screws out of the framing and snapping the caulk lines.
To avoid this disaster, you must leave a 1/8-inch (3 mm) expansion gap at both ends of any board longer than 12 feet (3.6 m). Fill this intentional gap with a highly flexible, exterior-grade polyurethane or elastomeric sealant that can safely compress and stretch as the board moves throughout the seasons. Fasten the center of the board securely to force the expansion outward toward these protected gaps.
- Wood moves with moisture, whereas cellular PVC moves strictly with temperature changes.
- An 18-foot (5.4 m) PVC board can expand by 1/4 inch (6 mm) between winter and summer.
- Leave a 1/8-inch (3 mm) expansion gap at the ends of long runs and fill it with flexible sealant.
How Do You Flash and Caulk the New Trim to Prevent Future Leaks?
Properly flashing and caulking the new trim block dictates whether the wall cavity behind it stays dry for the next decade. Always slip a metal or PVC drip cap flashing over the top edge of horizontal window and door trim. This rigid flashing deflects bulk rainwater out and over the face of the trim, preventing water from ever sitting on the top ledge.
When applying sealant, understanding moisture flow separates professional carpenters from DIY beginners. A beginner will almost always run a thick, continuous bead of caulk around all four sides of a newly installed trim block, mistakenly believing that a completely airtight seal is the best way to waterproof the house.
A professional makes a completely different judgement call: they caulk the top edge and the two vertical sides, but intentionally leave the bottom horizontal edge completely uncaulked. This unsealed bottom edge acts as a vital weep gap. If wind-driven rain penetrates the siding higher up on the wall, gravity will pull it down behind the trim. The weep gap ensures that trapped water can freely drain out, rather than pooling indefinitely against the framing and causing hidden rot.
- Install a rigid drip cap over the top edge of all horizontal trim to deflect bulk rainwater.
- Beginners caulk all four sides of a trim block, trapping moisture inside the wall cavity.
- Professionals leave the bottom horizontal edge uncaulked to create a weep gap for water to escape.
Do You Have to Paint Cellular PVC Trim?
Cellular PVC trim is manufactured in a UV-resistant, semi-matte white finish and technically never requires painting to maintain its durability. However, many homeowners choose to paint it so it seamlessly matches the surrounding siding, or to hide the slightly shiny, plastic-like sheen it exhibits under direct, harsh lighting. Unpainted PVC also holds onto airborne dust and pollen more tightly than a painted surface.
If you choose to paint the trim, you must strictly follow the manufacturer's guidelines regarding paint chemistry and color choice. You can only use 100% acrylic latex paint; oil-based paints will not adhere properly to the plastic surface. More importantly, you must select a paint color with a Light Reflective Value (LRV) of 55 or higher. The LRV scale runs from 0 (absolute black) to 100 (pure white).
Painting PVC a dark color like navy blue or forest green (which have low LRV ratings) causes the material to absorb massive amounts of solar radiation. On a sunny afternoon, dark-painted PVC can easily reach internal temperatures exceeding 140°F (60°C). This extreme heat will cause the plastic board to permanently warp, distort, and potentially pull away from the wall framing entirely.
- PVC does not require paint for protection but can be painted to hide its plastic sheen.
- Only use 100% acrylic latex paint, as oil-based finishes will fail to adhere to the material.
- Never use paint with an LRV below 55; dark colors cause PVC to absorb heat and severely warp.
| Material | 2026 Cost per Lineal Foot (1x4) | Rot Resistance | Best Application |
|---|---|---|---|
| Cellular PVC | $1.90 - $3.00 | Absolute | Ground contact and water-prone areas |
| Primed Pine | $0.90 - $1.40 | Low | Covered porches and dry eaves only |
| Western Red Cedar | $2.50 - $4.00 | High | Clear natural finishes and historical accuracy |
| Fiber Cement | $1.20 - $2.00 | High | High-fire-risk zones and direct masonry contact |
Frequently asked questions
Can I use wood putty to fill nail holes in PVC trim?
No. Standard wood putty dries rigid and will quickly pop out as the PVC expands and contracts with temperature changes. Use an acrylic-based PVC filler, specialized two-part epoxy, or a hidden fastener system with matching PVC plugs for a permanent, invisible fix.
Can I install cellular PVC directly over old, rotted wood?
Never. Trapping wet, rotted wood behind impervious PVC creates a permanently damp environment that encourages black mold and structural termite damage. Always remove all decayed material and treat the surrounding framing with a copper naphthenate wood preservative before installing the new trim.
Can I use silicone caulk on cellular PVC trim?
Avoid pure silicone. Silicone caulk does not hold paint, and its slick surface often peels away from the PVC as the boards expand and contract in the sun. Always use an exterior-grade, highly flexible polyurethane or elastomeric sealant designed specifically for exterior trim movement.
Keep reading
- How Much Paint Do You Actually Need for a Room?The tin says 400 square feet. Your wall says otherwise. Here is the arithmetic that actually holds up.
- DIY or Hire a Pro? A Decision Framework That Is Not About MoneyThe labour saving is real. So is the cost of a job done twice — and of tools you use once.
- Storage for Small Rooms That Does Not Make Them SmallerSmall rooms do not need more storage. They need storage that stops interrupting the eye.