How Do You Replace a Rotted Wood Deck Post Without Rebuilding the Deck?
By Jim Vernon · 9 min read · Last updated
You don't have to tear down your entire backyard oasis just because one timber post is turning to spongy mulch at the base.
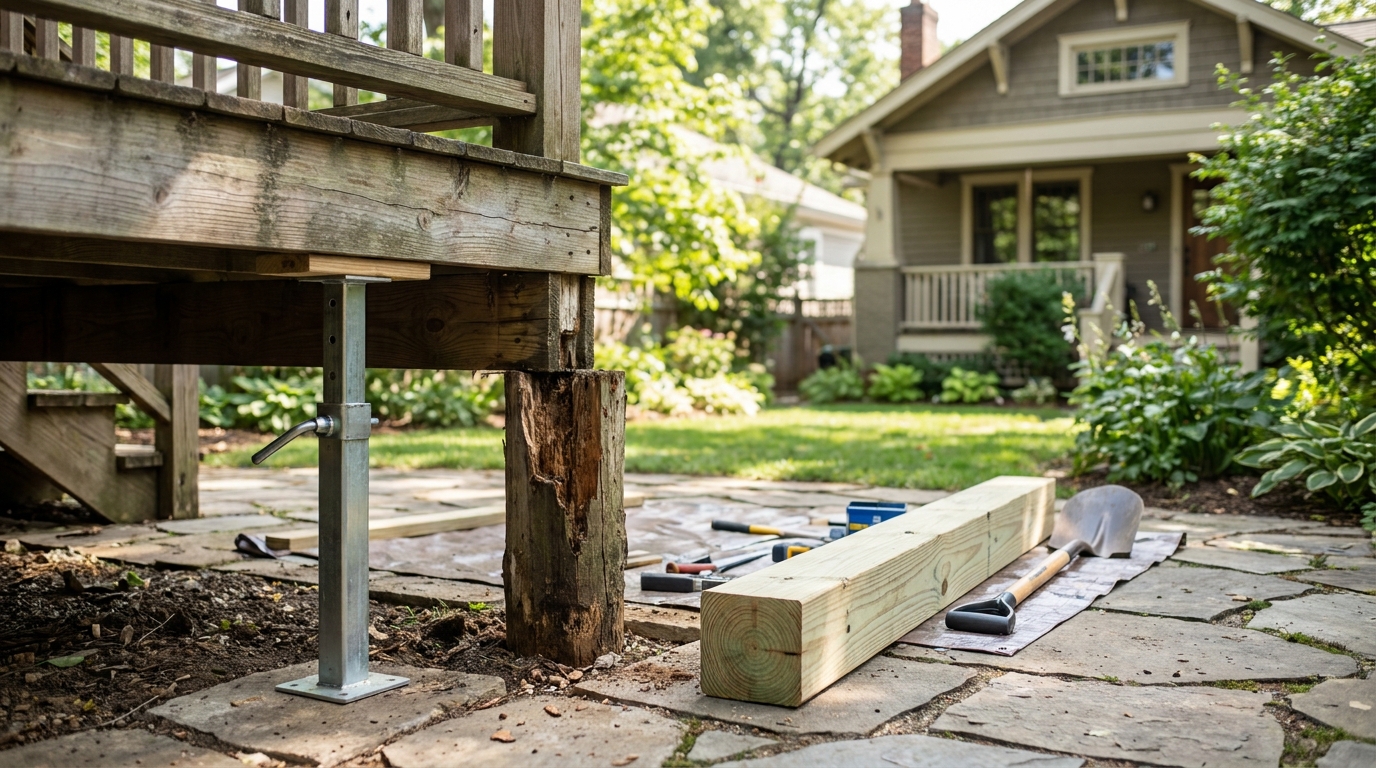
To replace a rotted deck post without dismantling the deck, you must first relieve the weight on the timber by placing a hydraulic bottle jack and a temporary support post under the main deck beam. Once the live load is safely transferred to your temporary shoring, you can unbolt the decayed post, remove it, and install a raised galvanized post base onto the existing concrete footing. Finally, you measure, cut, and install a new pressure-treated 4x4 or 6x6 timber before slowly lowering the deck back into place. Most homeowners assume a rotting support means the entire deck is compromised, leading to panic and unnecessary contractor bills. However, localized rot usually happens because the original builders embedded the wood directly into the soil or concrete. By properly staging the area and using 2026 building code-compliant standoff hardware, you can permanently fix the issue yourself for under $150 in materials.
- Always jack against the main structural beam, never against a single floor joist, to avoid cracking the deck frame.
- Upgrade to a galvanized post base with a 1-inch (2.5 cm) standoff to prevent the new wood from wicking moisture out of the concrete.
- Seal the freshly cut end of your replacement post with a copper naphthenate wood preservative before installation to ensure decades of rot resistance.
- Use 1/2-inch (12.7 mm) hot-dipped galvanized through-bolts rather than lag screws to secure the new post to the deck beam.
How Do You Know If a Deck Post Is Unsafe or Just Weathered?
A beginner often looks at deep, vertical cracks running up the length of a deck post and assumes the wood is failing. A professional knows that these vertical cracks, called checking, are a normal part of the drying process and rarely affect structural integrity unless you can slide a ruler more than halfway through the timber. The real danger is horizontal decay at the base.
To test for actual structural rot, take a flathead screwdriver and firmly press it into the wood near the ground or the concrete footing. If the metal easily penetrates more than 1/4 inch (6.4 mm) into the timber, the wood fibers have decayed and lost their load-bearing capacity. You should also look for visual cues like crushing at the bottom, spongy white or brown fungal growth, and a post that seems to be mushrooming outward under the weight of the deck above.
- Probe the bottom 6 inches (15 cm) of the post with an awl or screwdriver to check for soft spots.
- Look for a post that has settled, causing a noticeable dip in the deck surface directly above it.
- Examine the hardware connecting the post to the beam; severe rust often accompanies wood rot.
What Tools and Materials Do You Need for a Safe Post Swap?
Replacing a structural post requires heavy-duty lifting and secure anchoring. You will need a hydraulic bottle jack with at least a 12-ton (10.8-metric ton) lifting capacity, a 4-foot (1.2-meter) spirit level, a heavy framing hammer, and an impact driver. For cutting the thick timber, a 7 1/4-inch (184 mm) circular saw is ideal, though you may need a reciprocating saw to cut through stubborn, rusted bolts on the old post.
Your shopping list will run between $110 and $160 in 2026 US dollars. You must purchase a pressure-treated replacement post rated for ground contact (UC4A or UC4B rating), a galvanized retrofit post base (such as a Simpson Strong-Tie ABA44Z or ABA66Z depending on your post size), 1/2-inch (12.7 mm) wedge anchors for the concrete, and new 1/2-inch (12.7 mm) hot-dipped galvanized carriage bolts. Do not reuse the old, fatigued fasteners.
- 12-ton (10.8-metric ton) hydraulic bottle jack and scrap 2x10 wood blocks for the jack base.
- Temporary 4x4 or 6x6 shoring timber to hold the deck while the main post is out.
- Structural screws or 16d galvanized nails for the new metal base hardware.
- Copper naphthenate wood preservative for the freshly cut ends.
How Do You Safely Jack Up and Support the Deck Beam?
A common failure mode for beginners is placing a hydraulic bottle jack directly onto soft soil or resting the top of the jack against a single deck joist. The immense, concentrated pressure will either drive the jack straight down into the mud or snap the joist like a twig, causing a dangerous collapse. To avoid this, always place your jack on a wide, solid base like a stack of 2x10 blocking, and only lift against the main structural beam of the deck.
Position your temporary support station 1 to 2 feet (30 to 60 cm) away from the rotted post. Cut a piece of temporary 4x4 lumber to act as a shoring post. Place your hydraulic jack on its solid wooden base, sit the shoring post on top of the jack, and pump the handle. You only want to lift the beam 1/8 to 1/4 inch (3.1 to 6.4 mm)—just enough to take the squeezing pressure off the rotted post so it can be removed. Do not attempt to level a severely sagging deck in one rapid motion, as this can tear the deck ledger board away from your house.
- Clear the ground and lay a solid, level footing of scrap lumber for the bottle jack.
- Position the jack directly under the main beam, never under the thinner floor joists.
- Lift slowly and listen to the wood; stop pumping as soon as the weight transfers off the old post.
How Do You Detach and Remove the Rotted Timber?
With the weight safely supported by your temporary shoring, the old post is merely hanging in place. Use a wrench or an impact driver to remove the nuts from the carriage bolts holding the top of the post to the beam. If the bolts are heavily rusted and spin freely in the soft wood, use an angle grinder equipped with a metal cut-off wheel to slice the bolt heads off completely.
If the bottom of your old post was buried in the dirt or cast directly into the concrete footing, you will need to cut the post with a reciprocating saw just above the concrete line. Yank the upper portion free. If the remaining buried wood is firmly trapped in the concrete, you can drill into it with a large spade bit and chisel it out, creating a clean concrete cavity. Wear a high-quality dust mask during this step, as older treated wood contains chemical preservatives.
- Use an impact wrench to back out lag screws or nuts from the top beam connection.
- Cut through seized bolts using an angle grinder or a reciprocating saw with a carbide metal-cutting blade.
- Pull the rotted post away carefully, ensuring the temporary jack setup remains undisturbed.
How Do You Prepare the Concrete Footing for the New Hardware?
Modern building codes prohibit burying untreated or standard treated deck posts directly into the ground or casting them flush into concrete, as this traps water against the end grain and guarantees future rot. To fix this permanently, you must install a raised metal post base. These galvanized brackets feature a 1-inch (2.5 cm) standoff plate that elevates the wood above sitting water.
Sweep the concrete footing entirely clean of dirt and old wood chips. Place the new galvanized post base in the center of the footing and mark the center hole. Using a rotary hammer drill and a masonry bit, bore a hole to the depth specified by your wedge anchor packaging, usually around 3 to 4 inches (7.6 to 10.1 cm). Tap a 1/2-inch (12.7 mm) wedge anchor into the hole, thread the post base over the stud, and tighten the nut securely with a wrench. The metal base is now locked to the concrete.
- Clean the concrete surface with a wire brush to ensure the new metal base sits perfectly flat.
- Drill a precise hole using a rotary hammer, blowing out the concrete dust before inserting the anchor.
- Tighten the wedge anchor firmly, but avoid over-torquing and cracking old, fragile concrete footings.
How Do You Cut, Treat, and Install the Replacement Post?
Measure the exact distance from the top of the 1-inch (2.5 cm) metal standoff inside your newly installed base up to the underside of the deck beam. Cut your new pressure-treated 4x4 or 6x6 timber to this exact length using a circular saw. Because you have just exposed the untreated inner core of the wood by cutting it, you must heavily brush the freshly cut ends with a liquid copper naphthenate wood preservative. Let it soak in for 15 minutes.
Slide the top of the new post into position against the beam, then swing the bottom into the metal post base. Use a 4-foot (1.2-meter) spirit level on two adjacent sides of the post to ensure it is perfectly plumb. Once aligned, drive 1 1/2-inch (38 mm) galvanized structural screws through the holes in the metal base and into the bottom of the wood post to lock it in place.
- Measure twice, accounting for the height of the metal standoff plate inside the base bracket.
- Seal all fresh cuts with a brush-on copper naphthenate solution to maintain the wood's rot resistance.
- Verify the post is perfectly vertical on both the X and Y axes before driving in any fasteners.
How Do You Lower the Deck and Secure the Final Structural Connections?
With the bottom of the post anchored and the timber sitting perfectly plumb, slowly twist the release valve on your hydraulic bottle jack. Do this in tiny increments. The beam will gently lower the final fraction of an inch until its full weight rests permanently on top of the new post. Remove the temporary shoring timber and jack from the work area.
To finish the job, drill two new 1/2-inch (12.7 mm) holes directly through both the deck beam and the new support post. Insert hot-dipped galvanized carriage bolts or hex bolts through the holes. Place a galvanized washer and nut on the opposite side and tighten them down with a wrench until the hardware is snug against the wood. Your deck is now fully supported, code-compliant, and protected against future moisture rot.
- Release the hydraulic pressure slowly to prevent sudden shocking or bouncing of the deck structure.
- Drill clean, straight holes through the beam and post using a long auger bit.
- Use washers on both the bolt head and nut sides to prevent the metal from crushing into the timber.
| Hardware Type | Standoff Height | Best Application | 2026 Cost Estimate |
|---|---|---|---|
| Standard U-Bracket (No Standoff) | 0 inches (0 cm) | Interior columns on dry concrete floors only | $8 - $12 |
| Elevated Post Base (ZMAX Galvanized) | 1 inch (2.5 cm) | Exterior deck posts on existing concrete footings | $22 - $35 |
| Adjustable Height Post Base | 1 to 3 inches (2.5 to 7.6 cm) | Uneven concrete patios requiring precise leveling | $45 - $60 |
Frequently asked questions
Can I repair a rotted deck post with epoxy instead of replacing it?
No. While structural wood epoxy is excellent for repairing cosmetic damage on window sills or non-load-bearing trim, it should never be used to fix a heavily decayed deck post. The sheer vertical weight and lateral sway of a deck require a single, uninterrupted piece of solid timber to remain safe.
Do I need a building permit to replace one deck post?
In most municipalities, swapping out a single rotted post like-for-like is considered routine maintenance and does not require a permit. However, if you are altering the footing size, moving the post location, or replacing multiple posts at once, you will likely need to pull a permit. Always check your local 2026 building codes before starting.
Can I use a 4x4 instead of a 6x6 for the replacement?
You must replace the post with the same dimensions as the original, or larger. If the deck was built with 6x6 (140x140 mm) posts, downsizing to a 4x4 (89x89 mm) violates building codes and compromises the structural integrity of the deck. For any deck taller than 6 feet (1.8 meters), modern codes strictly require 6x6 posts to prevent bowing.
Keep reading
- How Much Paint Do You Actually Need for a Room?The tin says 400 square feet. Your wall says otherwise. Here is the arithmetic that actually holds up.
- DIY or Hire a Pro? A Decision Framework That Is Not About MoneyThe labour saving is real. So is the cost of a job done twice — and of tools you use once.
- Storage for Small Rooms That Does Not Make Them SmallerSmall rooms do not need more storage. They need storage that stops interrupting the eye.