How Do You Replace a Kitchen Garbage Disposal Without Calling a Plumber?
By Jim Vernon · 11 min read · Last updated
That ominous hum and sudden puddle under your kitchen sink means it's time for a new disposal, but you don't need to hand a plumber $300 to twist on a replacement.
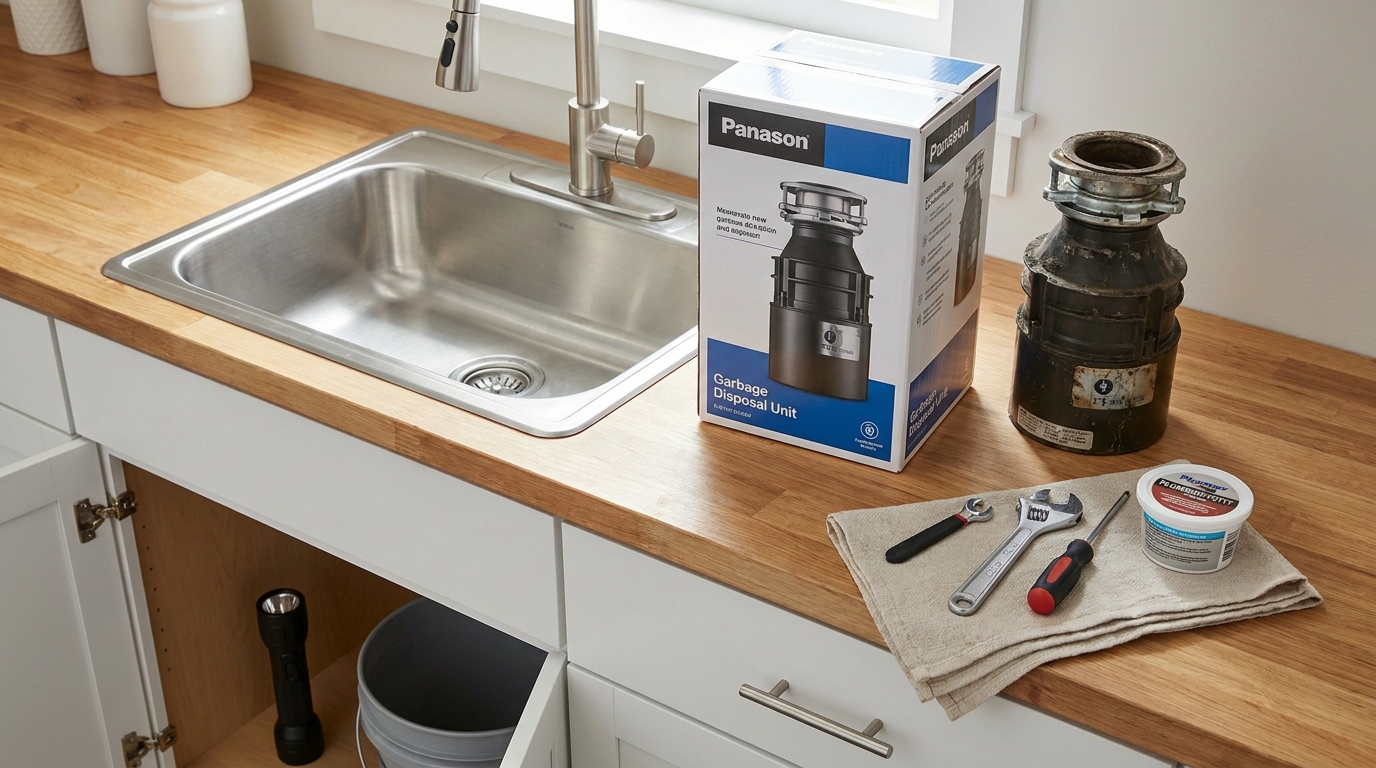
To replace a garbage disposal, turn off the power at the breaker, disconnect the P-trap and dishwasher hose, support the heavy unit from below, and twist the mounting ring counterclockwise to drop the old disposal. Install the new sink flange using a thick rope of plumber's putty, knock out the dishwasher drain plug, lift the new unit into the mounting bracket, and twist the lower ring clockwise until it locks tight. Reconnect your drain pipes and test for leaks. Swapping a garbage disposal is a straightforward, 90-minute project that requires only basic hand tools. A quality replacement unit costs between $150 and $350 in 2026 US dollars, while a plumber will easily charge another $150 to $250 for the labor alone. By taking the time to properly seal the sink flange and correctly route the 1-1/2 inch (38 mm) PVC drain pipes, you can achieve a permanent, leak-free installation. The process is highly standardized, meaning almost any modern replacement will interface perfectly with your existing plumbing.
- Always turn off the circuit breaker before touching the disposal, even if the wall switch is in the off position.
- Remove the plastic dishwasher knockout plug inside the new disposal before hanging it, or your dishwasher will flood the kitchen.
- Replace the entire sink flange assembly rather than reusing the old one to guarantee a leak-free seal.
- Use a screwdriver through the mounting ring lugs to get the leverage needed to fully lock the heavy unit into place.
What Tools and Materials Do You Need to Swap a Disposal?
Before you crawl under the sink, gather everything you need so you are not stuck holding a heavy motor with one hand while reaching for a screwdriver. You will need a flathead and a Phillips screwdriver, a hammer, pliers, and a tub of fresh plumber's putty. Keep a bucket and a few old towels directly under the P-trap, as residual water will spill out when you disconnect the plumbing.
When purchasing the new disposal, check if your current unit is hardwired or plugs into an outlet. Many new disposals come with a pre-installed power cord, but if your house features a hardwired connection, you will need to buy a unit without a cord or remove the cord and wire it directly using wire nuts and electrical tape. Ensure you have the included hex wrench (often called an Allen wrench) that comes in the box with your new unit, as it is required to manually turn the motor if it jams in the future.
- Flathead and Phillips screwdrivers for the mounting ring and wiring.
- Plumber's putty to seal the new stainless steel sink flange.
- A hammer and punch (or heavy screwdriver) for the knockout plug.
- A bucket and towels to catch standing water from the P-trap.
How Do You Safely Remove the Old Garbage Disposal?
Safety begins at the electrical panel. Flip the circuit breaker for the kitchen disposal to the off position. Even if you rely on the wall switch, a bump during installation could activate a hardwired unit while your hands are near the blades. Once the power is isolated, place your bucket under the 1-1/2 inch (38 mm) PVC drain pipe. Loosen the slip nuts holding the P-trap to the disposal's tailpiece and pull the pipe downward. Next, use a screwdriver or pliers to loosen the metal hose clamp securing the ribbed dishwasher drain hose to the side nipple, and pull the hose free.
With the plumbing disconnected, the only thing holding the disposal is the mounting ring. Disposals weigh between 15 and 20 pounds (6.8 and 9 kg), so place one hand firmly under the bottom of the unit. Insert a long screwdriver into one of the metal loops (lugs) on the lower mounting ring. Push the screwdriver counterclockwise. The ring will rotate about an inch, and the heavy disposal will suddenly drop off the mount into your hand.
- Isolate the 120-volt power supply at the main breaker box.
- Disconnect the PVC P-trap and the rubber dishwasher drain hose.
- Support the 15-pound (6.8 kg) unit from underneath before loosening the ring.
- Twist the lower mounting ring counterclockwise using a screwdriver for leverage.
Should You Replace the Sink Flange and Mounting Ring?
Here is a classic judgment call a professional plumber makes differently from a weekend DIYer. Because standard three-bolt disposal mounts have not changed design in decades, a new unit will usually twist right onto the old mounting bracket perfectly. A beginner will often leave the old, dirty sink flange in place to save 20 minutes of work. A professional will always remove the old hardware and install the new flange assembly from the box.
The old plumber's putty sealing the existing flange to your sink basin has likely been baking in hot water for a decade. The moment you violently twist the old disposal off the mount, you risk breaking that brittle, invisible putty seal. If you reuse the old flange, it may not leak today, but it frequently develops a slow drip within a few months, rotting out the cabinet floor. Always loosen the three bolts, pry off the metal snap ring with a flathead screwdriver, and push the old flange up and out of the sink.
- Beginners often reuse the old mount; pros always replace it.
- Twisting off the old unit fractures the aging putty seal above.
- Remove the old snap ring with a flathead screwdriver to release the mount.
- Thoroughly clean the sink opening of all old putty and grime.
How Do You Seal the New Sink Flange So It Never Leaks?
A leak-free installation relies entirely on how well you bed the new stainless steel flange into the sink. Take a handful of plumber's putty and roll it between your palms to create a snake about 3/8 inch (9.5 mm) thick and long enough to wrap completely around the underside of the flange lip. Press this ring of putty firmly up against the flange, then drop the flange into the sink drain hole. Press down hard so the putty begins to squeeze out around the edges in the sink basin.
From underneath the sink, slide the fiber gasket, the backup flange, and the mounting ring onto the protruding sleeve. Hold them in place and slide the metal snap ring up the sleeve until it snaps securely into the retaining groove. Tighten the three mounting bolts evenly, alternating between them so the ring pulls up flat against the sink. As you tighten, more putty will ooze out inside the sink. Wipe this excess away with a dry rag. Note: If you have a fireclay or quartz sink, check the putty manufacturer's label; some porous sinks require a silicone sealant instead of oil-based putty to prevent staining.
- Roll plumber's putty into a 3/8 inch (9.5 mm) uniform rope.
- Press the flange in firmly and let the excess putty squeeze out.
- Seat the snap ring fully into the groove to support the entire unit.
- Tighten the three mounting bolts evenly to prevent a crooked seal.
Why Do So Many New Disposals Flood the Dishwasher?
The single most common failure mode for first-time disposal installers is forgetting to remove the dishwasher knockout plug. Manufacturers ship every new disposal with a solid plastic barrier inside the dishwasher inlet nipple, allowing the unit to be used in homes without dishwashers. If you connect your dishwasher hose without removing this plug, the dishwasher's drain pump will force dirty water against a solid wall of plastic, causing the hose to blow off or the appliance to flood your kitchen floor.
Before you mount the disposal, lay it on its side on the floor. Look inside the 7/8 inch (22 mm) dishwasher inlet tube protruding from the top. You will see a plastic wall. Place the tip of a flathead screwdriver or a metal punch against this wall and strike the handle sharply with a hammer. The plug will snap cleanly off. Reach into the main drain opening of the disposal and retrieve the plastic disk so it does not rattle around or jam the grinding impellers later.
- Failure to remove the plug causes immediate dishwasher flooding.
- Use a hammer and screwdriver to punch out the plastic barrier.
- Always retrieve the broken plastic disk from inside the grinding chamber.
- Skip this step only if your kitchen does not have a dishwasher.
How Do You Hardwire or Plug In the New Disposal?
If you bought a disposal with a pre-attached power cord and you have a matching outlet under the sink, simply plug it in once the unit is mounted. However, if your home features a hardwired setup (an armored metal cable coming straight from the wall into the unit), you must wire the disposal before lifting it into place. Remove the small metal cover plate on the bottom of the new disposal to expose the black, white, and green wires.
Strip about 1/2 inch (13 mm) of insulation from the house wires. Connect the black house wire to the black disposal wire, and the white house wire to the white disposal wire, securing them with appropriately sized wire nuts. Wrap the wire nuts tightly with electrical tape to prevent vibrations from loosening the connections over time. Fasten the bare copper or green house ground wire to the green grounding screw on the disposal. Push the wires carefully back into the housing and secure the cover plate.
- Pre-wire the disposal while it is sitting on the cabinet floor.
- Connect black to black (hot) and white to white (neutral).
- Secure the grounding wire to the green screw on the chassis.
- Wrap wire nuts with electrical tape to combat heavy motor vibrations.
How Do You Lock the New Disposal Onto the Mount?
Lifting the heavy disposal and aligning it with the mounting ring can be frustrating. Align the disposal so the dishwasher nipple faces the dishwasher hose, and the main drain outlet faces your PVC P-trap. Lift the unit straight up so the three tabs on the lower ring slide up past the ramps on the upper mounting ring. Twist the lower ring clockwise by hand to temporarily hold the weight of the motor.
Hand-tightening is never enough. To permanently lock the unit and prevent heavy vibrations from shaking it loose, insert your screwdriver into one of the mounting lugs. Pull the screwdriver firmly to rotate the ring clockwise until the metal tabs hit the absolute end of their tracks on the upper ring. You will feel a distinct lock. The disposal should now be completely rigid and perfectly suspended.
- Pre-align the discharge tubes to face your existing plumbing.
- Lift straight up and engage the three mounting tabs simultaneously.
- Twist clockwise by hand to take the 15-pound (6.8 kg) weight off your arms.
- Use a screwdriver for leverage to force the ring into its final locked position.
How Do You Reconnect the Plumbing and Test for Leaks?
Attach the black rubber or plastic discharge tailpiece to the side of the disposal using the supplied metal flange and screws. Slide the PVC P-trap onto the tailpiece and hand-tighten the plastic slip nut. Slide the dishwasher drain hose over the upper inlet nipple and tighten the metal hose clamp securely. Double-check that all slip joint nuts on the PVC piping are firmly hand-tightened.
Before restoring power, place a dry paper towel on the floor of the cabinet directly beneath the disposal and the P-trap. Turn on the kitchen faucet and let water run straight through the sink for two minutes. Check the paper towel for any drips, particularly around the top sink flange and the PVC connections. If it remains dry, turn the circuit breaker back on, run the cold water, and flip the disposal switch. Listen for a smooth hum and check for any vibration-induced leaks while the motor is spinning.
- Install the rubber discharge tailpiece using the provided metal bracket.
- Secure the dishwasher hose with a metal screw clamp.
- Place a dry paper towel under the plumbing to instantly spot invisible drips.
- Run water before turning on the power to verify passive seal integrity.
| Motor Size | Best For | Average Lifespan | Estimated 2026 Cost |
|---|---|---|---|
| 1/3 HP | Light use, soft foods, apartments | 5 - 7 Years | $80 - $120 |
| 1/2 HP | Typical homes, moderate daily use | 8 - 12 Years | $120 - $180 |
| 3/4 HP | Heavy use, small bones, fibrous scraps | 10 - 15 Years | $200 - $280 |
| 1 HP | Large families, intensive cooking, quiet operation | 12 - 20 Years | $300 - $450 |
Frequently asked questions
Why does my new garbage disposal hum but not spin?
A humming sound indicates the motor is receiving power but the impellers are jammed. Ensure the power is off, then insert the provided hex wrench into the small hole in the very bottom center of the disposal. Crank the wrench back and forth to manually free the jam, which is usually a small piece of gravel, a dropped screw, or the plastic knockout plug you forgot to remove.
Can I use a 3/4 HP disposal to replace a 1/2 HP model?
Yes, upgrading to a larger motor is perfectly fine and often recommended for households that cook frequently. A 3/4 HP model grinds bones and fibrous vegetables much more efficiently. However, larger motors have larger physical casings, so you must measure the vertical and horizontal clearance under your sink to ensure the new, wider unit will not hit your cabinet walls or plumbing.
How long should a kitchen garbage disposal last?
A standard 1/2 HP continuous feed disposal typically lasts 8 to 12 years under normal daily use. The lifespan ends when the internal metal grinding chamber rusts through and begins leaking water out of the bottom casing, or when the motor simply burns out from frequent jamming.
Is it safe to pour boiling water down a garbage disposal?
No, you should never pour boiling water into a disposal while it is running, or immediately before running it. Heat softens the fat and grease on your dirty dishes, allowing it to coat the grinding chamber and PVC pipes. When the grease cools further down the line, it hardens and causes massive plumbing clogs. Always run cold water while operating the disposal to keep fats solid so they can be ground up and flushed away.
Keep reading
- How Much Paint Do You Actually Need for a Room?The tin says 400 square feet. Your wall says otherwise. Here is the arithmetic that actually holds up.
- DIY or Hire a Pro? A Decision Framework That Is Not About MoneyThe labour saving is real. So is the cost of a job done twice — and of tools you use once.
- Storage for Small Rooms That Does Not Make Them SmallerSmall rooms do not need more storage. They need storage that stops interrupting the eye.