How Do You Repair a Rotting Exterior Wood Window Sill With Epoxy?
By Jim Vernon · 10 min read · Last updated
A soft, spongy window sill doesn't mean you need a costly window replacement; it just means you need a two-part epoxy and a free Saturday.
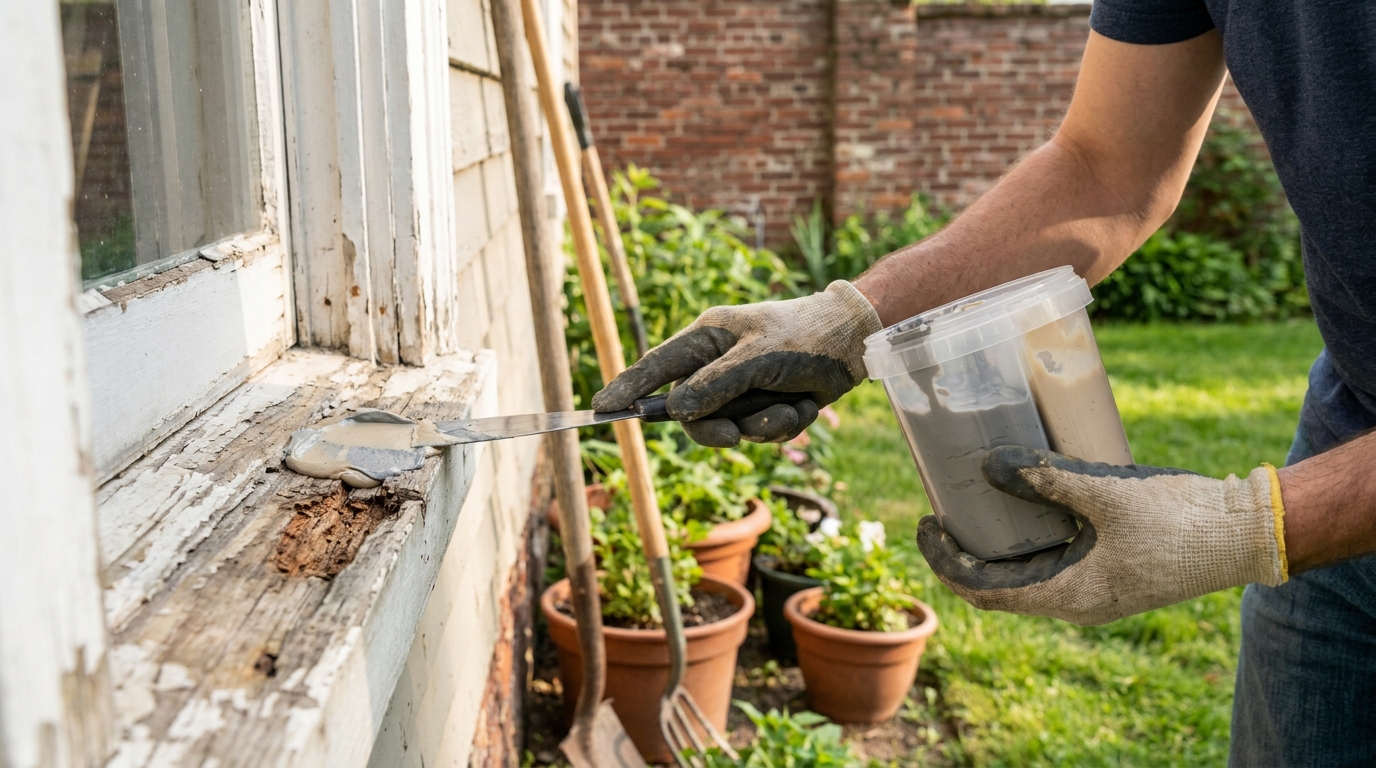
To repair a rotting exterior wood window sill with epoxy, you must first dig out all the decayed wood down to hard, solid grain, treat the exposed area with a liquid wood hardener to arrest the fungi, and then sculpt a two-part wood epoxy into the void before sanding and painting. The total cost for a professional-grade epoxy kit in 2026 is between $45 and $75, making it vastly cheaper than a $600 to $1,200 full window replacement. This process takes roughly four to six hours of active labor spread over a weekend, requiring temperatures above 50°F (10°C) for the chemicals to cure properly. The repair is permanent, structural, and weather-resistant, provided you eliminate the moisture source that caused the rot in the first place. Whether you are dealing with a historic home or standard brick-mold windows, epoxy consolidation is the most durable way to restore a sill without tearing into the house framing.
- Always dig past the soft rot until you hit dry, solid wood to prevent the fungi from continuing to eat the sill from the inside out.
- Liquid wood hardener is non-negotiable; it penetrates the wood fibers and creates a solid structural bonding surface for the epoxy paste.
- A typical DIY epoxy sill repair costs $45 to $75 in 2026, compared to a $600 to $1,200 full window replacement.
- Avoid standard wood fillers or auto body bondo, as they lack flexibility and will crack and pop out during seasonal wood expansion.
How Do You Know If the Sill Is Too Rotted to Fix?
Before buying supplies, you need to determine if the window sill is a candidate for epoxy repair or if it requires full replacement. Take a flathead screwdriver and press it firmly into the wood along the entire length of the sill. If the screwdriver sinks in by 1 inch (2.5 cm) or more, you have rot. Epoxy is ideal for localized damage, such as rotting at the outer corners where the sill meets the exterior trim, or superficial surface decay caused by peeling paint. As a general rule, if more than fifty percent of the sill's volume is decayed, or if the rot extends deep into the structural jack studs beneath the window frame, epoxy is no longer the right solution.
In cases where the structural integrity of the window frame is compromised, the window will begin to sag, and the sashes will stick or refuse to lock. If the frame itself is crushing under the weight of the glass, you must replace the entire unit. However, if the damage is confined to the protruding ledge of the sill and the core structure remains rock solid, an epoxy restoration will save you significant time and money.
- Probe the wood with a screwdriver; soft, spongy areas indicate active rot.
- Check if the rot affects more than half the sill; if so, replace the wood.
- Ensure the underlying structural studs are solid and dry.
- Verify that the window sashes still operate smoothly, ruling out structural sagging.
What Materials and Tools Do You Actually Need for an Epoxy Repair?
You cannot use standard spackle or interior wood putty for an exterior sill repair. The defining characteristic of a wood window sill is that it expands in the summer heat and contracts in the winter cold. You need a two-part epoxy specifically engineered for wood restoration, such as Abatron WoodEpox or PC-Rot Terminator. These systems come in two parts: a liquid consolidant (hardener) and a two-part epoxy paste. In 2026, expect to pay between $45 and $75 for a complete kit that includes both the liquid and the paste, which is enough to rebuild two to three average-sized window sills.
Beyond the epoxy kit, you will need a stiff putty knife, a 5-in-1 painter's tool, a sharp wood chisel, and ideally an oscillating multi-tool to cut away the stubborn rotted sections. Because you are dealing with chemicals, stock up on disposable nitrile gloves and cheap bristle brushes for applying the liquid hardener. You will also need a random orbital sander equipped with 80-grit and 120-grit sandpaper for the final shaping, plus an exterior-grade acrylic latex primer and paint to seal the finished repair.
- Two-part wood epoxy kit (liquid consolidant and epoxy paste).
- Oscillating multi-tool and sharp wood chisel for rot removal.
- Nitrile gloves, cheap bristle brushes, and a stiff putty knife.
- Random orbital sander with 80-grit and 120-grit sanding discs.
- High-quality exterior acrylic latex primer and paint.
How Do You Properly Remove the Rotted Wood Before Applying Epoxy?
The most common failure mode in epoxy sill repair is sealing over damp, active rot. If you leave wet, decayed wood beneath your repair, the fungi will simply continue to eat away at the healthy wood underneath, and your expensive epoxy block will fall out completely by next spring. To avoid this, use your chisel and oscillating multi-tool to aggressively dig out every piece of soft, dark, or spongy wood. You must keep carving until you expose bright, hard, healthy wood grain. Do not be afraid of creating a massive crater in the sill; the epoxy is more than capable of filling large voids.
Once the rot is removed, the remaining wood must be completely dry before you apply any chemicals. Use a pin-type moisture meter to check the exposed wood cavity. The moisture reading must be under 15 percent. If the wood is still damp from recent rain, you have two choices: tent the window in plastic and let it air dry for a few days, or force-dry the cavity using a heat gun on a low setting. Never rush this step. Epoxy will absolutely not bond to wet wood fibers.
- Carve out all soft, dark wood until you reach bright, solid grain.
- Use an oscillating multi-tool for clean cuts in tight corners.
- Check the cavity with a moisture meter; it must read below 15 percent.
- Force-dry damp wood with a heat gun or wait several days before proceeding.
Why Must You Use a Liquid Wood Hardener First?
Applying epoxy paste directly to bare wood is a recipe for a weak bond. The liquid wood hardener, also known as a consolidant, acts as a deep-penetrating primer. When you mix the two-part liquid hardener and brush it liberally into the cavity, it soaks deep into the porous wood fibers. As it cures, it turns any marginal, slightly soft wood into a rock-hard, plasticized surface. This creates a highly tenacious chemical and mechanical bond between the old house framing and the new epoxy paste you are about to apply.
Mix the liquid hardener exactly according to the manufacturer's ratio, which is usually one-to-one. Use a cheap, disposable brush to flood the excavated cavity, allowing the wood to drink up as much liquid as it can hold. Keep applying coats every ten minutes until the wood stops absorbing the liquid and it pools on the surface. Depending on the ambient temperature, the hardener will take between one and three hours to become tacky. You want to apply your epoxy paste while this hardener is still slightly tacky to ensure the two chemicals cross-link and bond perfectly.
- Mix the liquid hardener in a strict one-to-one ratio.
- Brush it heavily into the cavity until the wood stops absorbing it.
- Allow the hardener to cure until it becomes tacky, usually one to two hours.
- Never skip this step, as it provides the structural anchor for the epoxy paste.
How Do You Mix and Sculpt the Two-Part Wood Epoxy?
Wood epoxy paste consists of a resin and a hardener that must be mixed in equal volumes. Scoop out golf-ball-sized amounts of each part using separate putty knives to avoid cross-contaminating the tubs. Knead the two parts together in your gloved hands until the color is entirely uniform, with no streaks. Once mixed, you have a working time of roughly 30 to 45 minutes before the heat of the chemical reaction causes the putty to stiffen. Press the epoxy firmly into the cavity, overfilling it slightly so you have material to sand down later. Ensure you push it hard into the corners to eliminate any trapped air bubbles.
Here is a judgement call a pro makes differently from a beginner: A beginner will smear the epoxy on like cake frosting, leaving a lumpy, irregular mess that takes three agonizing hours to sand flat. A pro minimizes sanding by creating a simple form. Take a scrap piece of 1x4 wood and wrap it tightly in clear packing tape. Epoxy will not stick to packing tape. Tack this tape-wrapped board against the front face of the window sill using finish nails to recreate the straight front edge. Pack your epoxy tightly against this form and smooth the top with a putty knife dipped in rubbing alcohol. When you pull the board away the next day, you will have a glass-smooth, perfectly square edge that requires almost zero sanding.
- Knead equal parts of resin and hardener until the color is uniform.
- Press the epoxy firmly into the cavity to prevent trapped air bubbles.
- Overfill the void slightly to allow for shrinkage and sanding.
- Use a tape-wrapped scrap wood form to mold a perfect, straight edge.
How Long Does the Epoxy Take to Cure, and How Do You Sand It?
Epoxy relies on a chemical exothermic reaction to cure, meaning temperature dictates the timeline. At an ideal 70°F (21°C), the epoxy will cure hard enough to sand in roughly two to four hours. However, if the temperature drops closer to the minimum threshold of 50°F (10°C), the cure time can extend to 24 hours. If you are doing this repair in late fall, you may need to point a heat lamp at the sill to keep the chemical reaction moving. Never attempt this repair if temperatures will drop below freezing overnight.
Once the epoxy is rock hard and you cannot dent it with your fingernail, it is time to sand. Start with an 80-grit sanding disc on your random orbital sander to knock down the high spots and flush the epoxy seamlessly into the surrounding wood. Be careful not to hold the sander in one place too long, as the friction can heat up and gum up the epoxy. Once the shape is perfectly flush, switch to a 120-grit paper by hand to smooth out the transition lines. Wipe the entire area down with a damp rag to remove all fine dust before painting.
- Wait for a rock-hard cure, which takes two to 24 hours depending on temperature.
- Ensure the ambient temperature remains above 50°F (10°C).
- Use 80-grit sandpaper to aggressively level the patch.
- Finish with 120-grit sandpaper for a smooth, paint-ready surface.
How Do You Prime and Paint the Repaired Sill to Prevent Future Rot?
Epoxy is completely waterproof and will never rot, but the old wood surrounding it remains vulnerable. To protect your hard work, you must seal the entire sill system properly. Start by applying a high-quality exterior acrylic latex primer over both the epoxy patch and the bare wood. Do not use interior primers, as they will peel when exposed to UV light and rain. Once the primer is dry, inspect the seams where the window trim meets the sill. Fill any gaps with a paintable polyurethane exterior window sealant. Avoid silicone caulk, as paint will not stick to it.
Finish the job with two coats of a premium exterior acrylic latex paint in a satin or semi-gloss finish to shed water effectively. Pay special attention to the underside of the sill overhang. Water often travels back under the sill via capillary action, soaking into the unpainted end grain and causing rot. By thoroughly painting the underside and ensuring a sharp drip edge remains intact, you force rainwater to drop off onto the ground rather than wicking back into your home's framing. With a proper paint job, an epoxy-repaired sill will outlast the window itself.
- Prime the entire area with an exterior-grade acrylic latex primer.
- Caulk all surrounding trim joints with paintable polyurethane sealant.
- Apply two coats of premium exterior acrylic latex paint.
- Paint the underside of the sill to stop capillary water wicking.
| Material | Flexibility | Structural Strength | 2026 Cost per Quart | Best Use |
|---|---|---|---|---|
| Two-Part Wood Epoxy | High (Moves with wood) | Excellent (Can hold screws) | "$45 to $75" | Deep rot, structural sills, window frames |
| Auto Body Filler (Bondo) | None (Rigid, prone to cracking) | Moderate | "$15 to $25" | Metal repair, indoor painted trim |
| Standard Wood Putty | Low | Poor (Cosmetic only) | "$10 to $15" | Indoor nail holes, minor surface scratches |
Frequently asked questions
Can you use Bondo or regular wood filler instead of epoxy for a window sill?
No. Auto body fillers like Bondo cure rigidly and lack the flexibility to move with wood as it naturally expands and contracts with seasonal temperature shifts. Within a year or two, Bondo will crack, let water in, and pop out of the cavity. Standard wood putty will simply dissolve in the rain. Only two-part wood epoxy has the specific elasticity required for exterior wood repairs.
Can you apply wood epoxy in the winter?
It is highly discouraged. Most wood epoxies require an ambient temperature of at least 50°F (10°C) to cure properly. If you must do an emergency repair in winter, you will need to build a plastic tent around the window sill and run a space heater or heat lamp continuously to keep the wood and the epoxy warm until the chemical reaction completes.
How long will an epoxy wood repair actually last?
If applied correctly over completely dry, solid wood and protected with a quality coat of exterior paint, an epoxy wood repair is permanent. The epoxy itself will never rot, warp, or degrade. The only risk is if moisture penetrates the surrounding old wood, causing a new area of rot to develop next to your repair.
Keep reading
- How Much Paint Do You Actually Need for a Room?The tin says 400 square feet. Your wall says otherwise. Here is the arithmetic that actually holds up.
- DIY or Hire a Pro? A Decision Framework That Is Not About MoneyThe labour saving is real. So is the cost of a job done twice — and of tools you use once.
- Storage for Small Rooms That Does Not Make Them SmallerSmall rooms do not need more storage. They need storage that stops interrupting the eye.