How Do You Remove and Replace a Kitchen Faucet With Rusted Mounting Nuts?
By Jim Vernon · 10 min read · Last updated
Stop bruising your knuckles fighting a rusted basin nut; the secret to removing an old kitchen faucet is knowing when to put the wrench down and pick up a saw.
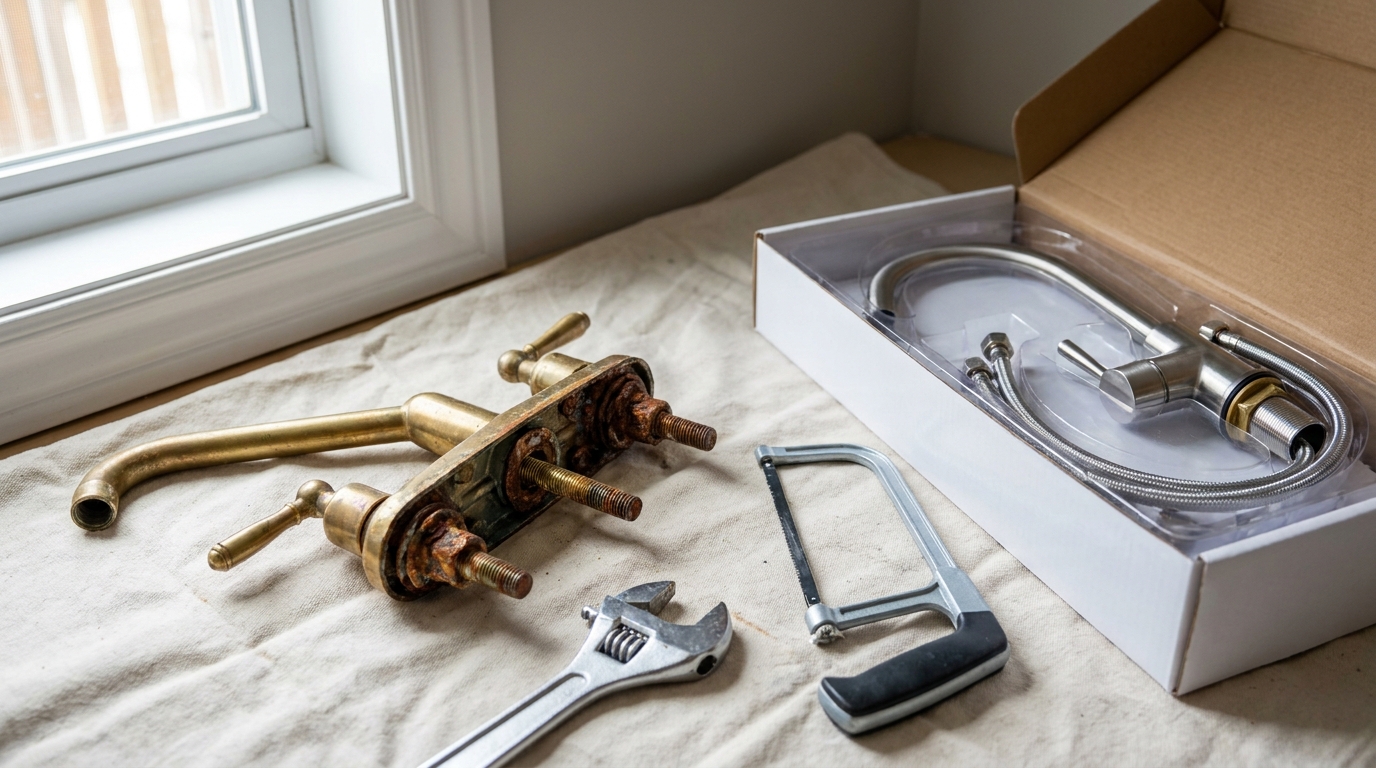
The fastest way to replace a kitchen faucet with heavily rusted mounting nuts is to cut the old hardware off from underneath using an oscillating multi-tool, pull the old unit out from the top, and drop the new faucet into the cleaned holes. Fighting a corroded brass or steel nut with a basin wrench usually results in stripped threads, damaged sink basins, or snapped water lines. By slicing the nut vertically, you break the tension and bypass the corrosion entirely. Expect to spend 45 to 60 minutes on this project. In 2026, replacement mid-range kitchen faucets cost between $150 and $400, and a carbide-tipped cutting blade runs about $25. This method saves hours of frustration and protects your plumbing from costly collateral damage.
- Cut off heavily rusted mounting nuts with an oscillating tool rather than forcing them with a wrench.
- Always use two wrenches when loosening supply lines to prevent snapping the copper pipes inside your walls.
- Never use Teflon tape on 3/8-inch compression fittings; it disrupts the mechanical seal and causes leaks.
- Flush the new faucet without the aerator installed to prevent manufacturing debris from permanently clogging the screens.
What makes old faucet nuts freeze solid in the first place?
Kitchen faucets live in a high-moisture environment where gravity works against the hardware. Over years of use, microscopic amounts of water from wet hands or a failing internal O-ring seep down the faucet shank. As this water evaporates in the warm air under the cabinet, it leaves behind hard calcium and limescale deposits that effectively cement the mounting nut to the threaded brass shank.
Compounding this mineral buildup is galvanic corrosion. When dissimilar metals, such as a brass faucet shank and a galvanized steel mounting nut, are in contact in the presence of moisture, they undergo an electrochemical reaction that fuses them together. By the time a standard builder-grade faucet is 10 to 15 years old, that hardware is no longer just threaded together; it is virtually welded.
- Hard water scale: Calcium and magnesium deposits lock threads in place like cement.
- Galvanic corrosion: The chemical bonding of mismatched metals like brass and steel destroys the thread path.
- Hidden leaks: Micro-drips from the spout base feed the corrosion over a decade without being noticed.
Should you try penetrating oil before cutting the hardware?
This is where a professional makes a completely different judgement call than a beginner. A DIYer will typically spray a rusted nut with WD-40 or a penetrating catalyst, wait an hour, and then spend another hour on their back straining with a basin wrench. A professional plumber will take one look at a heavily scaled, rusted nut, immediately grab an oscillating tool, and cut it off in two minutes.
Penetrating oils are highly effective on automotive bolts, but they struggle to dissolve thick, rocky calcium buildup on vertical plumbing threads. Gravity pulls the oil down and away from the joint, and the mineral scale blocks the fluid from reaching the bare metal. If the nut does not break free with moderate pressure from a 10-inch (25.4 cm) basin wrench, stop pulling. Forcing it will only warp a thin stainless steel sink deck or tear the basin away from the countertop.
- Do not use excessive force: Heavy torque will bend thin stainless steel sinks permanently.
- Skip standard lubricants: Household oils cannot dissolve heavy calcium scale on vertical threads.
- Recognize the limit: If a basin wrench slips or the nut will not budge under moderate pressure, switch to cutting immediately.
How do you safely cut off a rusted faucet from under the sink?
The safest and most controlled way to remove a frozen nut is using an oscillating multi-tool equipped with a carbide-tipped metal-cutting blade. Unlike a reciprocating saw, an oscillating tool vibrates in a tight arc, giving you pinpoint accuracy so you do not accidentally slice into the sink basin or the adjacent water supply lines. Put on safety glasses, as cutting rusted metal directly above your face will drop debris straight into your eyes.
Position the blade vertically against the side of the mounting nut. Turn the tool on a medium-high speed and gently press into the metal, cutting parallel to the threaded shank. Once you cut all the way through one side of the nut, insert a flathead screwdriver into the kerf (the small slot you just cut) and twist. The nut will snap open, breaking the tension, and slide right off the shank.
- Wear eye protection: Rust flakes and metal shavings will fall directly downward.
- Use a carbide blade: Standard bi-metal blades will dull instantly on hardened steel nuts.
- Cut only one side: You only need to cut through one wall of the nut to break the tension and release it.
How do you remove the old supply lines without snapping the shutoff valves?
The most expensive failure mode in a faucet replacement is snapping the copper pipe inside your wall because you twisted the shutoff valve too hard. The small valves under your sink, called angle stops, have 3/8-inch compression nuts that secure the faucet's water lines. Over time, these nuts seize up. If you try to loosen the nut with a single wrench, the entire valve body will turn, twisting and eventually breaking the copper pipe hiding behind the drywall.
To avoid this in-wall flood hazard, you must always use the two-wrench technique. Place an adjustable wrench or locking pliers on the body of the angle stop to hold it perfectly still. Then, use a second adjustable wrench to turn the 3/8-inch compression nut counter-clockwise. By counter-holding the valve body, all the rotational force goes directly into the nut, keeping the wall plumbing completely safe.
- Turn off the water: Always verify the local angle stops are fully closed before starting.
- Use the two-wrench method: One wrench holds the valve body stationary; the second turns the compression nut.
- Drain the pressure: Open the old faucet handles to release trapped water before unthreading the lines.
How do you clean and prep the sink deck for a watertight seal?
Once the old faucet is pulled out from the top, you will be left with one to three 1-3/8 inch (3.5 cm) holes surrounded by hard water rings and old, crusty plumber's putty. Dropping a new faucet on top of this debris guarantees a leak. The new rubber gaskets require a perfectly smooth, clean surface to compress and form a watertight barrier.
Use a plastic putty knife or a razor blade held at a very shallow angle to scrape away the old putty, being careful not to gouge the sink surface. Soak a rag in white vinegar and lay it over the hard water rings for 15 minutes to dissolve the minerals. Scrub the deck clean and wipe it completely dry with a microfiber cloth. If your new single-handle faucet is replacing an older three-hole model, you will need to install the 10-inch (25.4 cm) escutcheon plate included in your kit to cover the outer holes.
- Scrape gently: Use a plastic scraper on fireclay or enameled cast iron to prevent scratching the finish.
- Dissolve minerals naturally: White vinegar safely breaks down the hard water rings left by the old base.
- Wipe completely dry: New rubber gaskets will slip and fail to seal if installed on a wet or oily surface.
How do you mount the new faucet so it never wobbles?
Modern faucets have engineered the installation process to be nearly tool-free. Instead of a standard hex nut, most new units use a long slide-up collar or a large plastic nut with locking set screws. Drop the new faucet hoses and shank down through the center hole. Ensure the rubber gasket is seated properly at the base of the faucet above the sink. Do not add plumber's putty unless the manufacturer specifically calls for it; petroleum-based putties will degrade modern silicone seals over time.
From under the sink, slide the mounting washer and the new locking nut up the shank. Hand-tighten the nut until it is snug against the underside of the sink deck. Finally, use a Phillips screwdriver to drive in the two set screws located on the sides of the nut. These screws press against the mounting washer, locking the faucet in place with immense, even pressure so it never wobbles when you pull the sprayer hose.
- Position the handle: Ensure the handle orientation allows for full hot and cold rotation without hitting the backsplash.
- Skip the putty: Rely on the factory-provided rubber O-rings and gaskets for the deck seal.
- Drive the set screws: Tighten the locking screws evenly to prevent the faucet body from leaning.
How do you connect and tighten the new supply lines correctly?
New kitchen faucets come with braided PEX or stainless steel supply lines pre-attached to the valve body, color-coded red for hot and blue for cold. These lines end in 3/8-inch female compression fittings that attach directly to your angle stops. A very common DIY mistake is wrapping these threads with Teflon tape. Compression fittings rely on a rubber cone or brass ferrule crushing against the inside of the valve to create a seal; Teflon tape interferes with this mechanical seal and will actually cause leaks.
Thread the hot line onto the hot valve (typically on the left) and the cold line onto the cold valve (typically on the right) by hand until they stop. Once hand-tight, use an adjustable wrench to turn the nut exactly one-quarter to one-half turn further. Do not over-tighten. Excessive torque will crush the internal rubber seal, leading to an immediate drip.
- No Teflon tape: Never use thread seal tape or pipe dope on compression fitting threads.
- Match the lines: Left is traditionally the hot water supply, right is traditionally cold.
- Tighten correctly: Hand-tight plus one-quarter turn with a wrench is the industry standard for rubber compression seals.
How do you flush the new faucet to prevent clogged aerators?
Before you turn the angle stops back on and start washing dishes, you must flush the system. During installation, small pieces of rubber, calcium flakes from the valves, or manufacturing debris can get pushed into the water lines. If you turn the faucet on immediately, this debris will get blasted into the spray head and permanently clog the micro-screens in the aerator, permanently reducing your water pressure.
Unscrew the spray head or aerator from the end of the faucet spout. Place a bucket under the spout or aim the hose into the drain. Slowly turn on the hot and cold angle stops under the sink. Turn the faucet handle to the full-open, mixed-water position and let it run for 60 seconds. While the water is running, lay a dry sheet of toilet paper on the floor of the cabinet under the shutoff valves and the faucet shank; if any water is leaking, the paper will instantly wrinkle and show a dark spot.
- Remove the aerator: Take off the spray head to allow large debris to exit the lines without getting trapped.
- Open valves slowly: Turn the angle stops on gently to prevent a high-pressure water hammer from shocking the system.
- Test with toilet paper: Use dry tissue paper to instantly detect microscopic leaks under the sink.
| Tool | Estimated Cost (2026) | Time to Remove | Risk to Sink Basin |
|---|---|---|---|
| Oscillating Multi-Tool (Carbide Blade) | $80 - $150 | 2 Minutes | Very Low |
| Rotary Tool (Cutoff Wheel) | $40 - $90 | 5 Minutes | Low |
| Basin Wrench (Manual) | $15 - $30 | 30+ Minutes | Medium (Warping Risk) |
| Nut Splitter Tool | $15 - $25 | 10 Minutes | Low |
Frequently asked questions
Do I need to turn off the main water valve to replace a faucet?
No, assuming the angle stop valves under your sink are functioning properly. Turn them clockwise to shut off the local water. If they do not fully stop the water flow (a common issue with old multi-turn valves), you will need to turn off the main house valve before proceeding.
Can I reuse the old water supply lines?
Modern faucets come with built-in, non-removable supply lines. For older models that accept separate hoses, you should always replace them. Braided lines degrade over time, and reusing a $10 hose is not worth the risk of a $10,000 flooded kitchen.
Why is my new faucet wobbling on a stainless steel sink?
Thin gauge stainless steel sinks (like 20-gauge or 22-gauge) can flex under the weight of a heavy commercial-style pull-down faucet. If the mounting nut is fully tightened and the neck still wobbles, you need to install a rigid sink deck reinforcement plate underneath the basin to distribute the weight across a wider area.
What size is a standard kitchen sink hole?
The industry standard for a kitchen sink faucet hole is 1-3/8 inches (3.5 cm) in diameter. Almost all modern single-hole and three-hole faucets are designed to fit this standard spacing without any modification to the sink.
Keep reading
- How Much Paint Do You Actually Need for a Room?The tin says 400 square feet. Your wall says otherwise. Here is the arithmetic that actually holds up.
- DIY or Hire a Pro? A Decision Framework That Is Not About MoneyThe labour saving is real. So is the cost of a job done twice — and of tools you use once.
- Storage for Small Rooms That Does Not Make Them SmallerSmall rooms do not need more storage. They need storage that stops interrupting the eye.