How Do You Re-Grout a Tiled Shower So It Doesn't Crack or Leak?
By Jim Vernon · 10 min read · Last updated
A single hairline crack in your shower grout is all water needs to secretly rot the wall studs behind your tile.
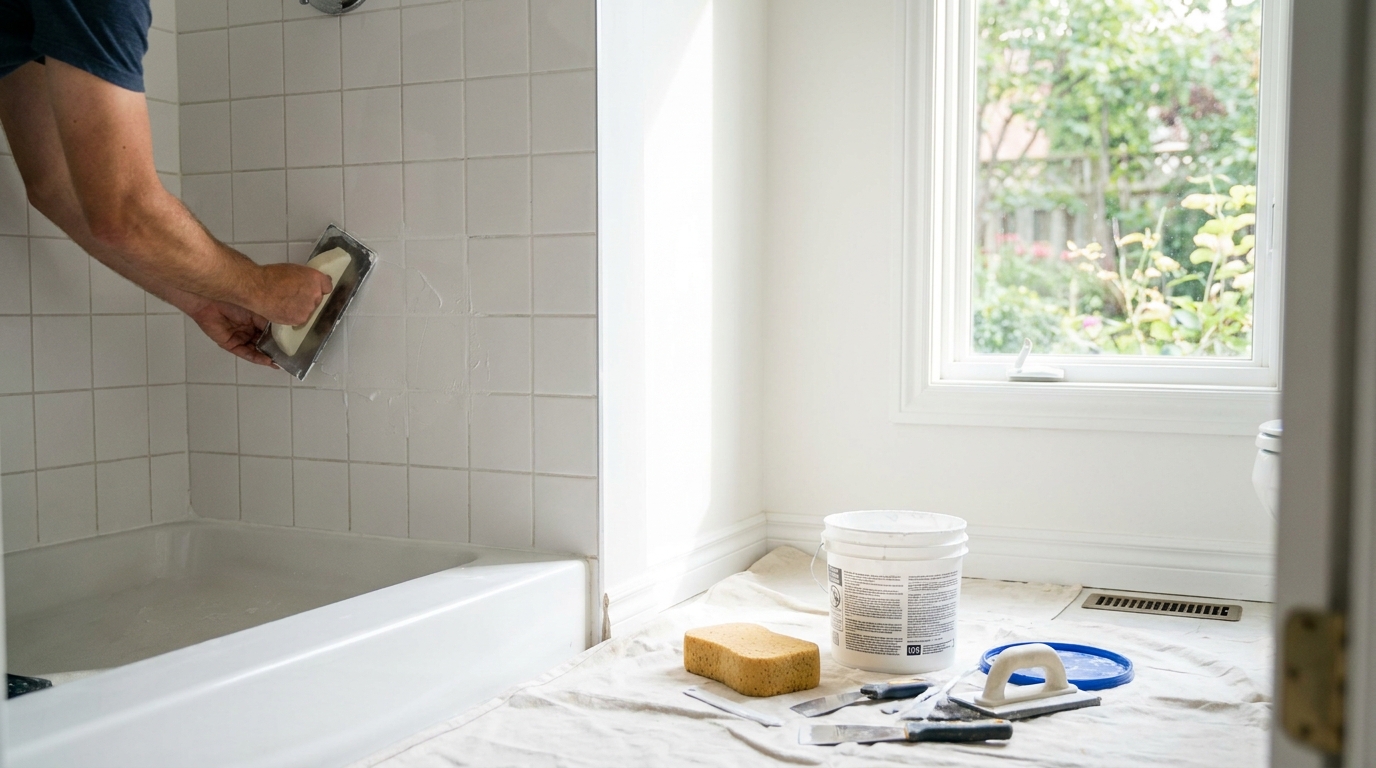
You re-grout a shower by mechanically grinding out at least 1/8 inch (3 mm) of the old grout using an oscillating multi-tool, vacuuming the joints completely clean, and floating a new high-performance polymer-modified or epoxy grout into the gaps. If you attempt to simply smear new grout over the old surface, the new layer will flake off within weeks because cementitious materials cannot bond to themselves at a shallow depth. Doing this job correctly takes a full weekend and requires about $60 to $130 in 2026 US dollars for materials to cover a standard 3-by-5-foot (0.9-by-1.5-m) shower enclosure. Re-grouting is not just an aesthetic upgrade; it is a critical structural maintenance task that prevents water from penetrating behind the tile, saturating the backer board, and rotting the wooden wall studs, which would cost thousands of dollars to repair.
- Grind out at least 1/8 inch (3 mm) of the old grout so the new mix has a deep trench to mechanically bond with.
- Choose a polymer-modified cementitious grout for a balance of long working time and high water resistance, avoiding fast-curing epoxy if you are a beginner.
- Slake the mixed grout for 5 to 10 minutes to fully activate the dry polymer chemicals before applying it.
- Never grout the 90-degree corners or floor seams; fill these movement joints with 100 percent silicone caulk.
What Tools and Materials Do You Need to Re-Grout a Shower?
To do this right, you cannot rely on a cheap plastic hand scraper. You need an oscillating multi-tool equipped with a carbide-grit or diamond-grit grout removal blade, which costs around $40 for a high-quality name-brand blade. You will also need a rigid rubber grout float ($15), two large hydrophilic tile sponges ($6 each), two 5-gallon (19-liter) buckets, and a wet/dry shop vacuum.
For the grout itself, expect to spend $25 to $55 per 10-pound (4.5-kg) bag of polymer-modified grout, plus another $10 for a tube of 100 percent silicone caulk matched to the exact color of your grout. Do not use standard acrylic painter's caulk in a shower environment, as it will wash away under daily water exposure.
- Oscillating multi-tool with a carbide or diamond blade.
- Rigid rubber grout float and two hydrophilic sponges.
- Polymer-modified grout and color-matched 100 percent silicone caulk.
Should You Use Sanded, Unsanded, or Epoxy Grout?
Choosing the correct grout chemistry is the most important decision you will make. If your tile joints are 1/8 inch (3 mm) or wider, you must use a sanded grout, as the silica sand provides structural bulk that prevents the grout from shrinking and cracking as it cures. If the joints are 1/16 inch (1.5 mm) or tighter, as is common with polished marble or glass subway tiles, you must use unsanded grout to avoid scratching the tile glaze and to allow the fine powder to fully pack the narrow gaps.
Here is where a professional makes a different judgment call than a beginner: A seasoned tile setter will often upgrade to a two-part epoxy grout for a shower because it is 100 percent waterproof, never requires sealing, and is completely immune to mold. However, epoxy grout cures rapidly via a chemical reaction, giving you only about 45 minutes of working time before it turns to stone in the bucket. If you are a beginner, the panic of a fast-curing epoxy can ruin a project. Instead, buy a high-performance polymer-modified cementitious grout or a pre-mixed urethane single-component grout, which gives you up to two hours of working time while still offering excellent water resistance.
- Use sanded grout for wide joints of 1/8 inch (3 mm) or more.
- Use unsanded grout for tight joints under 1/8 inch (3 mm) to avoid scratching tile.
- Beginners should avoid two-part epoxy due to its rapid 45-minute cure time.
How Do You Remove the Old Grout Without Chipping the Tile?
A very common failure mode for DIYers is failing to dig deep enough. To achieve a permanent mechanical bond, the new grout needs a physical trench to grab onto. You must grind out the old grout to a minimum depth of 1/8 inch (3 mm), though removing 1/4 inch (6 mm) or reaching halfway down the thickness of the tile is ideal. If you only scratch the surface and skim coat new grout over the top, it will flake off like old paint in less than a month.
Hold your oscillating tool firmly with two hands and let the vibration of the blade do the work; if you press too hard, the blade will jump out of the joint and permanently chip the edge of your ceramic glaze. Keep the blade perfectly vertical and work in long, steady passes. Wear a tight-fitting N95 respirator and safety glasses, as this process generates a massive amount of fine silica dust. Once the joints are carved out, use a utility knife to scrape away any lingering residue on the tile edges, then use your wet/dry vacuum with a bristle brush attachment to pull every spec of dust out of the empty joints.
- Hold the oscillating tool vertically with both hands to prevent the blade from jumping.
- Grind out a minimum depth of 1/8 inch (3 mm) to ensure a permanent bond.
- Vacuum the empty joints with a bristle attachment to remove all silica dust.
How Do You Mix the New Grout for Maximum Strength?
If you are using a cementitious grout, you must measure your water precisely according to the manufacturer's instructions. Use cool water between 65 and 75 degrees Fahrenheit (18 to 24 degrees Celsius); warm water will cause the grout to harden too quickly. Pour the measured water into your clean bucket first, then gradually add the dry grout powder while mixing with a margin trowel or a drill equipped with a paddle mixer on the lowest possible speed. Whipping the mix at high speed introduces air bubbles, which weaken the final cured grout and create tiny pinholes that trap dirt.
Mix until you reach the exact consistency of smooth peanut butter. At this point, you must perform a crucial step called slaking. Let the bucket sit entirely undisturbed for 5 to 10 minutes so the water can fully penetrate and activate the dry polymer chemicals. After the slaking period, give the mixture one final gentle stir without adding any extra water.
- Use cool water between 65 and 75 degrees Fahrenheit (18 to 24 degrees Celsius).
- Mix on low speed to avoid trapping air bubbles in the cement.
- Allow the mixture to slake undisturbed for 5 to 10 minutes before the final stir.
How Do You Pack the Grout Into the Joints Properly?
Scoop a tennis-ball-sized dollop of grout onto your rubber float and smear it onto the wall. Hold the float at a steep 45-degree angle to the wall and sweep it diagonally across the tile joints. Moving diagonally prevents the edge of the float from dipping into the joint and gouging out the fresh grout you just placed.
Your goal is not simply to paint the grout over the surface, but to forcefully pack and compress the material deep into the empty trenches so there are no hidden air voids behind the surface. Once a 3-by-3-foot (0.9-by-0.9-m) section is packed tightly, use the edge of the float held at a near 90-degree angle to scrape the excess grout off the face of the tiles, leaving as little material on the glazed surface as possible.
- Hold the rubber float at a 45-degree angle to the wall.
- Sweep diagonally across the joints to avoid gouging the fresh material.
- Scrape the excess off the tile faces holding the float at a 90-degree angle.
How and When Do You Sponge Off the Grout Haze?
Knowing exactly when to wash the tiles is a matter of touch. Wait 15 to 30 minutes after packing the joints until the grout in the joints becomes firm to the touch and the residue on the tile face turns into a hazy, dry powder. If you wipe too soon, you will wash the grout right out of the joints.
Dip your hydrophilic tile sponge into a bucket of clean water and wring it out until it is aggressively dry; it should be merely damp, not dripping. Too much water on the sponge will dilute the fresh grout, leading to a weak, powdery finish that washes away in a few months. Wipe the tiles diagonally in broad, single strokes. Flip the sponge over for a second pass, and then rinse it immediately. Change your bucket water frequently, as trying to clean tiles with milky grout water will only smear the haze back onto the wall.
- Wait 15 to 30 minutes until the grout is firm to the touch.
- Wring the sponge out until it is aggressively dry to avoid diluting the grout.
- Wipe diagonally across the tiles in single passes, turning the sponge often.
Why Do You Caulk the Corners Instead of Grouting Them?
Never put grout into the inside 90-degree corners of a shower, nor in the seam where the bottom row of wall tile meets the shower pan or bathtub. These areas are called changes of plane, and buildings naturally expand, contract, and settle at these intersections.
Rigid cement grout cannot flex with this movement, so if you grout the corners, they will inevitably develop hairline cracks within a year, creating an open door for water damage. Instead, leave the corners completely empty during the grouting process. Once the main joints have cured, fill these 90-degree seams with a bead of 100 percent silicone caulk. Silicone remains permanently flexible, acting as a waterproof expansion joint that easily absorbs seasonal structural movement.
- Leave all inside 90-degree corners and floor seams completely empty of grout.
- Rigid cement will inevitably crack at these natural expansion joints.
- Fill these seams with 100 percent silicone caulk after the grout has cured.
How Long Must the Shower Cure Before You Can Use It?
Do not turn on the shower the next morning. Polymer-modified cement grouts require a minimum of 48 to 72 hours to achieve their initial chemical cure and lock out moisture. Exposing the joints to water or heavy steam before the 72-hour mark stops the curing process, resulting in soft grout that will quickly erode under the pressure of a showerhead.
Keep the room well-ventilated during this period to help the moisture evaporate. If you used a standard cementitious grout rather than an epoxy or pre-mixed urethane, wait a full 14 days for the grout to completely dry, and then apply a high-quality penetrating liquid sealer to the joints using an applicator brush to protect against future soap scum and mildew stains.
- Wait at least 48 to 72 hours before running the shower.
- Keep the room well-ventilated to help moisture evaporate from the curing cement.
- Wait 14 days before applying a penetrating liquid sealer to the finished joints.
| Grout Type | Joint Width | Water Resistance | 2026 Cost per 10 lb | Best For |
|---|---|---|---|---|
| Sanded Polymer-Modified | 1/8 inch or wider | High (Requires sealing) | $25 - $35 | Standard ceramic and porcelain shower walls |
| Unsanded Polymer-Modified | 1/16 to 1/8 inch | Moderate (Requires sealing) | $25 - $35 | Glass tile and polished marble that scratches easily |
| Two-Part Epoxy | Any width | Total (Waterproof, no sealing) | $80 - $120 | Professional, permanent, mold-free installations |
Frequently asked questions
Do I have to remove all the old grout before re-grouting a shower?
No, you do not need to remove the grout all the way to the backer board. You only need to remove enough material to create a 1/8-inch to 1/4-inch (3 to 6 mm) deep trench. This gives the new grout enough surface area and depth to form a permanent mechanical bond without flaking off.
Can I just grout over moldy joints if I scrub them first?
Absolutely not. Mold in grout usually indicates that the porous cement is saturated all the way through, and potentially means water has breached the backer board. Grinding out the old grout physically removes the deeply rooted mold spores, ensuring they do not immediately grow back through your fresh application.
How do I remove old grout if I do not own an oscillating multi-tool?
You can use a manual carbide-tipped grout saw, which costs about $10. However, manually scraping out an entire shower by hand requires significant physical force and will add 8 to 10 hours of grueling labor to the project. Renting or buying an oscillating tool is highly recommended.
Why did my newly applied grout crack after only a week?
Early cracking is almost always caused by mixing the grout with too much water, skipping the slaking phase, or grouting the 90-degree corners instead of using flexible silicone caulk. Excess water evaporates rapidly, causing the cement to shrink violently and pull apart.
Keep reading
- How Much Paint Do You Actually Need for a Room?The tin says 400 square feet. Your wall says otherwise. Here is the arithmetic that actually holds up.
- DIY or Hire a Pro? A Decision Framework That Is Not About MoneyThe labour saving is real. So is the cost of a job done twice — and of tools you use once.
- Storage for Small Rooms That Does Not Make Them SmallerSmall rooms do not need more storage. They need storage that stops interrupting the eye.