How Do You Level an Uneven Concrete Floor for Luxury Vinyl Plank?
By Jim Vernon · 8 min read · Last updated
A floating floor is only as stable as the concrete beneath it, and skipping the subfloor prep is the fastest way to ruin a thousand-dollar flooring investment.
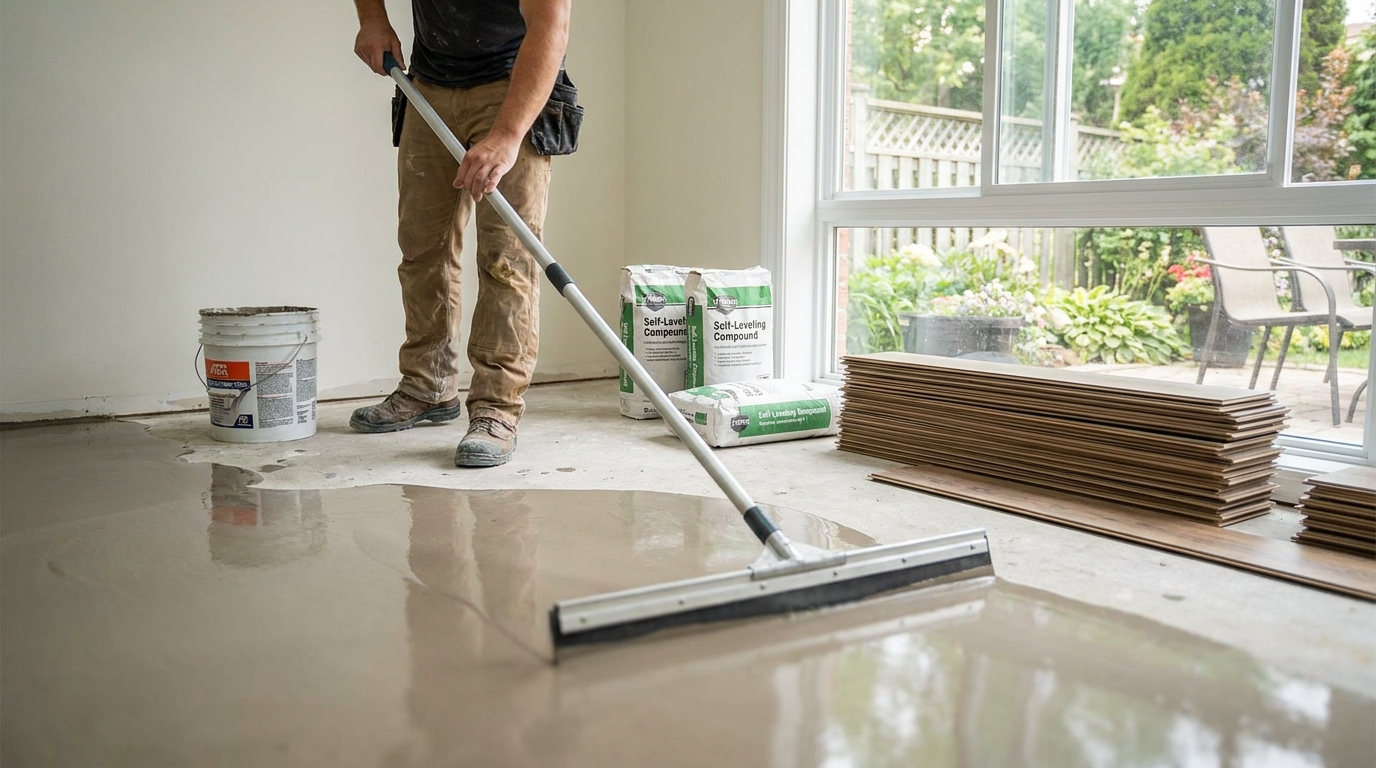
To level an uneven concrete floor for luxury vinyl plank (LVP), you must first locate dips greater than 3/16 inch (4.7 mm) over a 10-foot (3 m) span using a straightedge. Next, grind down high spots with a diamond cup wheel, apply an acrylic primer, and pour a Portland-cement-based self-leveling underlayment into the low spots. The goal isn't a perfectly horizontal room; the goal is a dead-flat surface so the locking mechanisms on your thin vinyl planks do not flex and snap under everyday foot traffic.
- Luxury vinyl plank requires a subfloor flat to within 3/16 inch over a 10-foot radius.
- Identify high and low spots using a heavy aluminum screed or a tightly pulled mason's line.
- Grind high spots down before filling low spots to save money on expensive leveling compound.
- Never pour self-leveling underlayment without applying an acrylic latex primer first, or the cure will fail.
- Use a 1/2-inch chuck drill with a mixing paddle; standard household drills will burn out their motors mixing 50 pounds of concrete.
Why does concrete flatness matter so much for LVP?
Luxury vinyl plank has revolutionized basement and slab-on-grade flooring because it is waterproof and easy to install. However, LVP is incredibly thin, typically ranging from 4mm to 8mm thick. Unlike rigid 3/4-inch hardwood that can bridge minor gaps in a subfloor, thin vinyl conforms to the shape of whatever is underneath it. If your concrete is wavy, your vinyl floor will be wavy.
More importantly, floating LVP relies on a fragile click-lock tongue-and-groove system to hold the planks together. When you step on a plank that is hovering over a dip in the concrete, the plank bends downward. This constant flexing fatigues the brittle locking mechanism. Within a few months, the joints will begin to squeak, separate, or snap off entirely, leaving gaps that cannot be repaired without pulling up the entire floor.
- Prevents click-lock joint failure under foot traffic.
- Stops hollow, clicking sounds when walking across the floor.
- Prevents subfloor imperfections from telegraphing through to the surface.
How do you measure concrete flatness accurately?
You cannot trust your eyes or a standard 2-foot carpenter's level to determine if a floor is flat. Concrete slabs are poured with intentional slopes toward drains and unintentional waves from the troweling process. You need to measure flatness over a wide span.
Take a 10-foot (3 m) aluminum straightedge, screed, or a perfectly straight piece of rigid unistrut, and lay it across the floor. Get down on your hands and knees with a tape measure. Look for any gaps under the straightedge. If you can slide a stack of three pennies or anything thicker than 3/16 inch (4.7 mm) under the bar, that low spot must be marked. Sweep the straightedge in a circle like the hand of a clock, using a permanent marker to outline the 'lakes' (low spots) and 'islands' (high spots) on the bare concrete.
- Use a 10-foot rigid metal straightedge, not a piece of lumber which can warp.
- Mark low spots (dips) with a circle and a minus sign.
- Mark high spots (ridges) with a circle and a plus sign.
Should you grind high spots or fill low spots?
Here is a classic judgment call a professional installer makes very differently than a beginner. A DIYer will typically buy fifteen bags of self-leveling underlayment to flood an entire wavy basement floor, easily spending over $600 in 2026 prices. A pro knows that pouring leveler over a high spot just raises the overall floor height without solving the variance.
Instead, a pro will spend an hour with a $45 diamond cup wheel on an angle grinder, attached to a HEPA shop vacuum via a dust shroud. By aggressively knocking down the concrete ridges, old mastic, and high spots first, they often reduce the required liquid leveling compound by 50 to 60 percent. Only after the peaks are ground flat do they pour compound into the remaining valleys. Grinding is noisy and requires dust control, but it is vastly cheaper and yields a better result.
- Always grind down localized peaks before pouring expensive leveler.
- Use a dust shroud and a HEPA vacuum; silica dust is highly hazardous.
- Filling low spots is reserved for broad dips that cannot be ground out.
What tools and materials do you actually need?
Self-leveling requires rapid, continuous work. Once you start mixing, you have about 10 to 15 minutes of working time before the compound begins to stiffen. You cannot run to the hardware store halfway through.
You will need multiple 5-gallon (19 L) mixing buckets, a dedicated mixing paddle, and a heavy-duty 1/2-inch chuck drill that operates at low RPM (around 400 to 600 RPM). A standard 3/8-inch household drill lacks the torque and will burn out its motor instantly when confronted with 50 pounds (22.6 kg) of wet cement. In 2026, expect to pay between $38 and $45 per 50-pound bag of high-quality Portland-cement self-leveling underlayment (SLU). You will also need a gauge rake to spread the material to a uniform depth, and spiked shoes if you need to walk through the wet pour to reach an exit.
- 1/2-inch chuck mixing drill and heavy-duty steel paddle.
- At least three heavy-duty 5-gallon buckets.
- Gauge rake and smoother for pushing the liquid leveler.
- High-quality self-leveling underlayment and acrylic latex concrete primer.
Why is concrete primer absolutely non-negotiable?
The most common failure mode when leveling concrete is skipping the primer. Many homeowners assume that concrete is concrete, and pouring wet cement over a dry slab will bond naturally. This is a catastrophic assumption.
If you pour self-leveling underlayment over unprimed concrete, the dry, porous slab acts like a sponge. It immediately sucks the water out of the wet underlayment mixture. This causes the leveler to flash-set before it has time to flow out and self-level, leaving you with lumpy, hardened ridges. Worse, without the proper water retention for hydration, the chemical cure fails entirely. The leveler turns into a crumbly, chalky dust that will delaminate and shatter under your new flooring. Always apply an undiluted acrylic latex concrete primer using a 3/8-inch (9.5 mm) nap roller, working it into the pores, and let it dry to a tacky, transparent finish for about two hours before pouring.
- Primer seals the pores of the old concrete so it cannot steal moisture from the leveler.
- Primer acts as a chemical bonding agent to fuse the old slab and the new pour.
- Never dilute the primer with water unless explicitly instructed by the manufacturer.
How do you mix and pour self-leveling underlayment correctly?
Precision is everything when mixing. If you add too much water, the sand aggregates will sink to the bottom, and a weak, powdery layer of white laitance will dry on top, which will eventually crumble. If you add too little water, the mix will be too thick to seek its own level. Follow the bag instructions to the ounce. Most 50-pound bags require exactly 5 to 5.5 quarts (4.7 to 5.2 L) of clean, cool water.
Always put the water in the bucket first, then slowly add the dry powder while running the mixer. Mix for exactly two minutes, scrape the sides, and mix for one more minute. Pour the liquid directly into the deepest part of your marked low spot, allowing it to feather out toward the edges. Use a gauge rake to gently push the material into corners. Do not overwork it; the product is designed to settle flat via gravity. If you are working in a warm room above 70°F (21°C), use ice water for mixing to buy yourself an extra five minutes of pot life before it hardens.
- Measure water precisely using a marked bucket; do not guess.
- Add powder to water, never water to powder, to prevent dry clumps.
- Keep the mixing paddle submerged to avoid whipping air bubbles into the mix.
- Pour continuously; have a helper mix the next bucket while you pour the first.
How long does the leveler need to cure before installing the LVP?
Most modern self-leveling underlayments are rapid-setting, meaning they are strong enough to withstand foot traffic in just 3 to 4 hours. However, being walkable is not the same as being ready for flooring installation.
Even though the surface feels dry, the compound is still holding massive amounts of water that is evaporating into the room. If you trap that moisture by immediately laying down waterproof vinyl planks, the moisture will condense under the flooring, promoting severe mold growth. You must wait a minimum of 24 to 48 hours before laying LVP. Furthermore, if your basement slab does not have an intact sub-slab vapor barrier, you should lay down a 6-mil polyethylene sheet over the cured leveler before clicking your planks together to block seasonal moisture emissions from the ground.
- Wait 4 hours for foot traffic, but at least 24 to 48 hours for flooring installation.
- Ensure room temperature remains between 50°F and 90°F during the cure.
- Run a dehumidifier during the 48-hour cure time to pull evaporated moisture out of the air.
| Method | Best Application | 2026 DIY Cost | Key Advantage |
|---|---|---|---|
| Angle Grinder with Diamond Cup Wheel | Removing ridges, old adhesive, and localized high spots under 1/4 inch (6.3 mm) | $45 to $65 for the wheel | Permanently lowers high spots without raising the overall floor height |
| Self-Leveling Underlayment (SLU) | Filling broad dips, sloping floors, and low spots up to 1.5 inches (3.8 cm) deep | $38 to $45 per 50-pound (22.6 kg) bag | Creates a glass-smooth surface perfect for thin vinyl planks |
| Feather Finish Patching Compound | Troweling over minor divots, cracks, and holes under 1/8 inch (3.1 mm) | $20 to $25 per 10-pound (4.5 kg) box | Dries in 15 minutes and requires no special mixing drills |
Frequently asked questions
Can I just use a thicker foam underlayment pad instead of leveling the concrete?
No. Thick, squishy underlayment pads do not solve uneven subfloors; they actually make the problem worse. Too much cushion allows the thin LVP planks to bend deeply under your weight, which will immediately void the manufacturer's warranty and snap the locking joints.
Can I use standard concrete patching compound instead of self-leveler?
Yes, but only for very small repairs. Trowelable patching compounds, like feather-finish cement, are perfect for filling narrow cracks, divots, or screw holes. However, they are incredibly difficult to hand-trowel perfectly flat over a wide, sweeping dip. For areas larger than two square feet, liquid self-leveler is required.
How thick can you pour self-leveling underlayment?
Most standard self-leveling compounds can be poured from a feather edge up to 1.5 inches (3.8 cm) thick in a single lift. If your floor has a hole deeper than 1.5 inches, you must use a specialized deep-pour compound or pre-fill the hole with traditional concrete mix and let it cure first.
Keep reading
- How Much Paint Do You Actually Need for a Room?The tin says 400 square feet. Your wall says otherwise. Here is the arithmetic that actually holds up.
- DIY or Hire a Pro? A Decision Framework That Is Not About MoneyThe labour saving is real. So is the cost of a job done twice — and of tools you use once.
- Storage for Small Rooms That Does Not Make Them SmallerSmall rooms do not need more storage. They need storage that stops interrupting the eye.