How Do You Lay Flagstone Over a Concrete Porch So It Doesn't Pop Loose?
By Jim Vernon · 9 min read · Last updated
A cracked, stained concrete porch drags down your curb appeal, but you can permanently bury it under beautiful natural stone in a single weekend.
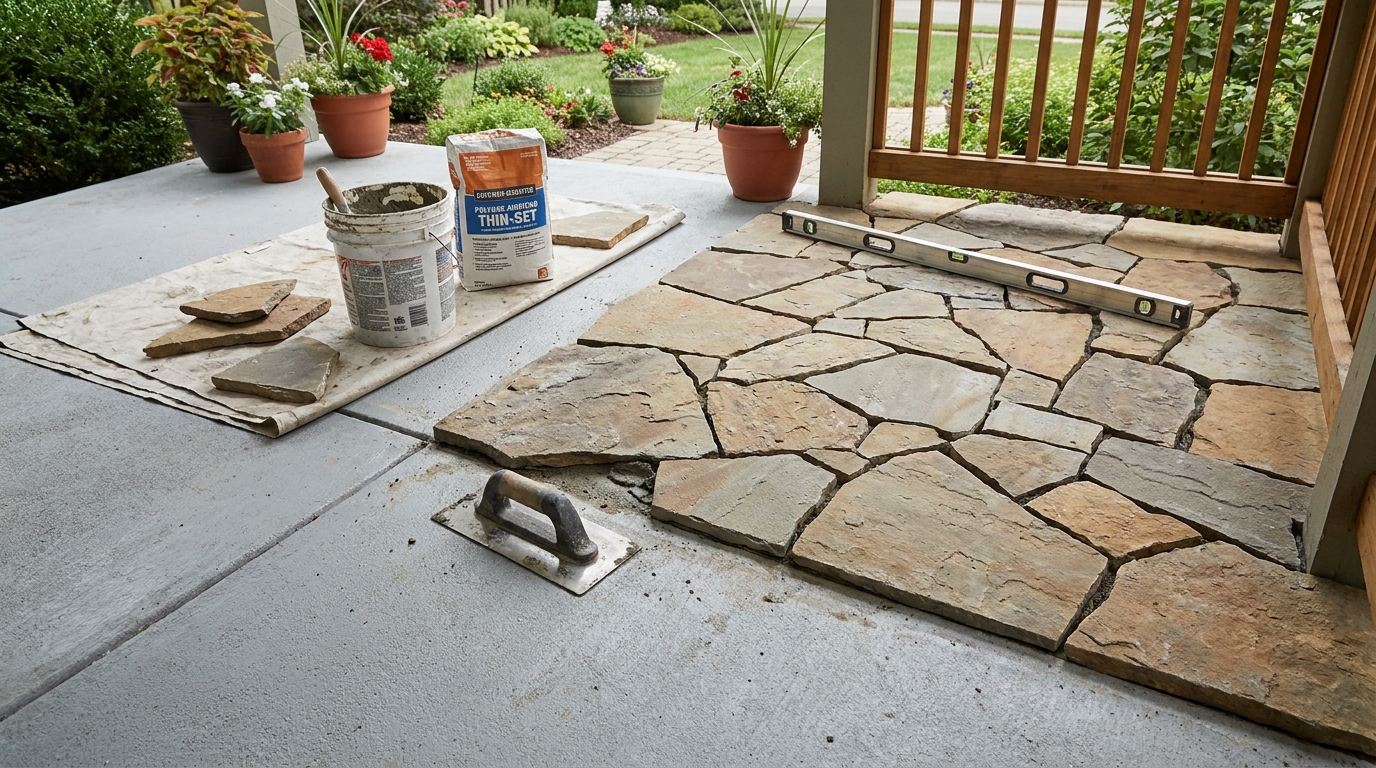
To lay flagstone over existing concrete without the stones popping loose, you must thoroughly clean the old pad, apply a polymer-modified bonding coat, and set the stones in a wet 1/2-inch (1.2 cm) layer of Type S mortar. Simply slapping standard masonry mortar onto a dry concrete slab is a guaranteed recipe for loose, rocking stones after the first winter freeze. Concrete is highly porous and will instantly suck the moisture out of wet mortar, ruining the cure and preventing a solid bond. By treating the existing porch as a structural subfloor and actively managing the chemical bond between the old and new masonry layers, you can massively upgrade your home's exterior for a fraction of the cost of tearing out and repouring a new entryway.
- Verify the concrete porch is structurally sound; surface cracks can be covered, but actively heaving slabs must be replaced.
- Always apply a 'slurry coat' of polymer-modified thinset to the concrete before placing the mortar bed to ensure an unbreakable chemical bond.
- Budget $8 to $15 per square foot for materials in 2026, depending heavily on your choice of natural stone.
- Use a masonry grout bag to fill the joints rather than smearing mortar across the stone, which permanently stains the surface.
Can My Concrete Porch Actually Support a Flagstone Overlay?
Before you buy a single piece of stone, you must evaluate the health of your existing concrete. Adding 1-inch (2.5 cm) thick flagstone and a 1/2-inch (1.2 cm) mortar bed will add roughly 18 pounds of dead weight per square foot to the porch. If the concrete is already failing, burying it under heavy stone will only accelerate the collapse.
Inspect the slab for movement. Hairline cracks that are less than 1/8-inch (0.3 cm) wide and level on both sides are standard shrinkage cracks and are perfectly safe to cover. However, if one side of a crack is higher than the other, or if the porch is actively pitching toward the house foundation instead of away from it, the underlying soil is compromised. Frost heave will shift the broken concrete over the winter, snapping your new flagstone joints like twigs.
- Safe to overlay: Hairline cracks, surface spalling, flaking finish, old paint, or minor stains.
- Do not overlay: Wide vertical fault lines, dropping corners, crumbling edges, or slabs sloping toward the house siding.
What Materials and Budget Are Required for the Job?
When laying stone over an existing rigid concrete base, you do not need thick, heavy patio stones. Opt for 'stand-up' or 'patio-grade' flagstone that is 1 to 1.5 inches (2.5 to 3.8 cm) thick. In 2026, expect to pay between $6 and $12 per square foot for common choices like Pennsylvania bluestone or sandstone at a local masonry yard.
For the adhesive layers, you need Type S masonry mortar for the bedding and joints, which runs about $10 per 80-pound (36 kg) bag. You will also need a 50-pound (22 kg) bag of high-quality polymer-modified thinset (around $25 to $35) to act as your bonding agent. Tool-wise, the most critical piece of equipment is a 4-inch or 4.5-inch (10 to 11 cm) angle grinder fitted with a diamond masonry blade for cutting the stone.
- 1 to 1.5-inch (2.5 to 3.8 cm) thick natural flagstone.
- Type S masonry mortar (one 80-lb bag covers roughly 12 square feet at 1/2-inch thickness).
- Polymer-modified thinset for the slurry coat.
- Angle grinder with a continuous rim diamond blade.
- Masonry grout bag and a convex jointer tool.
How Do You Prep the Old Concrete So the New Mortar Actually Sticks?
Mortar will not stick to dirt, algae, old paint, or oil. Pressure wash the entire porch using a 2,500 PSI machine. If the concrete was previously painted or sealed, you must physically remove that coating using a heavy-duty floor grinder or a cup wheel on your angle grinder. The pores of the concrete must be open to accept the new masonry.
Here is a critical judgement call that separates a professional mason from a struggling beginner. A beginner will often dampen the concrete and shovel standard Type S mortar directly onto the slab. The old concrete aggressively wicks the water out of the mortar, killing the cure and leaving a weak, crumbly bond. A professional will mix up a batch of polymer-modified thinset with extra water until it reaches the consistency of thick paint. Right before laying the mortar bed, the pro brushes this sticky 'slurry coat' onto the concrete and the back of the stone, ensuring a 100% chemical and mechanical bond.
- Remove all old paint, grease, and sealers down to bare concrete.
- Pressure wash the slab and let it dry entirely before beginning.
- Mix polymer-modified thinset to a paint-like consistency.
- Brush the thinset slurry onto the concrete just before applying the thicker mortar bed.
How Do You Dry-Fit and Cut Flagstone for Tight Joints?
Never mix mortar until every single stone has been cut and placed in a dry run. Lay out your flagstone directly on the dry porch, moving pieces around like a giant jigsaw puzzle. Aim for consistent gaps between the stones of 1/2-inch to 3/4-inch (1.2 to 1.9 cm). Avoid letting four corners meet in a cross pattern; always stagger your joints.
When a piece doesn't quite fit, overlap it with the adjacent stone and use a piece of chalk or a soapstone pencil to trace the cut line. Use your angle grinder with a diamond blade to score the line about a quarter-inch (0.6 cm) deep, then tap the waste side firmly with a masonry hammer to snap it off cleanly. Once your layout is perfect, use chalk to number the face of each stone and take a quick photo with your phone so you can recreate the pattern.
- Dry-fit the entire porch before opening a single bag of mortar.
- Keep joint gaps consistent, ideally around 1/2-inch (1.2 cm).
- Score cut lines with an angle grinder, then snap with a masonry hammer.
- Number your stones and photograph the layout before picking them up.
How Do You Mix and Trowel the Mortar Bed Under Each Stone?
Mix your Type S mortar with water in a wheelbarrow until it holds its shape on a trowel without slumping, similar to stiff peanut butter. Sweep the concrete clean, paint on a small section of your thinset slurry coat, and immediately trowel a 3/4-inch (1.9 cm) thick bed of the Type S mortar over the wet slurry.
This step introduces a major failure mode. The most common mistake is spreading a massive area of mortar all at once to save time. By the time you get to the fourth or fifth stone, the surface of the mortar has 'skinned over' in the air. The stone will sit on top of the mortar rather than bonding to it, guaranteeing it will pop loose in a few months. To avoid this, only spread enough mortar for the single stone you are about to lay. Paint the back of the stone with your slurry coat, drop it into the bed, and tap it down to exactly 1/2-inch (1.2 cm) thick using a rubber mallet.
- Mix Type S mortar to a stiff, peanut butter consistency.
- Apply mortar over the wet slurry coat one stone at a time.
- Never spread more mortar than you can cover in two minutes to prevent skinning.
- Tap stones level with a rubber mallet, checking constantly with a 2-foot (60 cm) spirit level.
How Do You Grout the Flagstone Joints So They Don't Wash Out?
Once all the stones are set, stay completely off the porch for at least 24 hours to let the bed harden. When you return to grout, do not pour wet mortar over the surface and attempt to squeegee it into the cracks like you would with bathroom tile. Flagstone is highly porous, and smearing mortar across the face will permanently stain it dull gray.
Instead, mix a fresh batch of Type S mortar slightly wetter than before and scoop it into a masonry grout bag. Twist the top of the bag and squeeze the mortar directly into the joints, overfilling them slightly. Let the mortar sit undisturbed until it becomes 'thumbprint hard'—meaning you can press your thumb into it and leave a mark without the mortar sticking to your skin (usually 30 to 45 minutes). Then, use a metal convex jointer tool to press the mortar down firmly, creating a smooth, weather-resistant recess.
- Wait a full 24 hours before stepping on the newly laid stones.
- Never smear mortar across natural stone to avoid permanent staining.
- Use a grout bag to precisely fill the joints from the bottom up.
- Tool the joints when thumbprint hard to compact the mortar and shed water.
How Long Do You Need to Wait Before Sealing the Finished Porch?
After tooling the joints, use a soft masonry brush to gently sweep away any loose mortar crumbs. If you accidentally dropped wet mortar onto a stone face, wait for it to dry completely, then use a stiff wire brush to scrub it off. Using a wet sponge on fresh mortar will only smear the stain wider.
Do not seal the porch immediately. Mortar and concrete require a full 28 days to cure and release their internal moisture. If you apply a sealer too early, you will trap this moisture, causing a cloudy white haze called efflorescence to bloom across the stone. After a month, apply a high-quality penetrating silane-siloxane sealer. Avoid glossy, film-forming sealers, which sit on top of the stone and become dangerously slippery in the rain.
- Brush away dried mortar crumbs with a soft bristle brush.
- Wait a mandatory 28 days for the mortar to fully cure before sealing.
- Use a breathable, penetrating masonry sealer.
- Avoid high-gloss sealers to maintain traction on outdoor steps and porches.
| Layer Name | Material Type | Primary Purpose | Application Method |
|---|---|---|---|
| Slurry Coat | Polymer-Modified Thinset | Creates chemical bond with old concrete | Brushed on wet, paint-like consistency |
| Bedding Layer | Type S Masonry Mortar | Supports weight and levels uneven stones | Troweled 3/4-inch thick over wet slurry |
| Back-Butter | Polymer-Modified Thinset | Bonds the stone directly to the bed | Brushed onto the back of the flagstone |
| Joint Grout | Type S Masonry Mortar | Locks stones together, sheds water | Squeezed via grout bag, tooled smooth |
Frequently asked questions
How thick should the mortar bed be under the flagstone?
Aim for a finished mortar bed thickness of about 1/2-inch (1.2 cm). Because natural flagstone varies slightly in thickness, you will lay a 3/4-inch (1.9 cm) bed and tap the thicker stones down deeper with a rubber mallet so the top surfaces sit perfectly flush with each other.
Do I need to install an expansion joint against the house?
Yes. Where the concrete porch meets the siding or foundation of the house, leave a 1/2-inch (1.2 cm) gap and do not fill it with rigid mortar. Instead, insert a foam backer rod and fill the gap with a flexible exterior polyurethane sealant. This allows the house and porch to shift independently without cracking the stone.
What happens if it rains heavily before the mortar cures?
Heavy rain on fresh mortar will wash the cement out of the mix and destroy its strength. If rain is forecast within 24 hours of your project, suspend a waterproof tarp over the porch using buckets or sawhorses. Do not lay the tarp directly on the wet stones, as it will trap condensation and smear the joints.
Can I use standard sand and gravel under the flagstone instead of mortar?
No. When laying stone over a solid, impermeable concrete slab, any sand layer will act like a sponge, trapping rainwater. The trapped water will freeze in winter, expanding and completely lifting the flagstone out of place. Over a concrete base, you must always use a wet mortar bed.
Keep reading
- How Much Paint Do You Actually Need for a Room?The tin says 400 square feet. Your wall says otherwise. Here is the arithmetic that actually holds up.
- DIY or Hire a Pro? A Decision Framework That Is Not About MoneyThe labour saving is real. So is the cost of a job done twice — and of tools you use once.
- Storage for Small Rooms That Does Not Make Them SmallerSmall rooms do not need more storage. They need storage that stops interrupting the eye.