How Do You Install Under-Cabinet LED Strip Lighting That Looks Built-In?
By Jim Vernon · 9 min read · Last updated
Bare LED strips stuck directly to cabinet bottoms create harsh glare and peel off within a year, but mounting them inside aluminum channels delivers flawless, permanent kitchen task lighting.
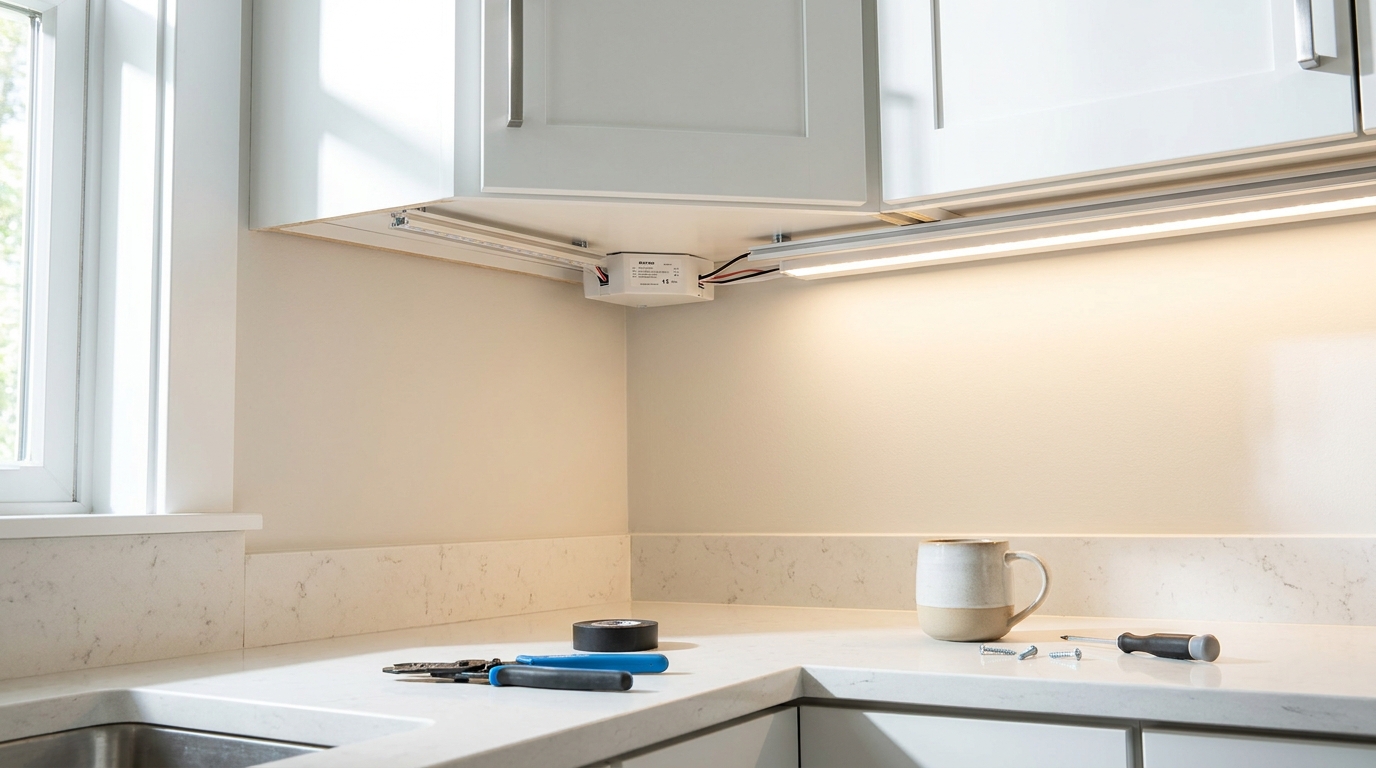
To install under-cabinet LED strip lighting that looks professionally built-in, you must mount 24-volt high-density LED tape inside diffused aluminum extrusions, power them with a single hardwired dimmable driver hidden in an upper cabinet, and route low-voltage wires through the cabinet bases to bridge gaps over sinks or stoves. Stop sticking cheap 12-volt strips directly to the wood; the adhesive will inevitably fail from cooking heat, and the exposed diodes will reflect individual, dotted bright spots onto your countertops. A proper hardwired installation costs between $150 and $350 in 2026 for an average kitchen and requires basic tools: a drill, wire strippers, a soldering iron, and a hacksaw. By isolating the power supply and using rigid channels, you create a seamless, shadow-free work surface that turns on seamlessly with your primary wall switch.
- Use 24-volt COB (Chip on Board) LED tape to eliminate visible light dots and prevent voltage drop over long runs.
- Always mount the tape inside aluminum channels with frosted diffusers to dissipate heat and protect the diodes from kitchen grease.
- Solder your low-voltage wire connections instead of using plastic clip-on connectors, which loosen over time from cabinet vibration.
- Hide a 120V-to-24V dimmable driver in an accessible upper cabinet or basement, running hidden 18-gauge wire to the first light strip.
What Type of LED Tape and Power Supply Do You Actually Need?
The foundation of a reliable under-cabinet system is 24-volt LED tape. While 12-volt kits dominate cheap online marketplaces, 24-volt tape carries power over longer distances without dimming at the far end (voltage drop). In 2026, the standard for kitchen task lighting is COB (Chip on Board) LED tape. Unlike older SMD (Surface Mounted Device) tape that spaces individual diodes out like runway lights, COB tape features a continuous line of phosphor that delivers a solid, unbroken beam of light.
To power this tape, you need a Triac dimmable LED driver. This rectangular metal box converts your home's 120-volt line voltage down to 24-volt low voltage while allowing you to use a standard LED wall dimmer switch. Always calculate your total wattage by multiplying the watts-per-foot of your tape by the total length, then size up your driver by 20 percent. If your tape draws 3 watts per foot and you have 15 feet (4.5 m) of cabinets, you need a driver rated for at least 54 watts, meaning a standard 60-watt driver is perfect.
- Select tape with a Color Rendering Index (CRI) of 90 or higher to make food colors look accurate.
- Choose a color temperature between 3000K (warm white) and 4000K (neutral white) for kitchen tasks.
- Purchase in-wall rated 18/2 (18 AWG, 2-conductor) stranded copper wire to connect the driver to the tape.
Why Must You Use Aluminum Channels and Diffusers?
A common failure mode for DIY under-cabinet lighting is relying entirely on the factory adhesive backing to stick bare LED tape directly to the underside of lacquered cabinets. Above appliances like coffee makers, toasters, and dishwashers, rising steam and heat quickly degrade the adhesive. Within six months, the tape droops into sticky loops, exposing the wiring to damage.
To avoid this, mount your tape inside aluminum extrusions. The aluminum acts as a critical heat sink, drawing operating heat away from the diodes and doubling their lifespan. Furthermore, the frosted polycarbonate covers snap over the top, diffusing the light. Without diffusers, bare LEDs will reflect off polished quartz or granite countertops like harsh laser pointers, causing extreme eye fatigue while chopping vegetables.
- Channels typically measure 0.6 inches (15 mm) wide by 0.3 inches (7.6 mm) deep, perfectly hiding behind the front cabinet lip.
- Use a standard hacksaw to cut the aluminum channel to length, filing the sharp edges so they do not cut the wires.
- Wipe the inside of the aluminum channel with rubbing alcohol before sticking the tape down to guarantee a permanent bond.
Where Should You Hide the Power Supply and Wiring?
Electrical code dictates that power supplies must remain accessible; you cannot permanently bury a driver behind drywall. The best location for the driver is typically inside the cabinet directly above the microwave or tucked onto the top shelf of a pantry. You will route a standard 120-volt Romex cable from your wall dimmer switch into this cabinet to feed the driver.
From the driver's low-voltage output, you will run 18/2 stranded wire inside the wall cavities or discreetly through the back corners of your cabinets, dropping down to the underside of the upper cabinets where the lighting begins. Keep the driver well-ventilated, leaving at least 2 inches (50 mm) of clearance around the metal casing so it can dissipate heat efficiently.
- Never plug an LED driver into a receptacle controlled by a standard wall dimmer; hardwire a Triac driver directly.
- Use wire staples to secure the low-voltage wire tightly to the cabinet corners so it does not snag on plates or glasses.
- Drill holes through cabinet dividers at the very top or bottom rear corners to route wires invisibly.
How Do You Measure and Cut the LED Tape Without Ruining It?
LED tape is manufactured with specific cut points, usually marked by small copper pads every 1 to 2 inches (25 to 50 mm). If you cut anywhere else, the entire segment between the cut and the nearest pad will go permanently dark. Always measure the inside length of your installed aluminum channel, subtract 1/4 inch (6.3 mm) to leave room for the wire connections and plastic end caps, and cut the tape at the nearest designated copper pad.
Use sharp household scissors to make a perfectly straight cut exactly down the center of the copper pad. This leaves half of the copper pad on the piece you are using, which provides enough surface area to attach your power wires.
- Never bend LED tape at a sharp 90-degree angle; it will snap the fragile internal circuitry.
- Test fit the tape inside the channel before removing the adhesive backing.
- If you cut off-center, trim the tape back to the next available cut point to ensure a clean electrical connection.
How Do You Connect Sections of Tape Over a Sink or Stove?
Kitchens rarely feature one continuous line of cabinets. You will inevitably need to jump a gap over a sink, a window, or a range hood. This is where a critical pro judgement call comes into play. Beginners almost always use the cheap, plastic snap-on clamp connectors included in budget kits. Pros know that the daily vibration of heavy cabinet doors slamming shut will slowly wiggle those plastic teeth loose, causing the lights to flicker or fail entirely.
Instead, pros solder 18-gauge stranded wire directly to the copper pads on the tape, sealing the joint with marine-grade heat shrink tubing. To bridge a gap, drill a discreet 1/4 inch (6.3 mm) hole up through the cabinet floor near the corner, run the insulated wire up through the cabinet, over the gap via the wall or ceiling, and drop it back down through the next cabinet to solder onto the next LED strip. This creates an uninterrupted, permanent circuit.
- Use a 40-watt soldering iron with a fine tip and rosin-core electrical solder for the strongest bond.
- Pre-tin the copper pads on the LED tape and the stripped ends of your wire before joining them.
- If you absolutely cannot solder, invest in heavy-duty, screw-down track connectors rather than plastic snap clips.
How Do You Mount the Channels to the Cabinets?
Positioning the light dictates how it functions. Do not push the aluminum channels against the back wall, or you will simply illuminate your backsplash while leaving the front edge of the counter in shadow. Mount the channels horizontally directly behind the front bottom lip (the valance) of the upper cabinets, pointing straight down.
Secure the aluminum channels using countersunk wood screws. Most upper cabinet floors are 3/4 inch (19 mm) thick, so use 1/2 inch (12.7 mm) screws to ensure you do not pierce through into the interior of the cabinet. Drill small pilot holes through the aluminum channel first, hold it in place, and drive the screws snug. Once the channel is mounted and wiped clean, peel the backing off the tape, press it firmly inside, and snap the frosted diffuser over the top.
- Place a screw every 12 to 16 inches (300 to 400 mm) to prevent the aluminum channel from bowing.
- If your cabinets do not have a front lip, mount the channels 2 inches (50 mm) back from the front edge.
- Run the lights continuously under the entire cabinet block, even over sections of counter you do not frequently use, for visual consistency.
How Do You Wire the System to a Wall Switch?
Integrating the under-cabinet lighting into your kitchen's main switchbank elevates the project from a weekend hack to a custom architectural feature. Turn off the breaker to the kitchen lighting circuit. You will need to install an LED-compatible dimmer switch in the wall box, connecting it to a new 14/2 (14 AWG) Romex cable that you snake up the wall and into the cabinet housing your LED driver.
Inside the cabinet, wire the black (hot), white (neutral), and bare (ground) wires from the Romex to the designated 120-volt input terminals on the driver. Then, wire your 18/2 low-voltage lines to the 24-volt positive and negative output terminals. Turn the breaker back on, test the dimming range, and adjust the trim dial on the side of the dimmer switch if the LEDs flicker at their lowest setting.
- Verify your wall switch specifically states it is compatible with LED and CFL loads.
- Ensure the red or positive wire connects strictly to the (+) output, and the black wire to the (-) output on the low-voltage side.
- Always use approved strain relief clamps where the 120-volt Romex enters the metal driver enclosure.
| Voltage Type | Maximum Continuous Run | Cut Point Frequency | Best Application |
|---|---|---|---|
| 12-Volt DC | 16 feet (4.8 m) | Every 1 inch (25 mm) | Short, single-cabinet runs like open shelving. |
| 24-Volt DC | 32 feet (9.7 m) | Every 2 inches (50 mm) | Standard kitchens with multiple cabinets and gap jumps. |
| 120-Volt AC | 150 feet (45.7 m) | Every 18 inches (450 mm) | Commercial outdoor perimeters; too bulky and unsafe for low cabinets. |
Frequently asked questions
Can I run LED tape directly over a gas stove?
No. Building codes and safety standards prohibit running low-voltage wiring and plastic LED tape directly over the open flame or extreme heat zone of a gas or electric range. The heat will melt the plastic diffuser and the tape casing. Always stop the run at the cabinet edge, run insulated wire up and over the range hood inside the wall or upper cabinetry, and resume the lights on the other side.
What do I do if my installed LED strip flickers when dimmed?
Flickering is almost always a compatibility issue between the wall dimmer and the driver. First, check that your wall switch is an LED-compatible model. Second, adjust the low-end trim lever hidden beneath the switch plate of the dimmer; moving this up slightly prevents the switch from dropping the voltage below the driver's minimum threshold. If it still flickers, ensure you purchased a Triac dimmable driver, not a standard non-dimmable power supply.
Can I use plug-in LED strips instead of hardwiring a driver?
Yes, but it compromises the built-in look. Plug-in adapters require sacrificing a valuable countertop outlet and leave an unsightly thick wire trailing down the backsplash. If you must use a plug-in adapter, try to route the wire up into an upper cabinet where a microwave is plugged in, keeping the countertop clear.
Keep reading
- How Much Paint Do You Actually Need for a Room?The tin says 400 square feet. Your wall says otherwise. Here is the arithmetic that actually holds up.
- DIY or Hire a Pro? A Decision Framework That Is Not About MoneyThe labour saving is real. So is the cost of a job done twice — and of tools you use once.
- Storage for Small Rooms That Does Not Make Them SmallerSmall rooms do not need more storage. They need storage that stops interrupting the eye.