How Do You Install Real Wood Shiplap Over Drywall Without Shrinkage Gaps?
By Jim Vernon · 10 min read · Last updated
Nothing ruins the timeless look of a new shiplap wall faster than watching the wood dry out in winter, leaving ugly, jagged gaps that expose the white drywall behind it.
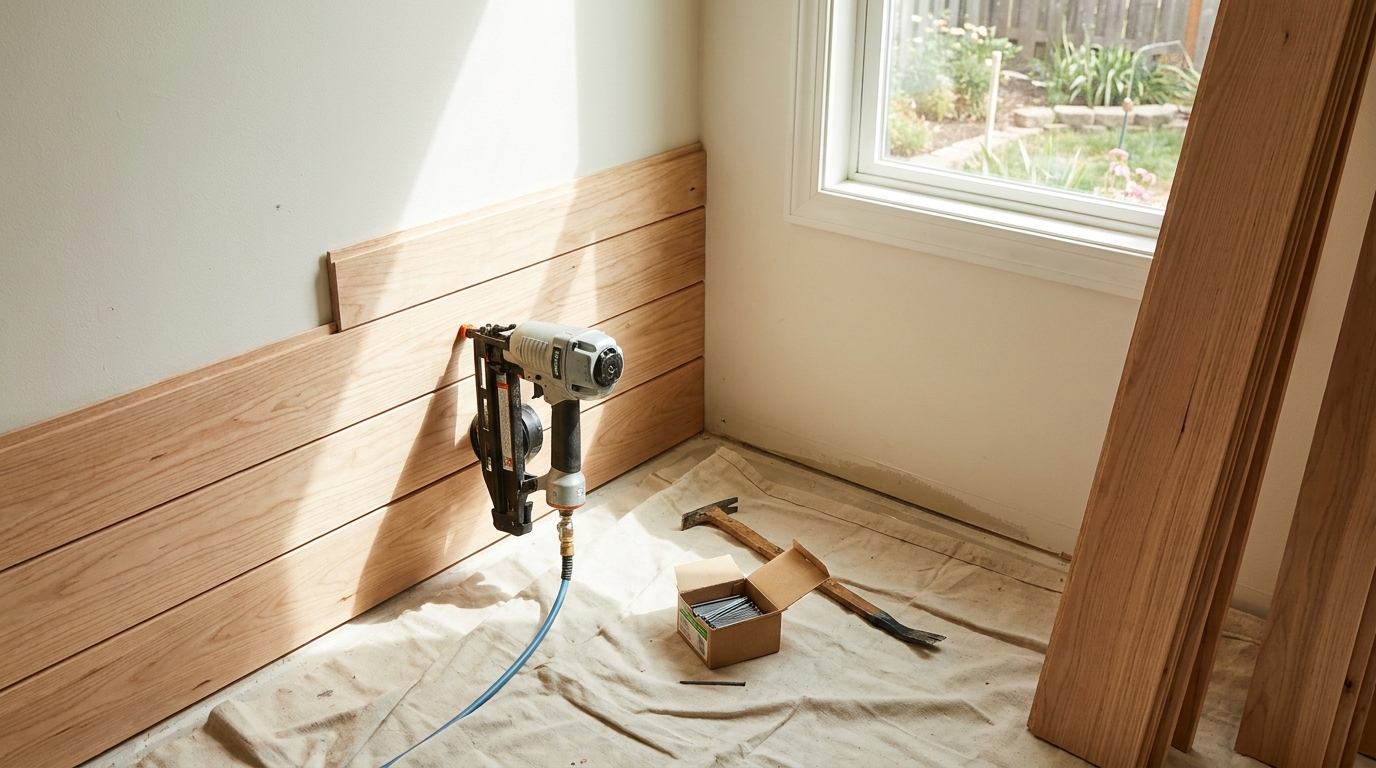
To install real wood shiplap over drywall without shrinkage gaps, you must acclimate the pine boards in the installation room for seven to ten days, paint dark stripes on the drywall behind every planned horizontal seam, and blind-nail the boards directly into the wall studs using 16-gauge, 2-inch (50 mm) finish nails. Solid wood naturally expands and contracts with your home's seasonal humidity shifts, meaning boards fitted perfectly tight in humid summer air will inevitably shrink when the winter furnace kicks on and dries the house out. By stabilizing the wood's moisture content before you make a single cut, leaving intentional perimeter expansion gaps, and masking the drywall behind the joints, you guarantee those microscopic seasonal shifts remain completely invisible to the eye.
- Acclimate solid wood shiplap in the room where it will be installed for 7 to 10 days before nailing to stabilize the moisture content.
- Paint a dark horizontal stripe on the drywall behind every seam to hide the bright white wall if the boards contract during winter.
- Use 16-gauge, 2-inch (50 mm) finish nails driven through the board's top flange directly into the wall studs to prevent sagging and bowing.
- Leave a 1/8-inch (3 mm) expansion gap at the ceiling and side walls to prevent buckling during humid summer months.
- Install electrical box extenders on all outlets and switches to meet local fire codes and keep the receptacles flush with the new wood face.
Why does real wood shiplap shrink and leave gaps?
Kiln-dried pine acts like a giant, rigid sponge. When the ambient humidity in your house rises above 50 percent during the summer, the cellular structure of the wood absorbs moisture from the air and swells. When winter arrives and your heating system drops indoor humidity down to 30 percent, the wood releases that moisture and shrinks. A standard 5.5-inch (14 cm) wide pine board can shrink by as much as 1/16-inch (1.5 mm) across its face during this cycle. If you install multiple boards stacked on top of each other, that cumulative shrinkage pulls the interlocking joints apart.
To stop this, you must acclimate the wood. Do not bring lumber straight from a cold lumberyard into a heated living room and nail it up the same afternoon. You must cross-stack the boards on the floor of the room where they will be installed, using small wood scraps as spacers so air can circulate around all four sides of every board. Leave them there for a minimum of seven to ten days while keeping the room at a normal living temperature of 68 degrees Fahrenheit to 72 degrees Fahrenheit (20 degrees Celsius to 22 degrees Celsius).
- Keep the room temperature steady during the entire acclimation period.
- Cross-stack the boards with spacers so air hits all faces evenly.
- Never store the wood in an unheated garage or damp basement prior to installation.
- Check the wood with a pin moisture meter if possible; aim for below 10 percent.
How much does a DIY real wood shiplap wall cost in 2026?
The cost of your project depends heavily on whether you choose raw knotty pine, pre-primed finger-jointed pine, or an MDF (medium-density fiberboard) alternative. While MDF is cheaper and does not shrink, it chips easily and degrades quickly if exposed to moisture, making real wood the superior long-term choice. In 2026, standard 1x6 kiln-dried, pre-primed pine shiplap costs between $3.50 and $5.50 per linear foot, which translates to roughly $4.00 to $7.00 per square foot of wall coverage.
For a standard 10-foot by 8-foot (3 m by 2.4 m) accent wall, you have 80 square feet (7.4 square meters) of space. You must always add a 15 percent waste factor for off-cuts and warped boards, bringing your total material order to 92 square feet (8.5 square meters). Including the shiplap, a box of 16-gauge nails, electrical box extenders, and a quart of touch-up paint, a DIY installation of this size will cost between $450 and $650 in materials.
- Budget $4.00 to $7.00 per square foot for pre-primed real pine shiplap.
- Always purchase 15 percent more material than your wall square footage requires.
- Factor in the cost of construction adhesive if your studs are irregularly spaced.
- Include the price of electrical box extenders for every outlet on the wall.
What is the secret to hiding gaps if the wood still shrinks?
A common failure mode for first-time installers is putting beautiful, crisp white shiplap perfectly tight over a bright white drywall surface without any background prep. Six months later, the winter air dries the wood out, the boards pull apart by a fraction of an inch, and the bright white drywall glares aggressively through the newly formed dark shadow line of the joint. It instantly ruins the illusion of solid wood paneling and looks like a cheap veneer.
You can avoid this completely with ten minutes of preparation. Before you start nailing boards, take a small roller and a quart of matte black or dark gray paint. Roll a 2-inch (50 mm) wide horizontal stripe exactly where every shiplap seam will land. If you do not want to measure out every single board height, simply roll the entire drywall surface with a coat of dark paint. If the boards ever shrink, the dark background will blend seamlessly into the shadow line of the rabbet joint, making the gap invisible.
- Use leftover dark gray or flat black paint for the background masking.
- Paint horizontal stripes precisely where the interlocking wood joints will sit.
- Allow the paint to dry completely before snapping any chalk lines for studs.
- Consider painting the entire wall dark if you are using narrow boards with many seams.
How do you prepare the drywall and find the studs safely?
You cannot rely on drywall alone to hold solid wood boards. You must anchor the shiplap directly to the structural framing of the house. Use a high-quality magnetic stud finder to locate the metal drywall screws holding the drywall to the studs. Once you find the top and bottom screws on a stud, use a 4-foot (1.2 m) spirit level to draw a continuous vertical pencil line down the entire wall. Repeat this for every stud, which are typically spaced 16 inches (40.6 cm) on center.
Before you start shooting long metal fasteners into those lines, investigate what might be hiding behind the drywall. If there is a bathroom on the other side of the wall or directly above it, there are likely PVC drain pipes or copper water supply lines running vertically alongside those studs. Using a 2-inch (50 mm) fastener directly into the center of a wood stud is generally safe, as building codes require protective metal strike plates over pipes that pass through the framing, but you should never drive a nail blindly into the empty cavity between the studs.
- Locate drywall screws with a magnetic stud finder to confirm stud centers.
- Draw continuous vertical lines down the wall to guide your nail gun.
- Verify the locations of plumbing lines by checking adjacent rooms.
- Avoid shooting nails into the empty drywall bays between the wooden studs.
How do you start the first row level on a crooked floor?
Never assume your floor or ceiling is perfectly level. If you simply rest the first board on the floor and build upward, a slight slant at the bottom will multiply with every row, leaving you with a wedge-shaped gap at the ceiling. First, pry off and remove the existing baseboards. You will reinstall them over the shiplap later. Starting at the bottom, hold your first shiplap board against the wall and place a long spirit level on its top edge.
Adjust the board until the bubble is perfectly centered. If the floor drops away on one side, you will need to slide wood shims under the board to hold it level. If the floor bows upward in the middle, you must use a compass to scribe that curve onto the bottom of the board and cut it away with a jigsaw. Always leave a 1/8-inch (3 mm) gap between the bottom of the board and the floor, as well as at the left and right adjoining walls, to allow for seasonal expansion. The baseboards and corner trim will easily cover these expansion gaps.
- Remove existing baseboards rather than resting the shiplap on top of them.
- Use a 4-foot (1.2 m) level to ensure the very first row is perfectly horizontal.
- Shim or scribe the bottom board to accommodate dips and humps in the floor.
- Leave a 1/8-inch (3 mm) perimeter gap at the floor, ceiling, and side walls.
Where exactly do you place the nails so the boards never bow?
Here is a classic judgement call a pro makes differently from a beginner: fastening strategy. A beginner will grab an 18-gauge brad nailer and shoot tiny, thin nails straight through the flat face of the wood into the drywall, hoping that a zigzag of construction adhesive will do the heavy lifting. As the wood expands and contracts, those thin brad nails offer zero resistance. The boards pull away from the wall, the adhesive tears the paper facing off the drywall, and the shiplap bows outward.
A pro uses a 16-gauge finish nailer loaded with 2-inch (50 mm) nails and uses a technique called blind nailing. Modern shiplap boards have an overlapping L-shaped rabbet joint. The pro places the board on the wall, rests the nose of the nail gun on the protruding lower flange (the tongue) of the board, and fires the nail at a slight downward angle directly into the wall stud. When the next board drops into place, it completely covers the nail head. You get massive holding power into the framing without having to fill and sand hundreds of nail holes on the face of the wood.
- Never use 18-gauge brad nails for solid pine; they lack the necessary holding power.
- Use a 16-gauge finish nailer with 2-inch (50 mm) nails to reach deep into the studs.
- Shoot nails at a 45-degree downward angle through the extended flange.
- Only face-nail the very bottom board where the baseboard will hide the holes.
How do you handle electrical outlets and switches safely?
When you add 1/2-inch to 3/4-inch (12 to 19 mm) of wood to your wall, your existing electrical outlets and light switches will suddenly be recessed deep inside the new wall surface. Leaving them like this is a major fire code violation, as sparks from a loose wire could ignite the exposed wood edges inside the cavity. You must bring the electrical box flush with the new shiplap surface.
Turn off the main breaker to the room and verify the power is dead using a non-contact voltage tester. Unscrew the receptacle and pull it slightly forward. Slide a plastic electrical box extender, often called a spark ring, over the receptacle and push it into the existing wall box. Measure the exact location of the box and transfer those dimensions to your shiplap board. Use an oscillating multi-tool to plunge-cut the rectangular hole perfectly, ensuring the wood fits snugly around the new box extender without gaps.
- Shut off the power at the main breaker before touching any outlets.
- Use a non-contact voltage tester to confirm the wires are entirely dead.
- Install plastic box extenders to bring the electrical enclosure flush with the wood.
- Cut precise, tight holes using an oscillating multi-tool or a jigsaw.
| Fastener Type | Holding Power | Best Application | Drawback |
|---|---|---|---|
| 18-Gauge Brad Nail | Low | MDF or thin decorative paneling only | Too thin to hold solid wood securely; allows boards to bow |
| 16-Gauge Finish Nail | High | Blind-nailing solid pine shiplap flanges | Leaves a slightly larger hole if you are forced to face-nail |
| 15-Gauge Finish Nail | Very High | Exterior siding or thick hardwood boards | Can split thin pine flanges; requires wood filler on the face |
| Construction Adhesive | Permanent | Bridging wide gaps between irregular studs | Tears the paper facing off the drywall if you ever remove it |
Frequently asked questions
Can I install shiplap directly over textured drywall?
Yes, you can install shiplap over textured drywall as long as the texture is not excessively deep or uneven, like heavy Spanish knockdown. The rigid wood boards will easily bridge minor bumps and stipple textures. However, you must ensure you are nailing securely into the wooden wall studs, not just relying on the uneven drywall surface for support.
Do I need to remove the baseboards before installing shiplap?
Yes, you should always remove the baseboards first. Leaving the baseboard in place forces you to rest the new shiplap directly on top of it, which creates an awkward, protruding ledge where dust and dirt will constantly gather. Remove the baseboard, run the shiplap down to the floor leaving a 1/8-inch (3 mm) expansion gap, and then reinstall the baseboard cleanly over the face of the new shiplap.
Is it safe to install solid wood shiplap in a bathroom?
It is safe to install solid wood shiplap in a powder room or a highly ventilated half-bath, but you should never install solid pine directly above a shower surround or bathtub. The intense, localized humidity from daily hot showers will force the wood to absorb moisture rapidly, leading to extreme expansion, warped boards, peeling paint, and eventual mold growth behind the wall. For wet zones, always use PVC composite shiplap instead.
Keep reading
- How Much Paint Do You Actually Need for a Room?The tin says 400 square feet. Your wall says otherwise. Here is the arithmetic that actually holds up.
- DIY or Hire a Pro? A Decision Framework That Is Not About MoneyThe labour saving is real. So is the cost of a job done twice — and of tools you use once.
- Storage for Small Rooms That Does Not Make Them SmallerSmall rooms do not need more storage. They need storage that stops interrupting the eye.