How Do You Install an Under-Sink Reverse Osmosis Water Filter System?
By Jim Vernon · 8 min read · Last updated
Stop spending hundreds on bottled water and hauling heavy jugs when your own plumbing can do the work for you.
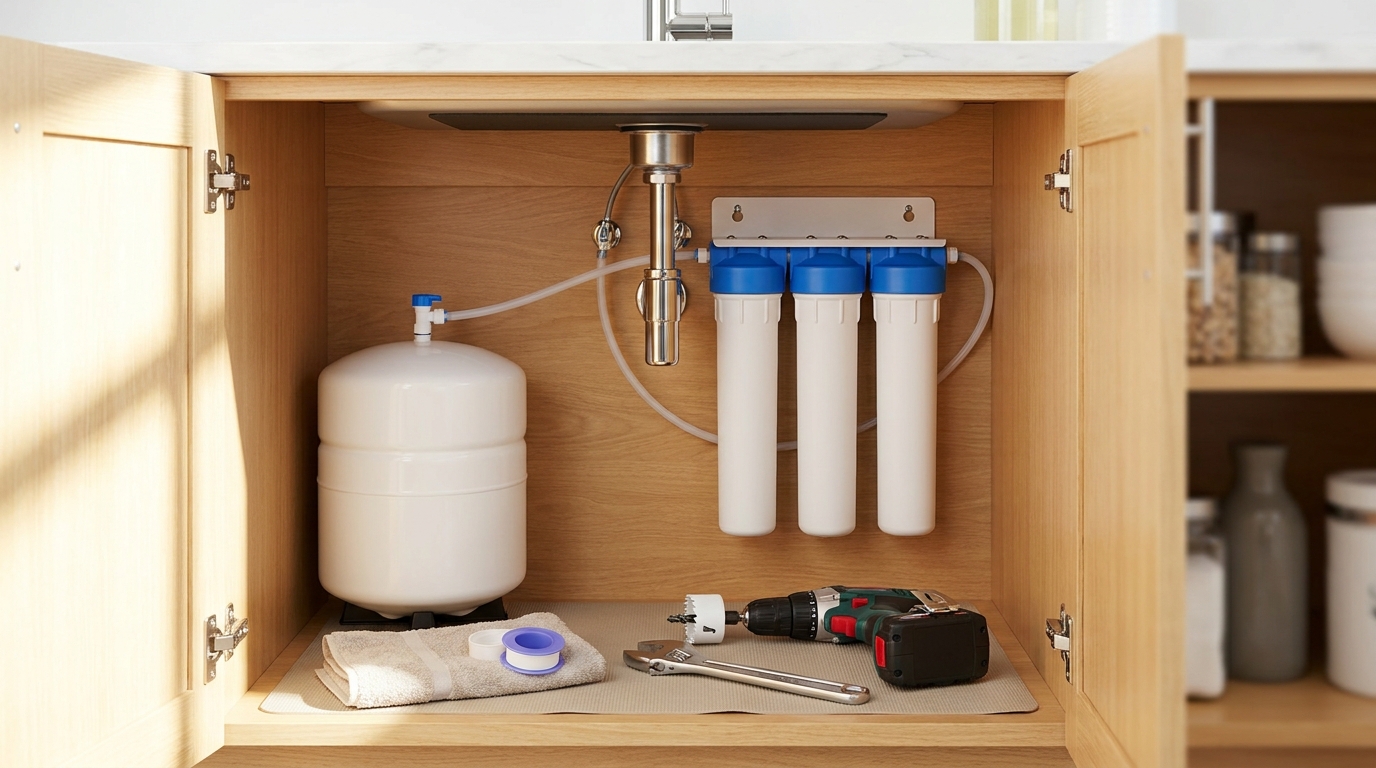
To install an under-sink reverse osmosis (RO) system, you must mount a dedicated dispenser faucet, tap into the cold water supply line with a feed adapter, attach a drain saddle to the sink’s tailpiece, and connect the filter manifold and storage tank using flexible polyethylene tubing. This project takes two to four hours and requires basic hand tools alongside a specialty hole saw if your sink lacks an open accessory hole. Expect to spend between $150 and $400 in 2026 for a reliable five-stage unit, which will process your tap water through a semi-permeable membrane to strip out dissolved solids, heavy metals, and chlorine.
- RO systems require a dedicated cold water feed, a waste drain connection, and an independent dispenser faucet.
- Never cut plastic water tubing with scissors; always use a sharp blade to make square cuts that seat deeply into push-fittings.
- Mount the drain saddle on the vertical pipe above the P-trap to prevent sewer gas from destroying the membrane.
- Allow two full hours for the 3.2-gallon (12-liter) tank to fill, and empty it completely before drinking your first glass.
What Tools and Materials Will You Actually Need?
Before unpacking your filter system, empty your under-sink cabinet completely. Working around a garbage disposal and drain pipes is cramped, and you will need room to maneuver your arms and tools. The installation requires an adjustable wrench, a Phillips-head screwdriver, a power drill, and a sharp utility knife or specialized tubing cutter.
If your sink or countertop already has a spare hole covered by a blanking plate or an old soap dispenser, you can skip the most difficult step. If not, you will need to purchase a specialty drill bit to bore a hole for the new RO faucet. For stainless steel sinks, a standard titanium step bit works perfectly. For granite, quartz, or marble countertops, you must use a diamond grit hole saw, which typically adds $20 to $40 to your 2026 project budget. Check your specific faucet's instructions, but most require a hole between 1/2-inch (13 mm) and 1 3/8-inch (35 mm) in diameter.
- Adjustable wrench and slip-joint pliers.
- Power drill with a 1/4-inch (6 mm) bit for the drain pipe.
- Diamond hole saw or step bit for the countertop.
- Utility knife or dedicated plastic tubing cutter.
- Teflon tape (plumber's tape) for threaded metal connections.
How Do You Drill a Granite Countertop Without Cracking It?
Drilling into expensive stone is where most homeowners panic, but the process is completely safe if you manage heat and friction. High speeds and dry bits will scorch the stone and crack your counter. To prevent this, roll a small piece of plumber's putty into a snake and form a ring around your drilling location. Pour a small amount of water inside this ring to create a cooling puddle for your drill bit.
Start the drill at a 45-degree angle at a low speed. Once the diamond bit bites into the stone and creates a crescent-shaped groove, slowly tip the drill up to a 90-degree vertical position. Do not push down with heavy force; let the abrasive diamond grit grind away the material at its own pace. It usually takes three to five minutes of steady, medium-speed drilling to punch through a standard 1.5-inch (38 mm) thick granite slab. Clean up the slurry with a rag, drop the faucet shank through the hole, and tighten the mounting nut from below.
How Do You Connect the RO Feed Valve to the Plumbing?
The RO system needs a dedicated water supply, which you will pull directly from the cold water shut-off valve under your sink. Never connect an RO system to the hot water line, as hot water will instantly melt and destroy the delicate semi-permeable membrane. Locate the cold water angle stop on the wall and turn it clockwise until the water is completely shut off. Open your main kitchen faucet to relieve the pressure in the line.
Unscrew the existing flexible metal hose from the angle stop. Your kit includes a T-shaped feed water adapter. Thread this adapter onto the angle stop, and then reattach the sink's flexible hose to the top of the adapter. Most modern adapters feature internal rubber gaskets that create a watertight seal simply by tightening them with a wrench. If your adapter is bare metal without a gasket, wrap the male threads tightly with three loops of Teflon tape before assembly. Once secured, leave the small RO feed valve in the closed position.
Where Do You Install the Drain Saddle Valve to Avoid Sewer Gas?
Because reverse osmosis forces water through a microscopically tight membrane, it produces wastewater that must be flushed away. This is handled by a drain saddle—a plastic clamp that wraps around your sink's PVC drain pipe. A common failure mode is installing the drain saddle on a horizontal pipe or below the sink's P-trap. If you mount it below the P-trap, corrosive sewer gases will travel up the drain line, ruining the reverse osmosis membrane and potentially venting into your kitchen. If you put it on a horizontal run, the wastewater splashes constantly, creating a loud dripping noise.
To avoid these issues, always drill the 1/4-inch (6 mm) drain hole on the vertical tailpiece above the P-trap, preferably facing away from the dishwasher inlet. Stick the self-adhesive foam gasket to the inside of the saddle, align the hole in the saddle perfectly with the hole you just drilled, and tighten the two machine screws evenly so the clamp grips the pipe securely without crushing it.
How Do You Cut and Seat Plastic Tubing So It Never Leaks?
Connecting the various components requires running lengths of flexible polyethylene tubing. A judgement call a pro makes differently from a beginner is how they handle these plastic lines. A beginner will usually grab a pair of scissors or wire cutters to snip the 1/4-inch (6 mm) tubing to length. This crushes the pipe slightly out of round, almost guaranteeing a slow, hidden drip when inserted into a push-to-connect fitting.
A pro always uses a dedicated tubing cutter or a sharp razor blade pressed against a flat block to make a perfectly square, uncrushed cut. They then use a marker to draw a line 5/8-inch (16 mm) from the end of the tube. When they push the tube into the fitting, that mark provides a visual confirmation that the line has bypassed the internal O-ring and is fully seated. Once seated, pull back gently on the tube to lock the internal metal teeth in place, and slide the plastic locking clip under the fitting's collar.
How Do You Position the Filter Manifold and Storage Tank?
Under-sink real estate is notoriously tight, so map out your component locations before driving any screws. Mount the primary filter manifold to the side wall of the cabinet. Keep it elevated at least 2 inches (5 cm) off the cabinet floor; you will need this clearance to unscrew the 10-inch (25 cm) filter housings when it is time for maintenance. Do not mount it on an uninsulated exterior wall if your location experiences winter temperatures below 40°F (4°C), as frozen lines will crack the plastic housings.
The 3.2-gallon (12-liter) steel storage tank comes pre-pressurized to 5 to 7 PSI (0.3 to 0.5 bar) and requires a solid, flat base. It does not have to sit directly under the manifold. If your primary cabinet is full of disposal units and cleaning supplies, you can run the tank line through a small hole into an adjacent cabinet. Keep the tubing run under 10 feet (3 meters) to prevent pressure drops at the faucet.
Why Must You Flush the System Before Drinking the Water?
Once all tubing is connected, slowly open the cold water angle stop, followed by the small RO feed valve. You will hear water begin to rush into the pre-filters. Check every connection point with a dry paper towel to catch any weeping moisture immediately. Leave the system alone for two hours so the slow drip of purified water can fill the storage tank.
Do not drink this first batch of water. The new carbon filters contain loose black dust, and the membrane contains food-grade preservatives. Open the RO dispenser faucet and let the entire tank drain until the flow drops to a slow trickle. Close the faucet, wait another two hours for the tank to refill, and your system is fully primed, flushed, and ready to provide pure drinking water.
| Filter Stage | Function | Lifespan | Estimated 2026 Replacement Cost |
|---|---|---|---|
| Stage 1: Sediment Pre-Filter | Removes rust, sand, and large particulates | 6 Months | $10 - $15 |
| Stage 2 & 3: Carbon Block | Removes chlorine and protects the RO membrane | 6 Months | $15 - $25 |
| Stage 4: RO Membrane | Strips heavy metals, fluoride, and dissolved solids | 2 - 3 Years | $40 - $70 |
| Stage 5: Post-Carbon Filter | Polishes the water's taste before it hits the faucet | 12 Months | $15 - $20 |
Frequently asked questions
Does a reverse osmosis system require high water pressure?
Yes, standard under-sink RO units require incoming city or well water pressure between 40 PSI and 80 PSI (2.7 to 5.5 bar) to force water through the semi-permeable membrane. If your home pressure drops below 40 PSI, the system will produce very little water and waste heavily down the drain. In that case, you will need to buy a system equipped with an electric booster pump, which adds about $75 to the initial cost.
Can I connect my RO system to my refrigerator's ice maker?
Yes, you can run a 1/4-inch (6 mm) polyethylene line from the RO manifold directly to your refrigerator. You will need a simple push-to-connect T-fitting spliced into the line that runs between the final filter and the sink dispenser. Ensure your fridge does not have a 'smart' filter that requires high pressure to bypass, as the RO tank only outputs around 40 PSI.
Why is my reverse osmosis drain making a loud gurgling noise?
A continuous, loud gurgling sound usually means the saddle valve is misaligned with the drilled pipe hole, or the drain line is pushed too far into the pipe, obstructing the flow of water. A brief hissing or trickling sound for an hour or two after you draw a glass of water is completely normal—this is just the system flushing wastewater down the pipe as it actively refills the storage tank.
Keep reading
- How Much Paint Do You Actually Need for a Room?The tin says 400 square feet. Your wall says otherwise. Here is the arithmetic that actually holds up.
- DIY or Hire a Pro? A Decision Framework That Is Not About MoneyThe labour saving is real. So is the cost of a job done twice — and of tools you use once.
- Storage for Small Rooms That Does Not Make Them SmallerSmall rooms do not need more storage. They need storage that stops interrupting the eye.