How Do You Fix Squeaky Wood Stairs From Above Without Removing Treads?
By Jim Vernon · 9 min read · Last updated
A squeaky staircase announces your midnight trips to the kitchen to the entire house, but you can silence the racket forever without tearing up your finished treads.
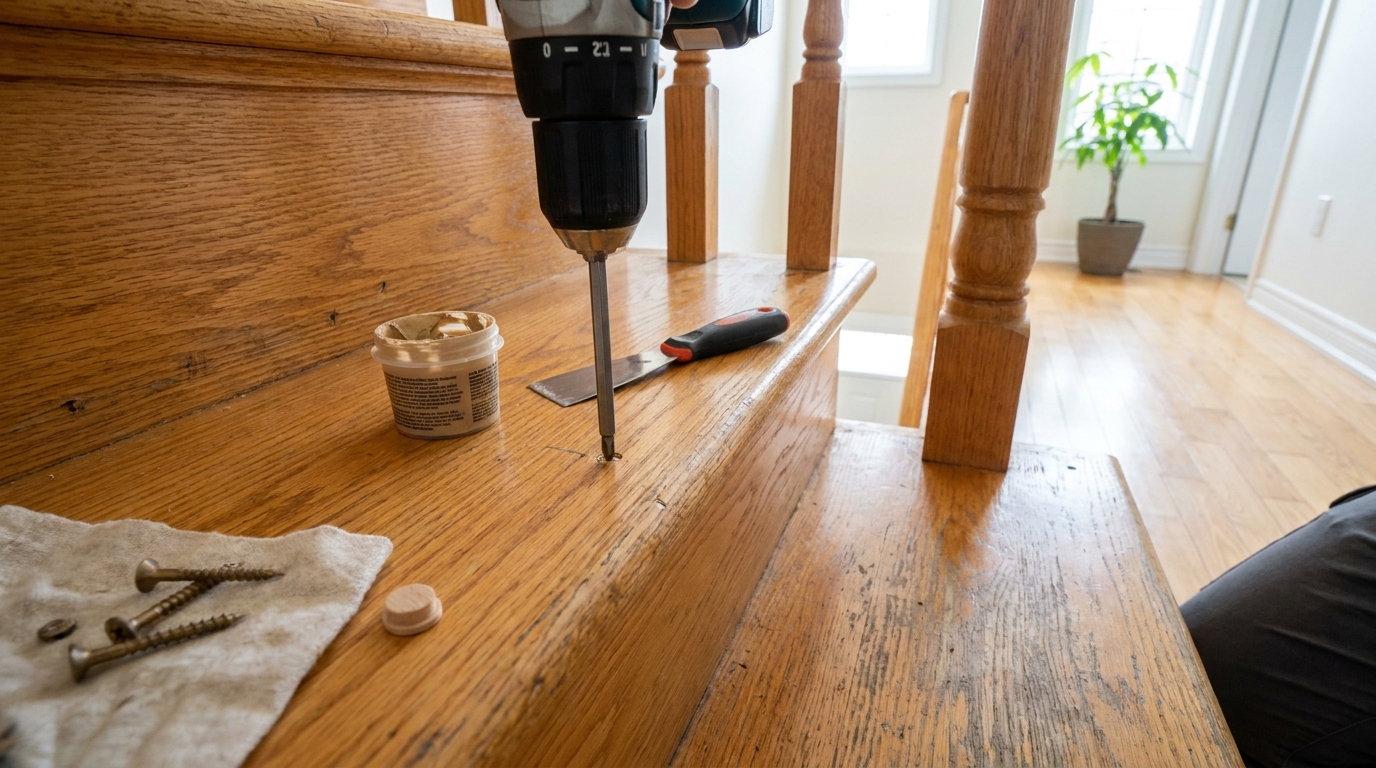
To fix a squeaky wood stair from above without removing the tread, you must drive specialized breakaway screws through the finished tread and into the underlying structural stringers. This eliminates the wood-on-wood friction causing the noise. Start by standing on the tread to compress the loose gap. Using a specialized depth-control driving fixture, sink a scored screw directly into the joist until it bottoms out. Then, use the fixture to snap off the exposed head below the surface of the wood. Finally, fill the tiny remaining hole with a stain-matched wood putty to render the repair invisible.
- Most stair squeaks are caused by loose nails rubbing against flexing wood when you step on the tread.
- Breakaway screw kits allow you to secure treads from the top down while snapping the screw head off 1/8-inch (3 mm) below the surface.
- Finding the hidden center stringer requires acoustic tapping and a 1/16-inch (1.5 mm) pilot hole to prevent ruining your finished wood.
- Squeaks at the back of the tread require screws driven at a 45-degree angle into the riser, not straight down.
- If the underside of your staircase is exposed, always fix squeaks from below using construction adhesive and standard wood screws for a completely hidden repair.
Why Do Wood Stairs Squeak in the First Place?
Wood stairs squeak purely because of friction. When you step on a tread, the sudden weight causes the wood to flex. If the original nails holding the tread to the stringer (the zigzag structural frame underneath) or the riser (the vertical board) have loosened over the years, the wood components rub against each other or slide up and down against the metal nail shafts. This microscopic movement creates the high-pitched squeak.
This problem is highly seasonal. In northern climates (USDA Zones 3 to 6), aggressive winter heating forces indoor humidity down below 30 percent. This dry air causes the wood treads and stringers to shrink slightly, pulling them further away from their original fasteners. When summer returns and humidity rises, the wood swells and the squeaks may temporarily disappear, but the structural looseness remains.
- Friction between loose nails and flexing wood causes the high-pitched squeak.
- Indoor humidity drops below 30 percent shrink the wood, making squeaks worse in winter.
What Tools and Materials Do You Need to Silence a Squeaky Stair?
To permanently fix the squeak from above, you need a breakaway screw kit specifically designed for flooring and stairs. In 2026, a standard kit containing an alignment fixture, a specialized drill bit, and 50 scored breakaway screws costs between $25 and $35. These kits are often sold under brand names like Squeeeeek No More.
You will also need a standard power drill, a hammer, a tape measure, and a stud finder. If you are dealing with minor friction squeaks that don't require screws, dry powdered graphite is necessary. To finish the job invisibly, purchase a small tub of stain-matched wood filler (typically $8 to $12) and a sheet of 220-grit sandpaper.
- Breakaway floor repair screw kits ($25–$35).
- Stain-matched wood filler ($8–$12).
- Dry powdered graphite for minor surface friction.
- 220-grit sandpaper for flush-sanding the filler.
How Do You Locate the Hidden Stringers Beneath the Treads?
While a beginner will often guess the stringer location and turn their stairs into Swiss cheese with unnecessary holes, a pro uses a combination of geometry and acoustic tapping to find the exact center of the support. Most residential stairs have three stringers: one on each outer edge and one dead center, usually 16 inches (406 mm) or 18 inches (457 mm) from the wall.
To find the center stringer, hold the head of your hammer and lightly tap the handle across the width of the tread. The sound will change from a hollow, drum-like echo to a dull, solid thud directly over the stringer. Once you find the dull spot, drill a tiny 1/16-inch (1.5 mm) pilot hole. If the drill bit pulls up wood shavings for more than 1 inch (25 mm) of depth, you have successfully hit the structural stringer and can proceed with the primary repair.
- Center stringers are typically 16 inches (406 mm) to 18 inches (457 mm) from the edge.
- Tap the tread with a hammer handle to listen for a dull, solid thud.
- Always drill a 1/16-inch (1.5 mm) pilot hole to verify solid wood before driving a large screw.
How Do You Install Breakaway Screws to Lock the Tread Down?
Once you have located the stringer directly under the squeak, place the kit's plastic driving fixture flat on the tread over your pilot hole. Crucially, you must stand your full body weight on the tread next to the fixture. This compresses the gap between the wood and the stringer, ensuring the screw locks the pieces together in their tightest position.
Using your drill, drive the specialized scored screw down through the center hole of the fixture until the drill bottoms out against the plastic. The screw features a built-in weak point that stops just below the wood's surface. Slip the fixture's snapping slot over the exposed screw head and tilt it sharply side to side. The head will cleanly snap off about 1/8-inch (3 mm) below the surface of the tread, leaving only a tiny hole.
- Apply your full body weight to compress the tread tight against the stringer.
- Drive the screw through the alignment fixture until it bottoms out.
- Snap the head off, leaving the shaft 1/8-inch (3 mm) below the wood surface.
What If the Squeak Is at the Back of the Tread Against the Riser?
If the squeak originates where the back of the tread meets the vertical riser behind it, driving screws into the underlying stringer won't stop the noise. A common failure mode for beginners is driving a screw straight down at the extreme back of the tread. Because the riser board sits perfectly vertical under that back edge, a straight-down screw usually misses the riser entirely, passing through thin air and leaving a useless hole.
To properly fix a tread-to-riser squeak from above, you must drive the screw at a 45-degree angle. Place the driving fixture near the back edge, angle your drill backward toward the riser, and drive the breakaway screw through the tread and into the face of the riser behind it. Apply downward and backward pressure with your foot while driving the screw to pull the seam tight.
- Never drive a screw straight down at the extreme back edge of a tread.
- Drive screws at a 45-degree angle backward to catch the vertical riser.
- Stand on the back of the tread to compress the joint while drilling.
How Do You Stop Squeaks Caused by the Front of the Tread?
Sometimes the bottom edge of a riser rubs against the back of the tread underneath it. If you can see a visible gap between the bottom of the riser and the tread, driving screws from the top is ineffective. Instead, you need to immobilize the joint using wood shims.
Coat a thin hardwood shim with carpenter's wood glue and tap it into the widening gap using a hammer. Tap it only until the joint feels tight; driving it too hard can lift the riser and create new squeaks elsewhere. Wipe away any excess glue with a damp rag. Once the glue sets, use a sharp utility knife to score the shim deeply and snap it off flush with the joint. This completely wedges the gap so the wood can no longer flex.
- Use thin hardwood shims to fill gaps between the bottom of a riser and the tread.
- Coat the shim in wood glue for a permanent, shift-proof hold.
- Score the shim deeply with a utility knife for a clean, flush snap.
How Do You Invisibly Patch the Screw Holes?
Because the breakaway screws snap off below the surface, you are left with a tiny, clean hole about the diameter of a finish nail. Press a small amount of stain-matched wood filler into the hole using your fingertip or a plastic putty knife. Leave the filler slightly mounded over the hole to account for shrinkage as the putty dries.
Once the filler is completely dry, which typically takes 30 to 45 minutes, lightly sand it flush using 220-grit sandpaper. Only sand the spot over the putty; aggressive sanding will scuff the surrounding polyurethane finish. If you have carpeted stairs, the process is even easier: you can drive the breakaway screws right through the carpet without cutting it. The screw head snaps off below the carpet backing, sinking into the wood and leaving no visible trace.
- Overfill the hole slightly with wood putty to account for drying shrinkage.
- Sand gently with 220-grit sandpaper to avoid scratching the clear coat.
- Breakaway screws can be driven directly through carpet with no patching required.
When Should You Abandon Fixing From Above and Open Up the Back?
Fixing stairs from above is a compromise for finished spaces. If your staircase is exposed underneath, such as over an unfinished basement or inside an under-stair storage closet, fixing the squeaks from below is always the superior, permanent pro method. Working from below allows you to secure the structure without putting a single hole in your finished hardwood.
From underneath, you can drive standard 2-inch (50 mm) construction screws upward through the 1.5-inch (38 mm) thick stringer and into the bottom of the treads. You can also apply heavy-duty construction adhesive along every joint and tap glue-coated wooden wedges into any loose gaps between the treads and risers. If you have access, spend $15 on adhesive and a box of screws to do the job right from the bottom.
- Open access under stairs allows for completely invisible, permanent repairs.
- Use 2-inch (50 mm) screws driven upward through the stringer into the tread.
- Apply heavy-duty construction adhesive to all accessible joints to permanently stop flex.
| Method | Best Used For | 2026 Cost Range | Difficulty | Visibility |
|---|---|---|---|---|
| Breakaway Screw Kit | Treads pulling loose from stringers | $25 - $35 | Beginner | Barely visible holes |
| Dry Lubricant (Graphite) | Minor surface rubbing between tread and riser | $5 - $10 | Novice | Invisible |
| Wood Shims with Glue | Widening gaps at the bottom of the riser | $10 - $15 | Intermediate | Visible if not painted |
| Screwing and Gluing from Below | Stairs with open, unfinished access underneath | $15 - $20 | Intermediate | Completely hidden |
Frequently asked questions
Will WD-40 stop my wood stairs from squeaking?
Do not use WD-40 or any liquid oil on wood stairs. It will soak into the wood, ruin the stain and clear coat, create a dangerous slipping hazard, and eventually dry out, causing the squeak to return worse than before. If you must use a lubricant for minor friction, always use a dry powder like graphite.
Can I use regular deck screws to fix squeaky stairs from above?
While regular deck screws will physically hold the tread down, they are thick and highly prone to splitting older hardwood treads. Furthermore, their large heads are almost impossible to hide cleanly without drilling massive countersink holes and gluing in wooden dowel plugs, which looks messy and obvious.
How long should screws be to secure a stair tread from underneath?
If you are fixing the stairs from underneath, use 2-inch (50 mm) wood screws. This length is sufficient to pass completely through a standard 1.5-inch (38 mm) thick stringer and bite deeply into a standard 1-inch (25 mm) tread without poking through the top surface.
Why do my stairs stop squeaking in the summer?
Wood naturally expands and contracts with ambient humidity. In the humid summer months, the wood treads and structural stringers swell with moisture. This swelling temporarily tightens the gaps around the old, loose nails, silencing the friction. When winter heating dries the house out, the wood shrinks and the squeaks return.
Keep reading
- How Much Paint Do You Actually Need for a Room?The tin says 400 square feet. Your wall says otherwise. Here is the arithmetic that actually holds up.
- DIY or Hire a Pro? A Decision Framework That Is Not About MoneyThe labour saving is real. So is the cost of a job done twice — and of tools you use once.
- Storage for Small Rooms That Does Not Make Them SmallerSmall rooms do not need more storage. They need storage that stops interrupting the eye.