How Do You Build a Wood Fence Gate That Actually Won't Sag?
By Jim Vernon · 8 min read · Last updated
A dragging wooden gate is not a stubborn annoyance you have to live with; it is a structural cry for help that takes just two hours and fifty bucks to fix permanently.
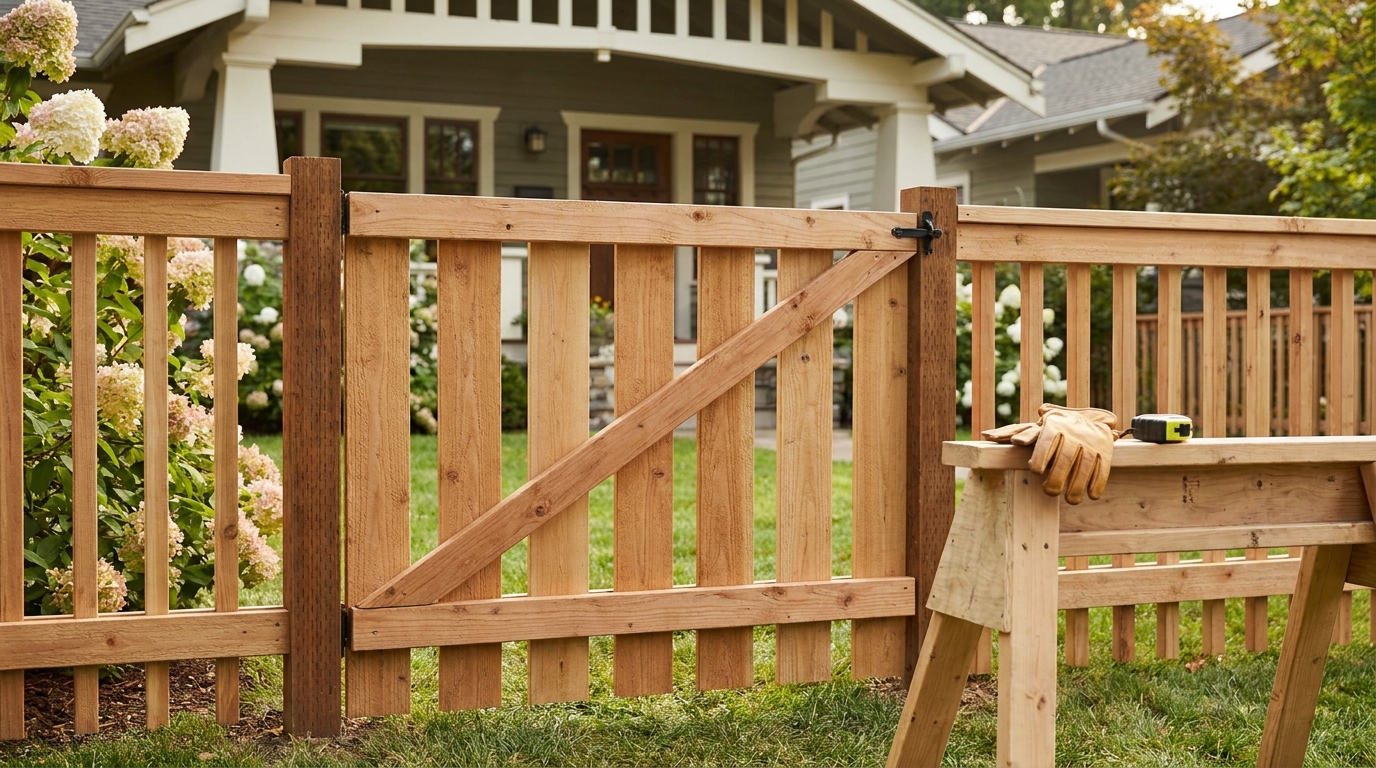
To build a wood fence gate that will not sag, you must install a diagonal cross-brace running from the bottom hinge corner up to the top latch corner. This transfers the weight of the unsupported latch side directly into the hinge post, which must be a 4x4 (10x10 cm) or 6x6 (15x15 cm) pressure-treated timber set at least 36 inches (91 cm) deep in concrete. Without this specific bracing geometry and an unyielding post, gravity will pull the latch side down into the dirt within a single season.
- Wood diagonal braces must run from the bottom hinge up to the top latch to work under compression.
- Single wood gates should never exceed 48 inches (122 cm) in width without switching to a double-gate design.
- Hinge posts for standard 72-inch (183 cm) tall gates require a depth of at least 36 inches (91 cm) and 150 pounds (68 kg) of concrete.
- Professional gate hardware in 2026 costs between $45 and $70 and should utilize heavy-duty strap hinges spanning one-third of the gate width.
Why Do Most Wood Fence Gates Sag So Quickly?
The most common failure mode in DIY fence building is installing the diagonal wood brace backward, running it from the top hinge down to the bottom latch. Wood fibers and mechanical joints are inherently weak under pulling forces, known as tension. When the unsupported weight of the gate pulls down on a backward brace, the screws strip out, the joints separate, and the frame slowly deforms into a leaning parallelogram.
By contrast, a brace running from the bottom hinge corner up to the top latch corner operates under compression. The weight of the gate pushes down into the brace, wedging it tighter into the frame and transferring the load directly into the heavy hinge post. Gravity is constantly trying to twist a 72-inch (183 cm) tall privacy gate into the ground, especially when wet pressure-treated lumber adds up to 80 pounds (36 kg) of dead weight. Utilizing compression is the only way to counteract that constant gravitational pull.
- Backward diagonal braces pull apart under tension instead of locking together under compression.
- Standard zinc screws sheer off or rust, loosening the frame joints over time.
- Wet lumber shrinks as it dries, creating slop in poorly cut corner joints.
What Are the Exact Dimensions for a Sag-Free Gate?
The absolute maximum width for a single wooden privacy gate is 48 inches (122 cm). Beyond this width, the leverage exerted on the hinge post becomes too great for standard residential lumber. If you have an opening wider than 48 inches (122 cm), you must build a double gate. The vertical frame pieces, called stiles, and horizontal pieces, called rails, should always be constructed from sturdy 2x4 (5x10 cm) cedar or pressure-treated pine to provide a rigid backbone for your fence pickets.
You must leave a 0.5-inch (1.3 cm) gap between the gate and the latch post, and another 0.5-inch (1.3 cm) gap on the hinge side. Wood swells significantly during heavy rain and high humidity. If you build the gate with tight tolerances, it will swell shut and bind during wet seasons, forcing you to plane or cut it down later. The gap beneath the gate should be 2 to 3 inches (5 to 7.6 cm) to accommodate winter snow accumulation or organic debris like fallen leaves.
- Keep single gate widths strictly under 48 inches (122 cm) to prevent excessive leverage.
- Leave exactly 0.5 inches (1.3 cm) of horizontal clearance on both the hinge and latch sides.
- Allow 2 to 3 inches (5 to 7.6 cm) of clearance along the bottom edge for ground swelling and debris.
How Do You Cut and Install the Diagonal Brace Properly?
Here is a judgment call a professional builder makes differently than a beginner: A novice will often cut a 2x4 (5x10 cm) short, hold it generally in the middle of the frame, and drive screws in at awkward angles, hoping it holds the frame square. A pro cuts the diagonal brace to fit absolutely flush into the interior corners, maximizing wood-to-wood contact so the brace cannot slip under heavy loads.
To get the perfect cut, lay your squared rectangular gate frame flat on a driveway or garage floor. Lay your 2x4 (5x10 cm) brace material directly on top of the frame, crossing from the bottom hinge corner to the top latch corner. Use a pencil to trace the exact angles where the brace overlaps the stiles and rails from underneath. Cut along these lines using a circular saw or miter saw. Once cut, wedge the brace tightly into the frame and secure it using 3-inch (7.6 cm) exterior-grade structural screws, entirely avoiding brittle drywall screws or standard thin deck screws.
- Always mark the brace by laying it directly over the squared frame rather than trying to calculate compound angles with a tape measure.
- Secure the brace with heavy-duty structural wood screws that will not snap under shear pressure.
- Ensure the angled ends of the brace make solid physical contact with both the vertical and horizontal frame members.
What Hardware Do You Need to Support the Weight?
Hardware is where many homeowners attempt to save money, resulting in a gate that literally tears itself off the post. Do not use lightweight T-hinges designed for lightweight shed doors. Instead, purchase heavy-duty strap hinges that extend at least one-third of the total width of your gate. For a maximum 48-inch (122 cm) gate, your strap hinges must be a minimum of 16 inches (40 cm) long to properly distribute the immense torque.
In 2026, expect to spend between $45 and $70 for a professional-grade set of hinges and a lockable self-latching mechanism. Immediately discard the short 1-inch (2.5 cm) mounting screws that come in the package. They are far too short to bite into the meat of the lumber. Replace them with 2.5-inch (6.3 cm) exterior structural screws or through-bolts if your gate frame allows. Always use three hinges for any gate over 60 inches (152 cm) tall.
- Use strap hinges that cover a minimum of one-third of the total gate width.
- Install three evenly spaced hinges on any gate exceeding 60 inches (152 cm) in overall height.
- Replace short factory hardware screws with 2.5-inch (6.3 cm) structural screws or through-bolts.
How Deep Must the Hinge Post Be Buried in the Ground?
Even the most perfectly braced gate will drag if the hinge post slowly leans into the opening under the continuous weight. A 4x4 (10x10 cm) post is standard for running fence panels, but a much thicker 6x6 (15x15 cm) timber is far superior for hanging heavy doors. The post must be buried at least 36 inches (91 cm) deep, or 6 inches (15 cm) below the frost line in your specific USDA zone. In USDA Zone 5, for example, frost can regularly reach 36 inches (91 cm), meaning your post hole must be a full 42 inches (106 cm) deep.
Dig a bell-shaped hole that is wider at the bottom than the top to prevent winter frost heaves from pushing the concrete footing out of the frozen ground. Suspend the post plumb in the hole and backfill with a minimum of 150 pounds (68 kg), or roughly three standard bags, of fast-setting concrete. Allow the concrete to cure undisturbed for a full 48 hours before hanging the heavy gate to prevent the post from shifting inside the fresh footing.
- Upgrade from a standard 4x4 (10x10 cm) to a beefy 6x6 (15x15 cm) post for heavy 6-foot (183 cm) privacy gates.
- Bury the post at least one-third of its total length, or solidly below your local USDA zone frost line.
- Pour at least 150 pounds (68 kg) of concrete into a bell-shaped hole to secure the foundation.
Can You Fix an Existing Sagging Gate Without Rebuilding It?
If your gate frame is still solid but starting to drag on the concrete or grass, you do not need to tear it completely apart. You can install a metal anti-sag gate kit, which is readily available at most major hardware stores for $15 to $25 in 2026. These simple retrofit kits use a braided steel cable and a metal turnbuckle to manually correct the geometry of the deformed gate.
Unlike a wood brace that works exclusively under compression, a steel cable works exclusively under tension. Therefore, the kit must be installed in the opposite direction of a wood brace. Attach the top bracket to the upper hinge corner and the bottom bracket to the lower latch corner. Thread the cable through the turnbuckle and tighten it with an adjustable wrench. As the turnbuckle shortens the cable, it actively pulls the sagging latch side up and permanently squares the frame.
- Anti-sag cable kits cost $15 to $25 and take about 15 minutes for a beginner to install.
- Cable kits must run from the top hinge down to the bottom latch to properly utilize tension.
- Tighten the turnbuckle slowly until the gate clears the ground, but do not overtighten and warp the frame outward.
| Bracing Method | Primary Force Used | Cost (2026 USD) | Best Use Case |
|---|---|---|---|
| Diagonal Wood 2x4 (5x10 cm) | Compression | $5 to $10 | New custom wooden gate builds |
| Steel Cable & Turnbuckle | Tension | $15 to $25 | Retrofitting older sagging gates |
| Metal Z-Frame Kit | Rigid Support | $80 to $120 | Extremely heavy privacy gates or inexperienced DIYers |
Frequently asked questions
Which direction should a wood fence gate open?
A gate should always open inward toward the private property, not outward over a public sidewalk or alleyway. This prevents the door from unexpectedly obstructing public paths and safely places the hinges on the secure side of the fence.
Do gate support wheels actually prevent sagging?
A caster wheel bolted to the latch side can temporarily help a heavy gate roll across smooth concrete, but wheels are practically useless on dirt, grass, or uneven gravel. Over time, ground bumps will violently stress the hinges and actually accelerate failure. Proper internal bracing is always better than adding a wheel.
Can I use cedar instead of pressure-treated lumber for the gate frame?
Yes. Cedar is highly rot-resistant and significantly lighter than wet pressure-treated pine, which drastically reduces the long-term strain on the hinges and the post. However, cedar is softer and considerably more expensive, costing roughly double the price of treated pine in 2026.
Keep reading
- How Much Paint Do You Actually Need for a Room?The tin says 400 square feet. Your wall says otherwise. Here is the arithmetic that actually holds up.
- DIY or Hire a Pro? A Decision Framework That Is Not About MoneyThe labour saving is real. So is the cost of a job done twice — and of tools you use once.
- Storage for Small Rooms That Does Not Make Them SmallerSmall rooms do not need more storage. They need storage that stops interrupting the eye.