How Do You Build a French Cleat Tool Wall That Holds Heavy Power Tools?
By Jim Vernon · 8 min read · Last updated
One clean rip cut on a sheet of plywood is all it takes to build a modular tool wall strong enough to hold a 40-pound miter saw.
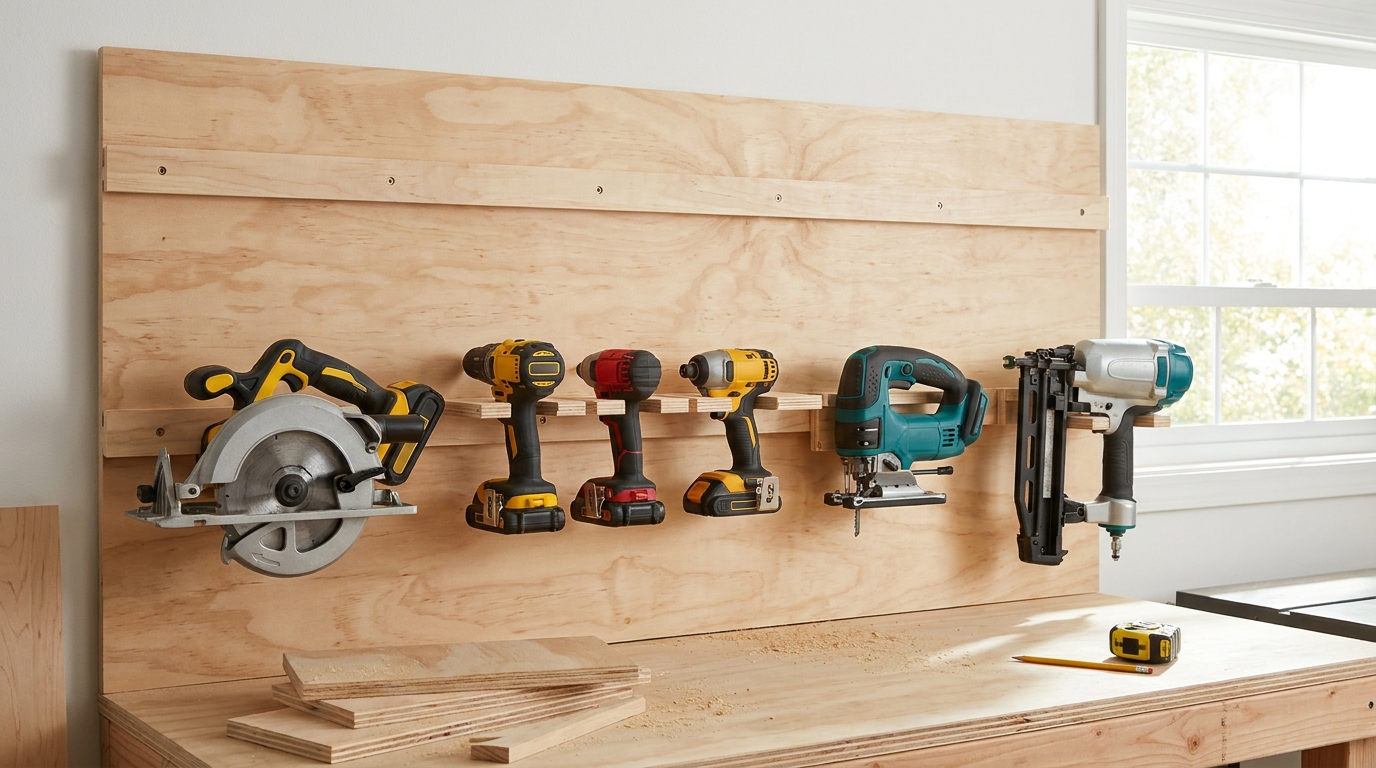
You build a heavy-duty French cleat tool wall by ripping 3/4-inch (19 mm) cabinet-grade plywood into 5-inch-wide (12.7 cm) strips with a 45-degree bevel on one edge, then anchoring the bottom halves horizontally across bare studs or drywall using 3-inch (7.6 cm) structural screws. The opposing 45-degree bevel on your custom tool holders locks securely into the wall cleat using gravity alone. This modular system outperforms traditional pegboard in every category, allowing you to hang heavy routers, battery charging stations, and circular saws anywhere along the rail without specialized metal hardware. A standard 8-foot (2.4 m) wall setup will run you $120 to $160 in 2026 material costs, requiring only a table saw, a spirit level, and an impact driver to complete. Unlike fixed shelving, a French cleat system lets you endlessly rearrange your workspace as your tool collection grows, keeping workbenches clear and dangerous blades out of reach.
- Use void-free 3/4-inch (19 mm) birch or maple veneer plywood to prevent the angled cleats from splitting or sagging under heavy loads.
- Anchor wall cleats into every 16-inch (40.6 cm) stud crossing using two 2.5-inch to 3-inch (6.4 to 7.6 cm) cabinet or structural wood screws.
- Design tool holders with a flat backer board that drops below the cleat line to prevent heavy tools from acting as a lever and popping off the wall.
- Space wall cleats 8 to 10 inches (20.3 to 25.4 cm) apart vertically to maximize storage density without crowding tall tools.
Why Use a French Cleat Instead of Pegboard for Heavy Tools?
Traditional hardboard pegboard is perfectly adequate for hanging lightweight hand tools like wrenches, tape measures, and screwdrivers. However, pegboard typically maxes out at 5 to 10 pounds (2.2 to 4.5 kg) per hook. When you try to hang a 15-pound (6.8 kg) circular saw or a heavy rack of bar clamps, the metal pegs act as levers, tearing out the compressed wood fibers and ruining the board. Slatwall is stronger, but the proprietary metal brackets are expensive and limit how you can build custom holders.
A French cleat system relies on simple physics. Because the downward force of the tool's weight pulls the two 45-degree wood angles tightly together, the connection actually becomes more secure as you add weight. A single 8-foot (2.4 m) cleat anchored across seven standard wall studs can easily hold hundreds of pounds. This makes it the ideal storage solution for heavy power tools, lumber racks, and bulk hardware bins.
- Pegboard tears out under loads exceeding 10 pounds (4.5 kg).
- French cleats pull tighter together as more weight is applied to the bracket.
- You can build custom holders for oddly shaped tools using scrap wood instead of buying expensive proprietary hooks.
What Is the Best Material for Cutting French Cleats?
A common failure mode in DIY French cleat walls is using medium-density fiberboard (MDF) or cheap 1/2-inch (12 mm) CDX sheathing plywood. MDF is essentially glued sawdust; under the weight of heavy tools, especially in unconditioned garages swinging from 20 degrees Fahrenheit (-6 degrees Celsius) in winter to 100 degrees Fahrenheit (38 degrees Celsius) in summer, the sharp 45-degree edge of an MDF cleat will crumble and snap. CDX plywood has internal voids. If your 45-degree cut lands on a void, the cleat loses its structural integrity and leaves a hollow, jagged edge.
To avoid this, you must use 3/4-inch (19 mm) cabinet-grade plywood, such as Baltic birch or a high-quality maple or birch veneer plywood with at least 7 to 9 internal plies. This material is dense, void-free, and incredibly rigid. Solid hardwood is also an option, but it is prone to warping over an 8-foot (2.4 m) span and costs significantly more than sheet goods.
- Avoid MDF, which crumbles at the thin 45-degree edge under heavy weight.
- Avoid rough sheathing plywood due to internal voids that ruin the bevel cut.
- Choose 3/4-inch (19 mm) birch or maple plywood with 7 or more plies for maximum edge strength.
How Do You Cut the 45-Degree Bevel Safely and Accurately?
The fastest way to batch out cleats is on a table saw. Tilt your saw blade to exactly 45 degrees. Set the rip fence so that the top, wider face of the strip will measure 5 inches (12.7 cm). This 5-inch width provides enough material to drive two screws securely into the studs without hitting the beveled edge, while leaving enough surface area for the opposing cleat to grip.
When ripping the 4x8-foot (1.2x2.4 m) sheet of plywood, keep the factory edge against the fence for your first pass. For subsequent passes, you will need to flip the board end-over-end to ensure you are cutting alternating angles, preventing waste. Always use a push stick, as cutting steep bevels traps the offcut between the blade and the fence, increasing the risk of kickback.
- Set the table saw blade to 45 degrees and lock it securely.
- Rip the plywood into 5-inch-wide (12.7 cm) strips.
- Flip the board end-over-end between cuts to yield alternating cleats with minimal waste.
How Do You Space and Anchor the Cleats to the Wall?
Before hanging anything, use a stud finder to locate and mark every stud across your wall. Most residential garage studs are framed 16 inches (40.6 cm) on center. Strike vertical chalk lines down the center of each stud so you know exactly where to drive your screws. A good spacing rhythm for a general tool wall is leaving 8 to 10 inches (20.3 to 25.4 cm) of vertical space between each horizontal cleat. This leaves enough room to lift and hook the holders without the tools bumping into the cleat above.
Start at the bottom and work your way up. Hold the first cleat on the wall with the 45-degree bevel facing up and pointing away from the wall. Place a 4-foot (1.2 m) spirit level on top. Once perfectly level, drive a 2.5-inch or 3-inch (6.4 or 7.6 cm) #8 construction or cabinet screw through the cleat and into a center stud. Re-check your level, then drive two screws into every stud crossing. Pre-drill and countersink the screw holes so the screw heads sit slightly below the wood surface; proud screw heads will prevent the tool holders from seating fully into the joint.
- Mark all wall studs with vertical chalk lines before installation.
- Space the cleats 8 to 10 inches (20.3 to 25.4 cm) apart vertically.
- Drive two 3-inch (7.6 cm) structural screws into every stud, countersinking the heads.
How Do You Build Tool Holders That Will Not Fall Off?
A judgement call a pro makes differently from a beginner is how they design the back of the custom tool holder. A beginner will often attach their opposing 45-degree cleat to a small block of wood just large enough to hold the tool. When a heavy, deep tool like a router is placed on it, the center of gravity pulls outward, causing the bottom of the holder to push into the wall and the top cleat to lever upward and pop off the rail.
To fix this, a pro always builds a backer board. The holder is constructed on a flat piece of plywood that extends several inches below the bottom of the wall cleat. The opposing 45-degree cleat is glued and screwed to the top back of this board. When hung, the extended lower section of the backer board rests flat against the wall beneath the cleat. This physically prevents the holder from pivoting outward, neutralizing the lever effect and locking the tool securely in place.
- Never attach a cleat to a holder that lacks a lower backer board.
- Extend the backer board 3 to 5 inches (7.6 to 12.7 cm) below the cleat joint to rest against the wall.
- Use wood glue and 1.25-inch (3.1 cm) brad nails or screws to attach the cleat to your tool holder backer board.
What Does a Complete 8-Foot Cleat Wall Cost in 2026?
Building a French cleat wall is highly cost-effective compared to buying commercial steel pegboard or aluminum slatwall systems. The primary expense is the plywood. In 2026, expect to spend between $85 and $110 for a premium 4x8-foot (1.2x2.4 m) sheet of 3/4-inch cabinet-grade birch plywood at a home center. One sheet yields about eighteen 8-foot (2.4 m) long, 5-inch (12.7 cm) wide cleats. You will use about half of these for the wall rails, leaving the rest to cut into shorter segments for building your tool holders.
Your only other material costs are fasteners and glue. A 1-pound (0.45 kg) box of premium 3-inch (7.6 cm) star-drive structural cabinet screws costs around $15 to $20, and a bottle of high-quality wood glue for assembling your custom holders adds another $8. This brings the total material cost for an 8-foot by 4-foot (2.4 by 1.2 m) wall section to roughly $110 to $140, a fraction of what you would pay for a weaker commercial alternative.
- One 4x8-foot sheet of birch plywood ($85 to $110) provides enough material for the wall rails and the holder cleats.
- Budget $15 to $20 for structural wood screws.
- Total 2026 project cost ranges from $110 to $140 depending on your local lumber prices.
| Material Type | Best Thickness | Strength & Rigidity | Risk of Sagging or Splitting |
|---|---|---|---|
| Cabinet Grade Birch/Maple Plywood | 3/4-inch (19 mm) | Excellent (Holds 50+ lbs per bracket) | Low (Void-free core holds sharp bevels) |
| CDX Sheathing Plywood | 3/4-inch (19 mm) | Moderate | High (Internal voids ruin the angled cut) |
| Medium-Density Fiberboard (MDF) | 3/4-inch (19 mm) | Poor | Very High (Crumbles under heavy lever action) |
| Solid Hardwood (Oak/Maple) | 3/4-inch (19 mm) | Excellent | Moderate (Prone to warping over long spans) |
Frequently asked questions
Can I use standard 2x4 lumber instead of plywood for French cleats?
Yes, but it is not recommended. A 2x4 is 1.5 inches (3.8 cm) thick, which eats up valuable space and pushes your tools further off the wall. Additionally, construction lumber is prone to twisting and bowing as it dries, which will warp your tool wall and prevent the cleats from seating flush.
Do I need to paint or seal the plywood cleats?
You do not have to, but applying a coat of wipe-on polyurethane or paste wax to the beveled edges reduces friction. This makes it much easier to slide heavy tool holders horizontally along the rail without binding.
Can I install a French cleat system over drywall?
Yes, as long as you use screws that are long enough to pass completely through the 3/4-inch (19 mm) cleat, the 1/2-inch (12 mm) drywall, and sink at least 1.5 inches (3.8 cm) deep into the center of the wooden wall studs.
How much weight can an 8-foot French cleat safely hold?
If anchored into seven wall studs (spaced 16 inches apart) using two 3-inch (7.6 cm) structural screws per stud, a single 8-foot (2.4 m) cleat made of 3/4-inch (19 mm) plywood can safely hold over 300 pounds (136 kg) of static weight.
Keep reading
- How Much Paint Do You Actually Need for a Room?The tin says 400 square feet. Your wall says otherwise. Here is the arithmetic that actually holds up.
- DIY or Hire a Pro? A Decision Framework That Is Not About MoneyThe labour saving is real. So is the cost of a job done twice — and of tools you use once.
- Storage for Small Rooms That Does Not Make Them SmallerSmall rooms do not need more storage. They need storage that stops interrupting the eye.