Exterior Paint Prep: Why 80% of the Job Happens Before the Roller
By Jim Vernon · 4 min read · Last updated
Exterior paint failure is almost always a prep failure, not a paint failure.
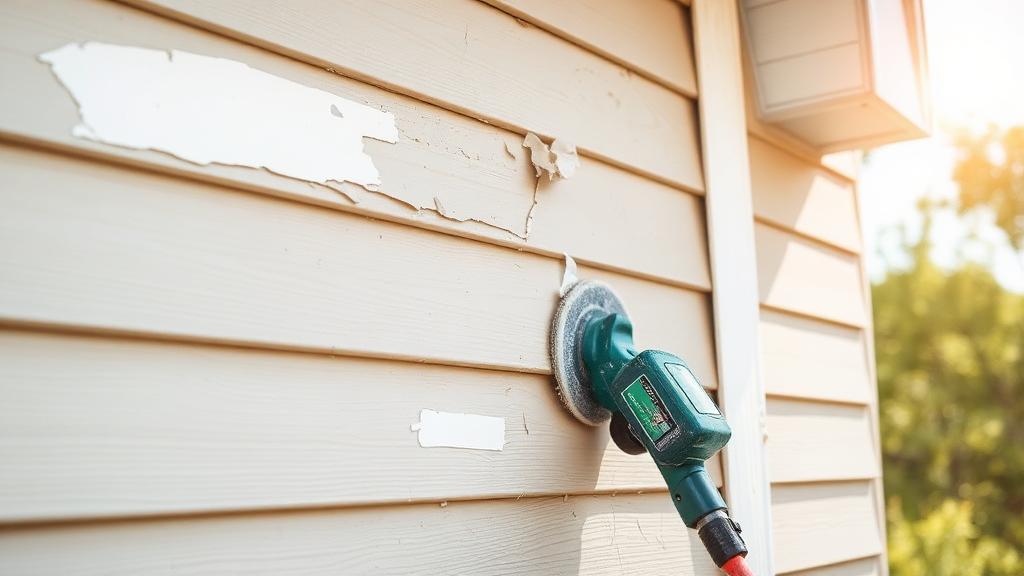
Manufacturers rate exterior paints for 7-10 years of life, but a huge share of exterior paint jobs peel, crack, or fade within 2-3 years. The paint isn't usually the problem — inadequate cleaning, scraping, priming, or caulking before it went on is.
The prep sequence
- Wash the surface — dirt, chalk, and mildew all prevent paint adhesion, and pressure washing or hand washing with a mildew-killing solution is not optional.
- Scrape all loose, peeling, and flaking paint back to a sound edge.
- Sand rough scraped edges so the new paint doesn't telegraph a visible ridge.
- Repair damaged wood — replace rotted sections, fill small gouges with exterior wood filler.
- Caulk gaps around trim, windows, and joints where the old caulk has cracked or pulled away.
- Spot-prime any bare wood, rusted metal, or repaired areas before the full coat.
- Apply paint only within the manufacturer's temperature and humidity range.
Paint sheen and where it matters
| Sheen | Typical use | Notes |
|---|---|---|
| Flat/matte | Siding, stucco, low-traffic trim | Hides surface imperfections well, harder to clean |
| Satin | Siding, most general exterior use | Good balance of durability and appearance |
| Semi-gloss | Trim, doors, shutters | Easier to wipe clean, highlights surface flaws more |
How long good prep actually takes
For an average single-family home, expect washing and drying to take a day, scraping and sanding another day or two depending on how much old paint has failed, and caulking and priming a final day before paint goes on. Rushing this timeline to fit a weekend is one of the most common reasons prep gets shortchanged.
Should I use a paint sprayer or brush and roller for exterior work?
Sprayers apply paint faster and more evenly on large flat areas like siding, but overspray requires careful masking, and back-rolling after spraying is often recommended for better adhesion. Brush and roller give more control on trim and detail work.
Why each skipped step shortens paint life
| Skipped step | Failure mode within 1-3 years |
|---|---|
| Washing | Poor adhesion, early peeling in a sheet pattern |
| Scraping loose paint | New paint peels along with the old layer beneath it |
| Priming bare wood | Paint absorbs unevenly, flashes or fails at that spot first |
| Caulking gaps | Water gets behind trim, causing rot and paint blistering |
| Temperature control | Poor film formation — chalky, dull finish that fails fast |
Weather window matters as much as the steps
Most exterior paints need daytime temperatures between roughly 50-85°F, low humidity, and no rain expected for 24-48 hours after application. Painting outside this window is one of the most common causes of premature failure even when every prep step was done correctly.
Primer choice by surface condition
- Bare wood: oil-based or acrylic exterior primer, always.
- Previously painted, sound surface: primer usually optional unless changing from dark to light color or oil to latex.
- Repaired or filled areas: always prime, even if the surrounding paint doesn't need it.
- Rusted metal: rust-inhibiting primer specifically, not a general-purpose one.
How long should I wait between washing and painting?
24-48 hours of dry weather, to make sure the surface and any wood beneath the paint has fully dried out.
Do I need to prime a whole wall or just repaired spots?
Spot-priming repaired and bare areas is usually enough if the surrounding paint is sound and you're using the same paint type and a similar color.
Is two coats always necessary?
For a color change or bare wood, yes. For a same-color refresh over sound paint, one coat of quality exterior paint is often adequate, though two extends the interval before the next repaint.
A worked example: two jobs, two outcomes
Two identical houses get painted the same week with the same paint. House A gets washed, scraped, sanded, primed, and caulked over three days before a single coat goes on. House B gets a quick rinse and paint straight over chalky, peeling trim. House A's paint job commonly holds for 8-10 years; House B often shows peeling within 18-24 months in exactly the spots that were skipped -- the paint cost the same, but the labor difference bought most of the extra lifespan.
Common mistakes
- Painting over a surface that still has active mildew rather than treating it first.
- Rushing caulk application right before rain, so it never cures properly.
Tool choice affects the finish too
A quality brush and roller combination, matched to the paint's sheen and the surface texture, lays down a more even film than a cheap set, and it also affects how well the prep work underneath is preserved -- a stiff, worn brush can drag and lift fresh caulk or thin spots in primer before they've had time to set.
Estimating paint needs after prep
- Measure total wall area and subtract large window and door openings before ordering paint.
- Budget for a bit more primer than paint if bare wood or repairs are extensive.
- Buy a bit extra of the exact batch/lot number for future touch-ups, since color can vary slightly between production runs.
How do I know if old paint is failing from moisture behind it rather than just age?
Peeling that exposes bare, damp-looking wood -- rather than just another layer of old paint -- usually points to a moisture source like a leak, poor caulking, or missing vapor barrier that needs fixing before repainting.
- Using interior caulk outdoors, which isn't formulated for UV and temperature swings.
- Painting in direct, hot afternoon sun, which dries the surface too fast for proper film formation.
Run the numbers for your own project
- Paint CalculatorHow much paint do I need for this room?
- Project Cost EstimatorWhat will this project cost me?
Keep reading
- How Much Paint Do You Actually Need for a Room?The tin says 400 square feet. Your wall says otherwise. Here is the arithmetic that actually holds up.
- DIY or Hire a Pro? A Decision Framework That Is Not About MoneyThe labour saving is real. So is the cost of a job done twice — and of tools you use once.
- Storage for Small Rooms That Does Not Make Them SmallerSmall rooms do not need more storage. They need storage that stops interrupting the eye.